Logging and notifications
Relevant for AppViz administrators
This topic describes how to manage AppViz activity logs and notification settings.
 Setting Up Email Notifications: Watch to learn how to set up email notifications for events and applications in AppViz.
View all activity logs
AppViz provides the ability to view all the activities related to applications and network objects in one place, enabling you to see the different impacts of a single action. The extensive options for filtering the logs enable you to search for the activities you want to view. In addition to tracking current applications and network objects, the logs also document the history of deleted objects and decommissioned applications.
To view activity logs:
-
In the toolbar, click your username.
A drop-down list appears.
- In the drop-down list, select Administration.
-
Click the Activity Logs tab.
The Activity Logs tab appears, displaying every activity log for every application and every network object.

Column Description Log Type
The activity log's type: Application or Object.
Name
The name of the application or network object.
Category
The activity's category: Flow, Information, Status, System or Object Content.
Description
Description of the activity.
User Name
Name of user who performed the activity.
Time
Date and Time the activity occurred.
- To filter the logs by type, select the desired type in the Log Type drop-down menu.
- To filter the logs by category, time, or a textual search, or to export the logs to a CSV file, see Application activity log.
Customize email notifications
If desired, you can specify which application events should trigger sending an email notification to your user. You can specify custom email settings for specific applications or for all applications you have permissions for.
Note: User-specific settings override the default settings for all users and applications. To set the default email notification setting for all users and applications, see Manage general email settings. Only administrators can manage general email settings.
To set custom email notification options:
-
In the toolbar, click your username.
A drop-down list appears.
-
In the drop-down list, select Notifications Settings.
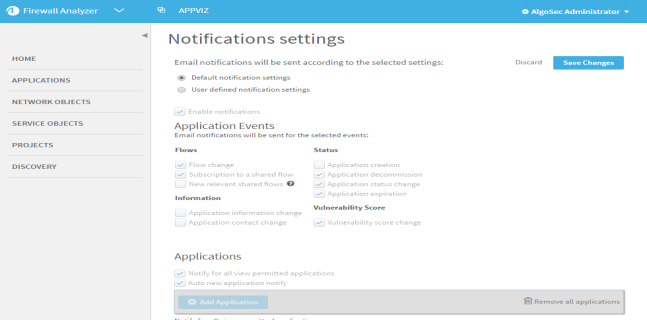
The Notifications settings page appears in the workspace.

- Do one of the following:
- To use the default email settings configured by the AppViz administrator, select Default notification settings.
- To configure custom notification settings for your user, do the following:
- Select User defined notification settings.
- In the Application Events area, select the check boxes for the events for which you want to receive email notifications.
- To only receive notifications for specific applications (and not every application you have permissions for), do the following in the Applications area:
- Clear the Notify for all view permitted applications check box.
- To not automatically receive notifications for new applications, clear the Auto new application notify check box.
- Click +Add Applications and select the desired applications. For details, see Use the Add Applications wizard.
- Click Save Changes.
Manage general email settings
AppViz allows you to define default email notification settings for all users and applications. The general email settings can be overridden by user-specific notification settings. For details, see Customize email notifications.
Note: The general email settings can only be configured by administrators.
To manage general email settings:
-
In the toolbar, click your username.
A drop-down list appears.
-
In the drop-down list, select Administration.
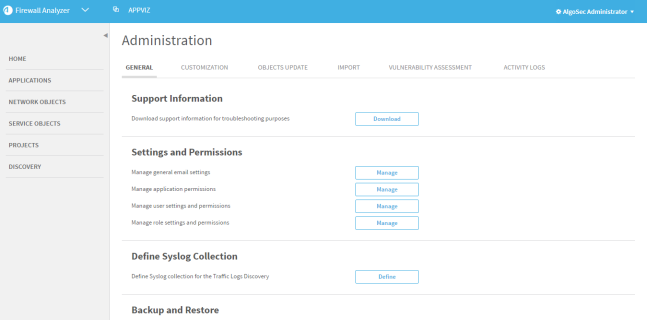
The Administration page appears in the workspace.

-
In the Settings and Permissions area, next to Manage general email settings, click Manage.
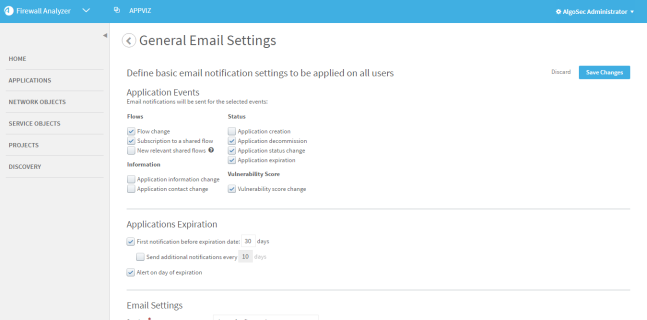
The General Email Settings page appears.

- Complete the fields as needed. For details, see Email settings fields.
- Click Save Changes.
|
In this Field... |
Do this... |
|---|---|
| Application Events |
Select the events that should trigger email notifications. |
| Applications Expiration |
Use this area to set when email notifications should be triggered for applications about to expiry. |
|
First notification before expiration date: n days |
To set how many days before expiration the first email notification should be sent, select this check box and type the number of days int he field. Notifications are via email and GUI. |
|
Send additional notifications every n days |
To set the period for additional email notifications, select this check box and type the number of days. Notifications are via email and GUI. |
|
Alert on day of expiration |
Select this check box to create an activity log alert on the day of expiration. No email or GUI notification on day of expiration. |
| Email Settings |
Use this area to customize the email notifications that are sent. |
|
Sender: |
Type the sending email address. |
|
Subject Prefix |
Type the prefix of the email subject. |
|
Greeting |
Type the email greeting. |
|
Signature |
Type the email signature. |
|
AppViz URL: |
In the box, type the IP address or host name to complete the URL. |

