Custom fields
AppViz supports custom fields for applications, flows, network objects, projects, and contacts.
Note: When viewing the Flows tab of an application, custom flow fields only appear if you display them or when you are editing a flow.
In this topic:
Add custom fields to flows
Do the following:
-
In the toolbar, click your username.
A drop-down list appears.
-
In the drop-down list, select Administration.
The administration page appears in the workspace.
-
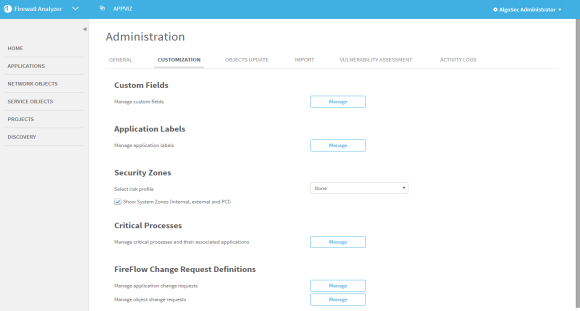
Click the Customization tab.
The Customization tab appears.

-
In the Custom Fields area, click Manage.
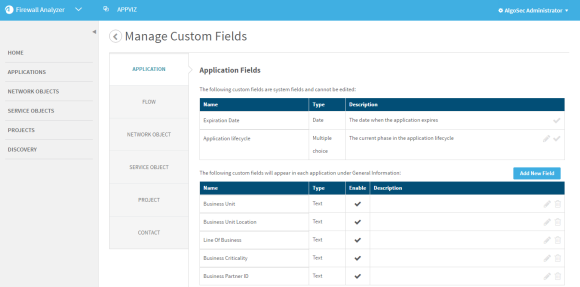
The Manage Custom Fields area appears.

- Enabled fields are marked with
 .
. - Disabled fields are marked with
 .
.
- Enabled fields are marked with
- In the left panel, select the information area in which the custom field appears: Application, Flow, Object, Project, or Contact.
- To add a new field, do the following:
Click Add New Field.
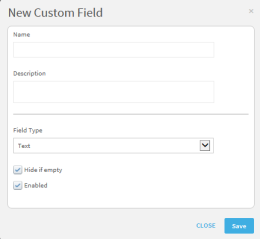
The New Custom Field window appears.

- Complete the fields using the information in Custom Field Fields (see Custom Field Fields).
- Click Save.
- To edit a custom field, do the following:
- Click
 .
. - Edit the fields you desire using the information in Custom Field Fields (see Custom Field Fields).
Click Save.
Note: When editing the Application lifecycle fields, you must have at least two stages, one of which must be Decommission.
- Click
- To delete a custom field, do the following:
Click
 .
.A confirmation message appears.
- Click OK.
Custom Field Fields
|
In this field... |
Do this... |
|---|---|
|
Name |
Type the name of the field. |
|
Description |
Type the description of the new field. |
|
Field Type |
In the Field Type list, select one of the following field types:
When editing the general information for an application, select one value from the list. To change the display order of the multiple choice values, click the value and move it to its new position in the list. |
|
URL Template |
Type the URL you want the link to direct to. You can include the following variables:
For example, if the template is domain.com/{AppName}, and you are viewing an application called "App1", the link will appear with the text the user types in the text box, and the link will direct you to domain.com/App1. This field only appears when the selected type is Link. |
|
Hide if empty |
If you do not want the field to appear if empty, select the Hide if empty check box. Clear the check box to display the field if empty. |
|
Enabled |
If you want the field to be enabled after creation, select the Enabled check box. Clear the check box to disable the field. |

