Add devices to AFA
Relevant for: AFA Administrators
This topic provides an introduction on adding devices to AFA so that you can start collecting data automatically.
In this topic:
Add device prerequisites
Before adding a new device to AFA, ensure that your environment is set up to accept communication between AFA and the device.
| Manage ports |
Note: Make sure to open the necessary port between each device and the AlgoSec server, depending on the protocol being used to connect to the device. Note: In the case of a distributed architecture, open the port between the device and the specific Remote Agent or Load Unit managing each device. |
| Device permissions |
You may need to configure device user permissions to enable AFA to collect data from your device. For details, see Device procedure reference and the device permissions section for each device type. |
Access the DEVICES SETUP page
This procedure describes how to access the DEVICES SETUP page for each device type.
Note: Before you start, ensure that your environment is configured to allow communication between AFA and your device. For details, see Device procedure reference and the device permissions section for each device type.
Do the following:
-
Access the DEVICES SETUP page in the Administration area as follows:
From the main menu on the left Click Devices, Groups, or Matrix, and then click the
 Configure .. button.
Note: This button is visible to AFA administrators only.
From the Administration area In the toolbar, click your username, and select Administration.
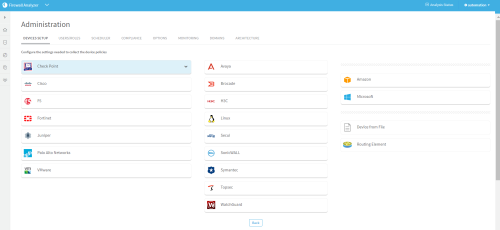
In the Administration area, click the DEVICES SETUP tab.
The DEVICES SETUP tab appears. For example:
-
Click New 6 and select Devices.
A selection of vendors appears:
-
Select a vendor, and then a device type.
-
A device form appears, specific to the device type you selected.
For example:
-
Populate the fields as needed to complete the configuration, clicking Next or Back as needed.
For more details, see Device procedure reference.
-
(Optional) Specify a syslog server. See Specify a Syslog server.
Specify a Syslog server
When relevant, do the following:
â See also:
- Defining Devices: Training video about collecting data from a few Check Point devices


