
Install ASMS with iLO 5
This topic explains how to install ASMS A32.10 on a new or re-purposed AlgoSec hardware appliance using the HPE iLO 5 Web Interface. This is a streamlined process that can easily be performed on a remote or local AlgoSec appliance.
In this topic:
- Before you start
- Download iso-file to your local machine
- Load the image file (.iso) to the iLO
- Set boot mode to: Legacy Bios Mode
- Install ASMS from iLO
Before you start
Before you start, make sure you are equipped with the following:
-
iLO IP address of your AlgoSec Hardware Appliance.
-
iLO Username (always Administrator) and Password (written on the label on the Hardware Appliance rear panel).
-
ASMS CLI username and password for user root.
-
Management IP should be configured, and a network cable should be connected to the management port.
-
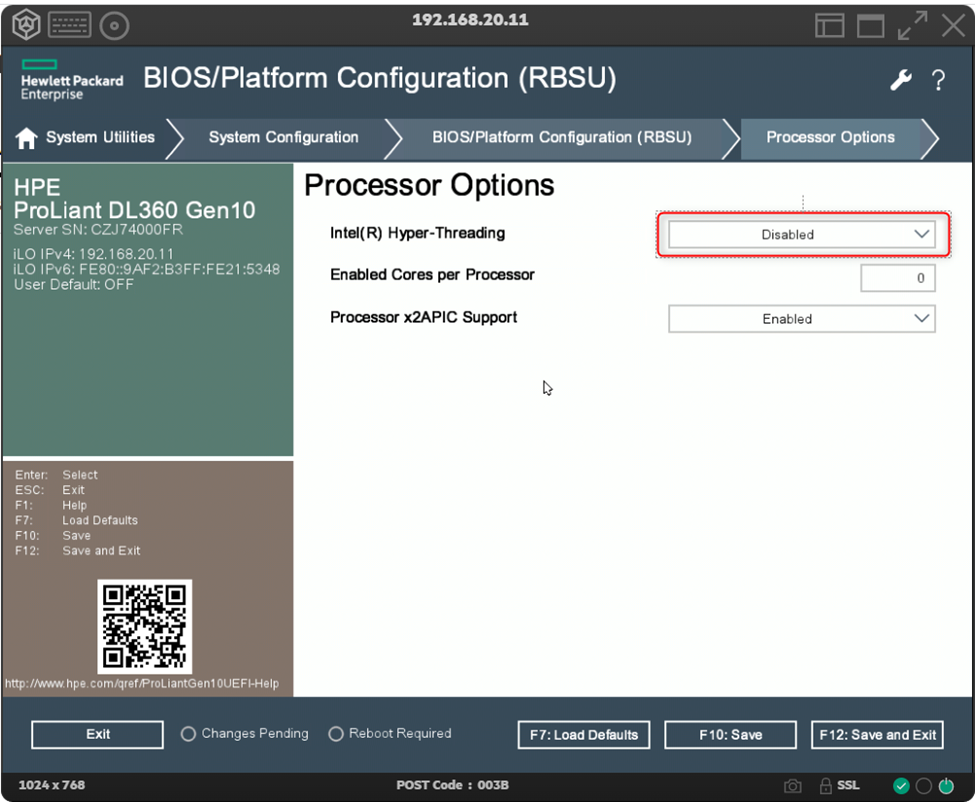
On AlgoSec Hardware Appliances 2403 (Gold) and 2203 (Silver), make sure that hyper-threading mode is disabled.
Download iso-file to your local machine
-
Browse to the AlgoSec Portal, and navigate to Downloads > Software > AlgoSec Security Management Suite. Select New Installation - Select Deployment Type, and select Repurposed AlgoSec Hardware Appliance from the list. Select version A32.10 (Latest).
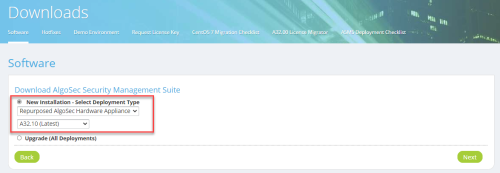
Click Next.
Download the image file (.iso) and store it on your PC.

Load the image file (.iso) to the iLO
-
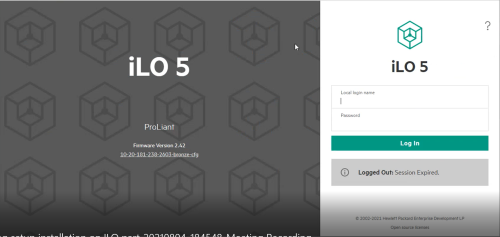
With your web browser or Windows Desktop, open the iLO IP address.
-
On the iLO 5 screen that is displayed, enter your AlgoSec Appliance machine's iLO credentials: login name and password.
-
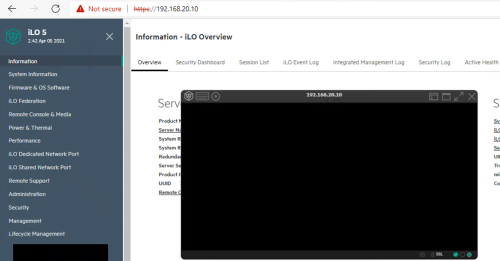
On the displayed iLO overview page, click on the small black screen displayed at the lower left of the screen and select either .NET Console or Java Web Start Console (we recommend you do not use HTML console) from the pop-up menu that is displayed.
Tip: You can maximize the Console screen by clicking on the
 expand arrows.
-
Click on the Virtual Media
 button in the title bar of the Console and then select CD/DVD followed by Local *.iso file.
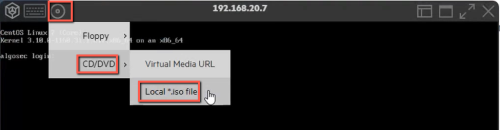
-
In the Windows file explorer that is displayed, browse and select the image file that you stored on your PC in Download iso-file to your local machine above.
-
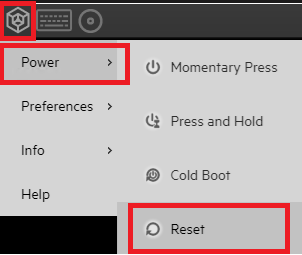
From the menu bar of the iLO console, reset the appliance:

-
Click the Reset Icon
 at the top left of the console window
 -
Click Power on the menu that is displayed
-
Click Reset on the power menu that is displayed.
-


Set boot mode to: Legacy Bios Mode
-
When the system starts up, from the boot menu press F9 to enter to System Utilities menu.


-
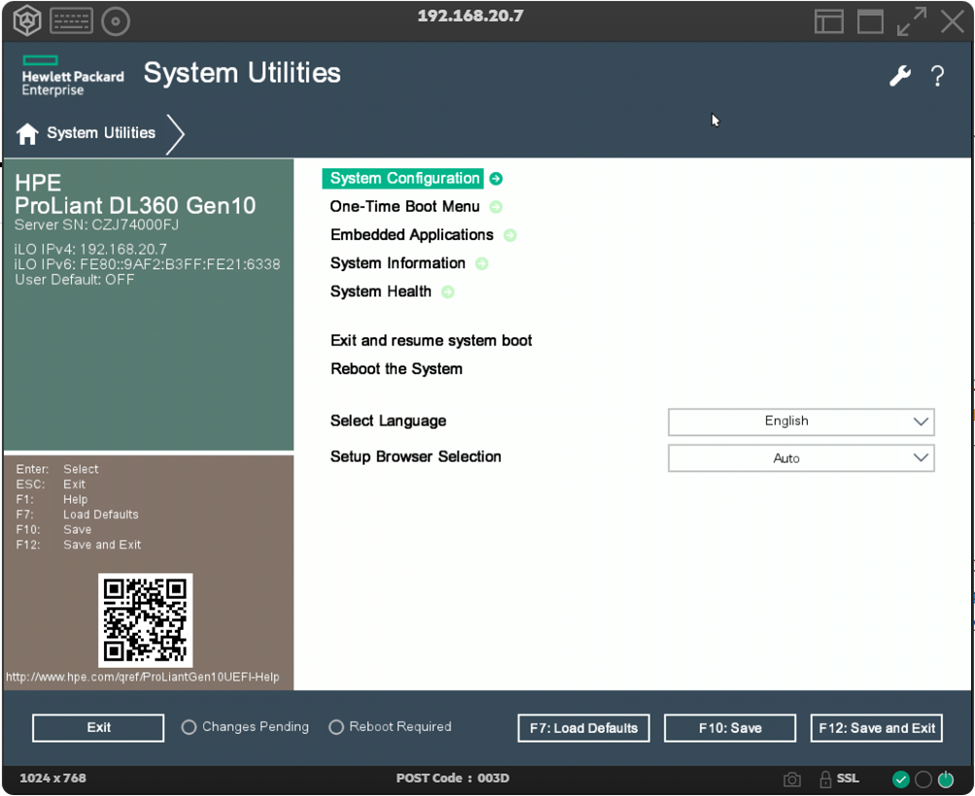
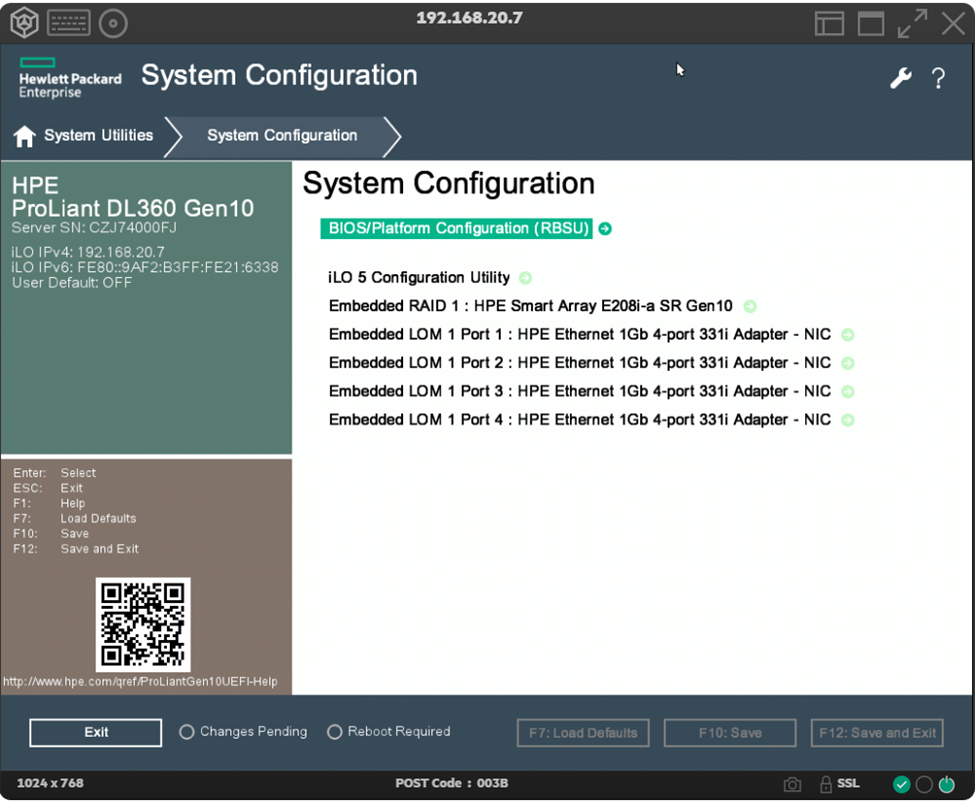
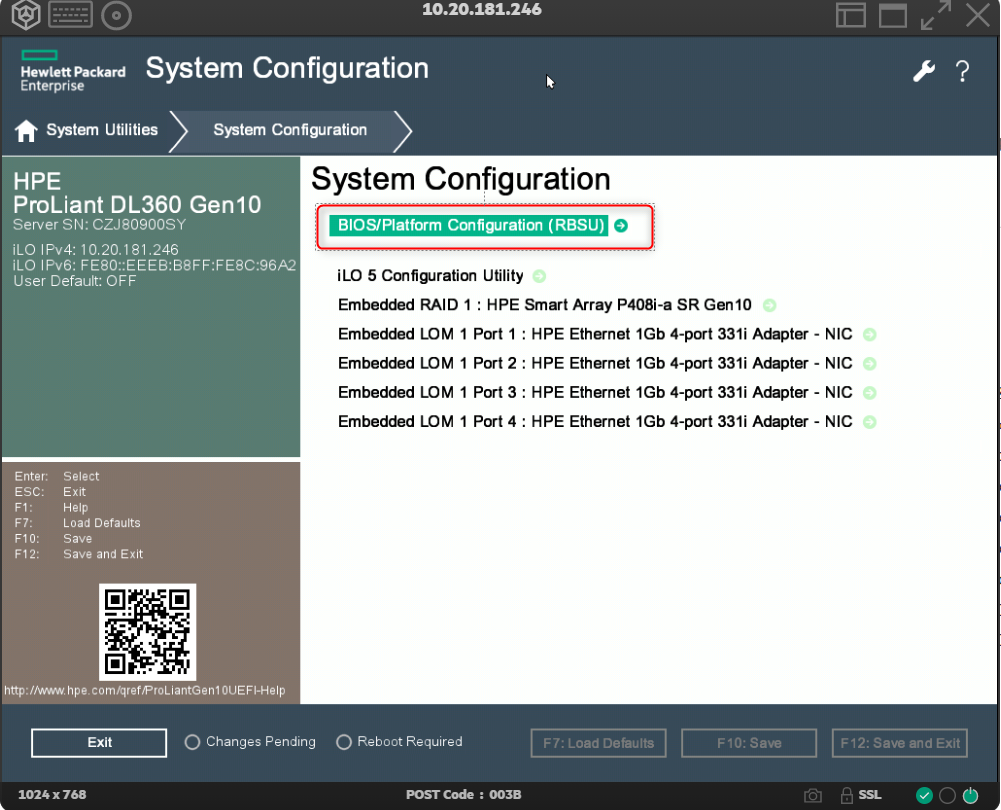
In System Utilities, select System Configuration.
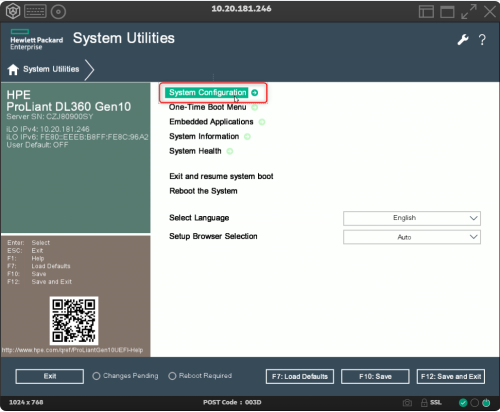
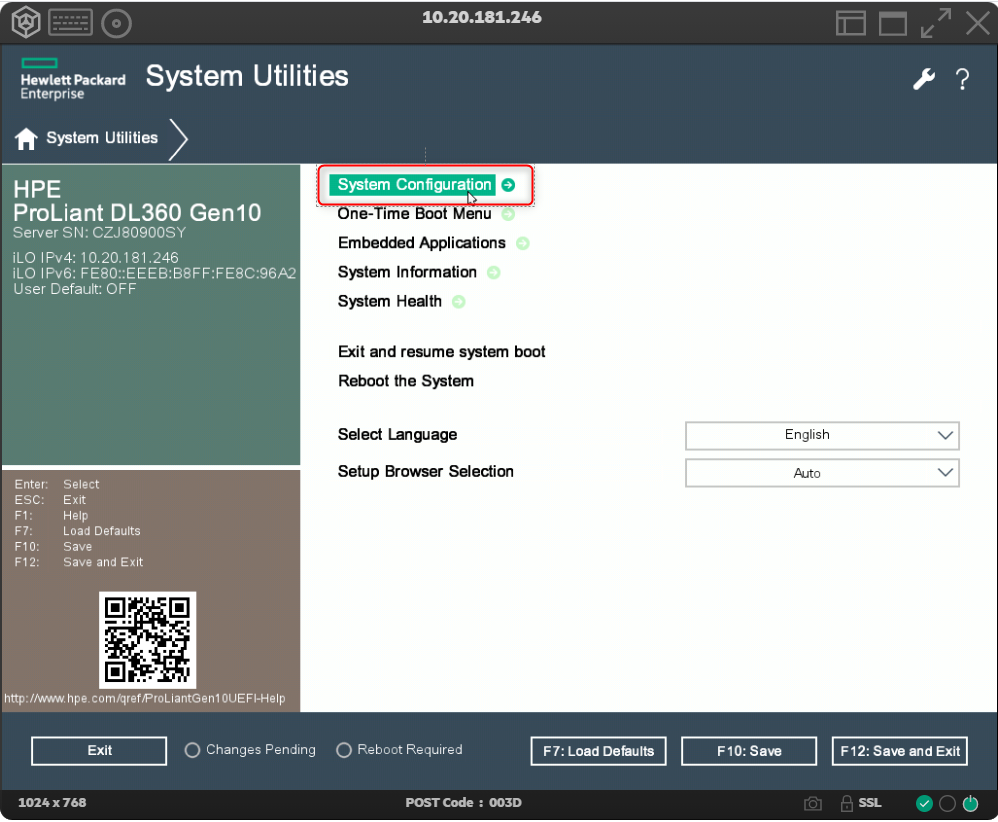
-
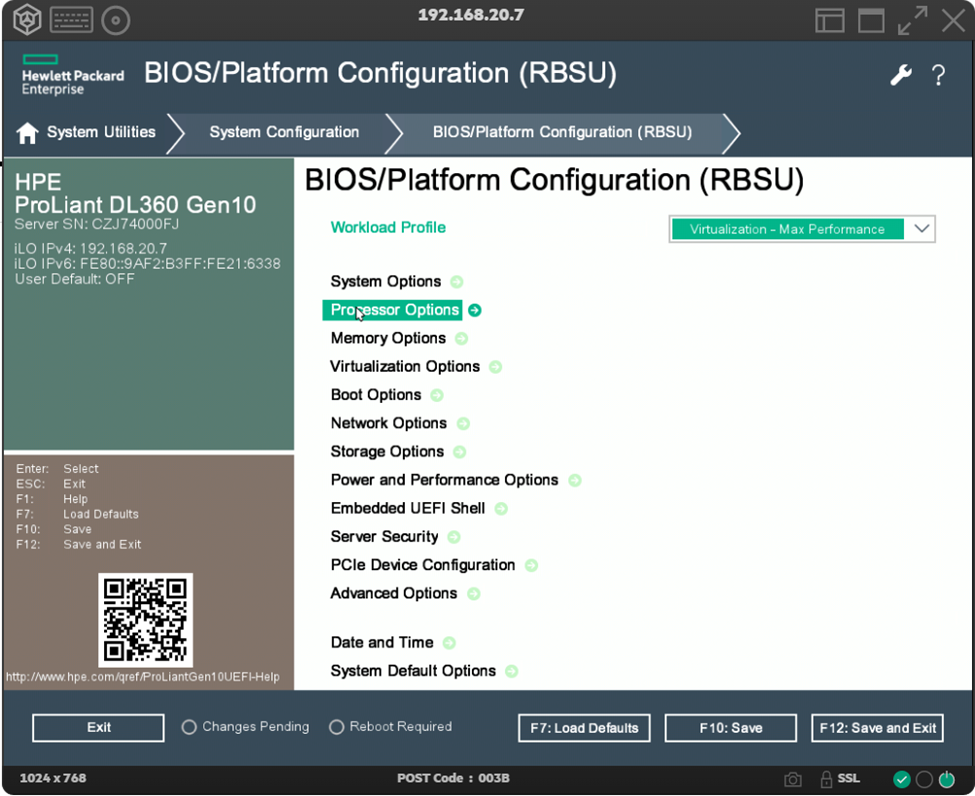
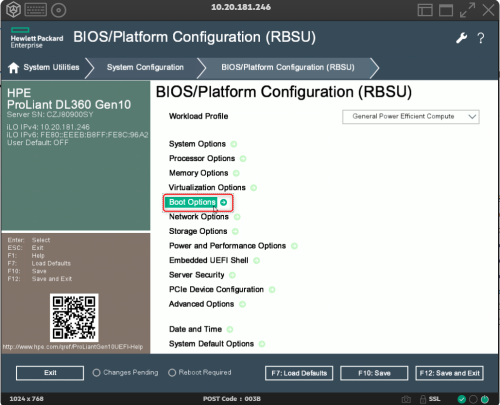
In System Configuration, select BIOS/Platform Configuration (RBSU).
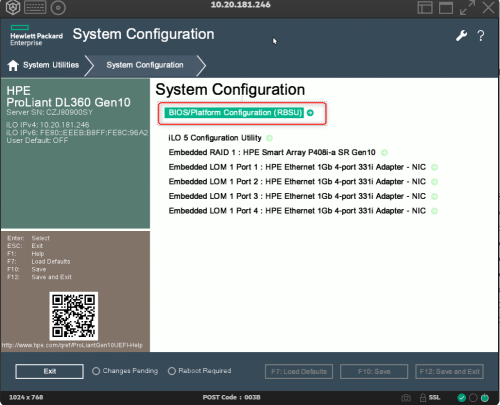
-
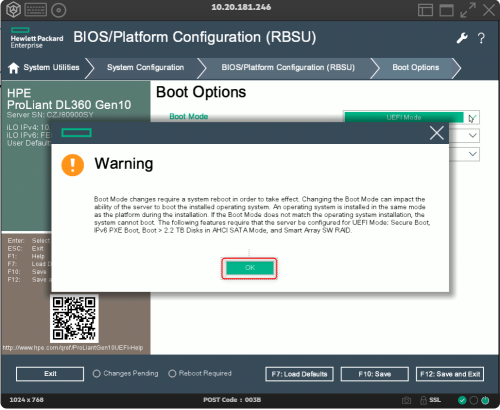
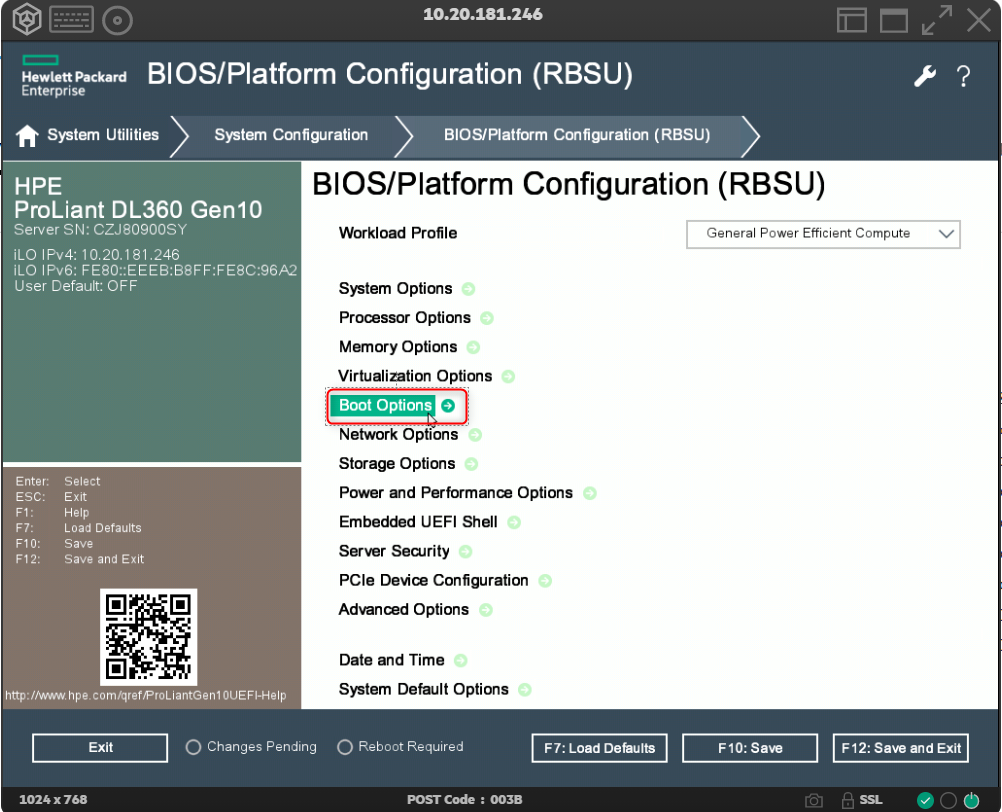
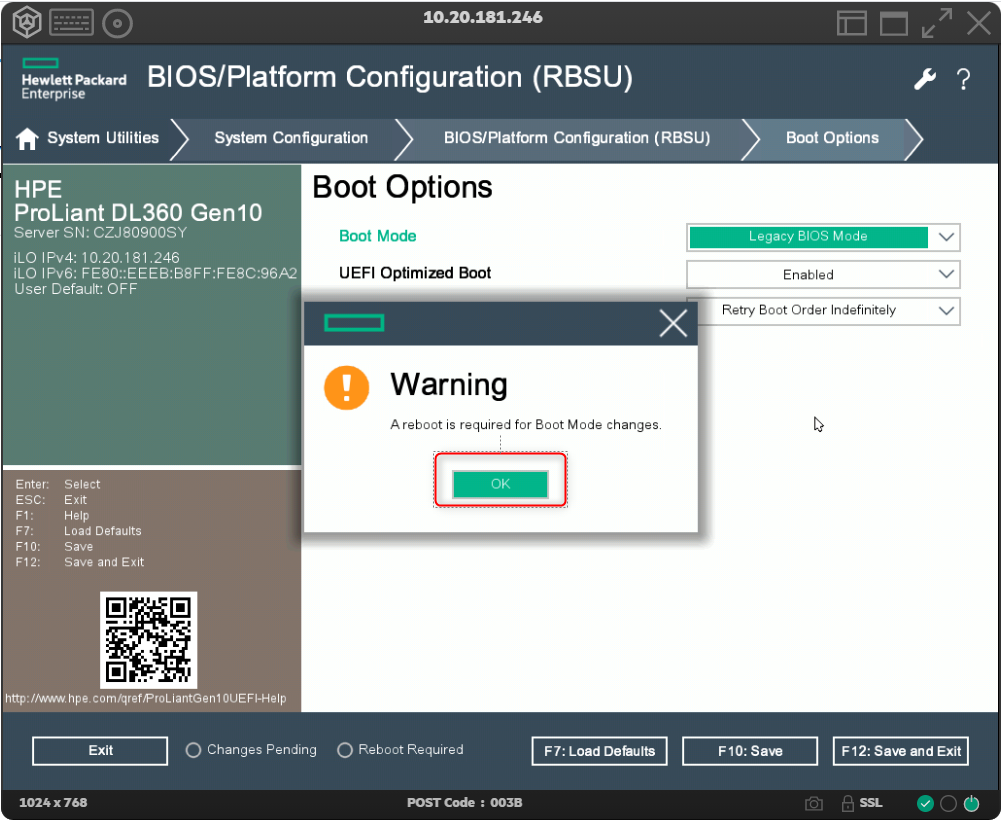
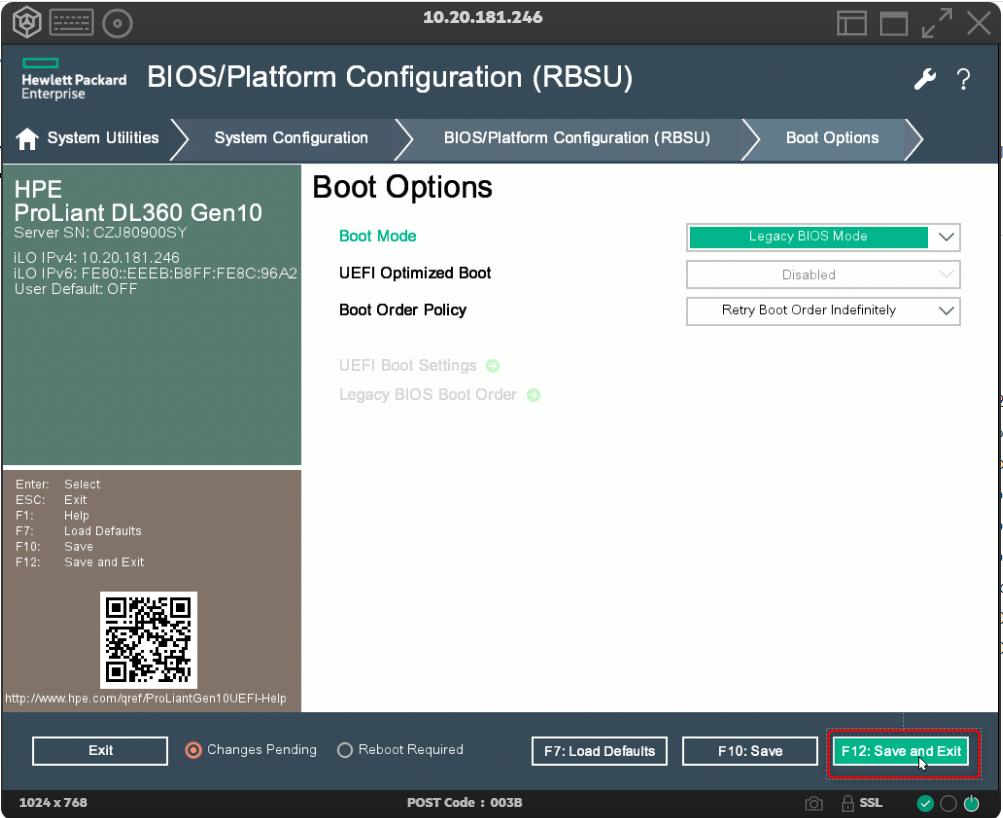
In BIOS/Platform Configuration (RBSU), select Boot Options.
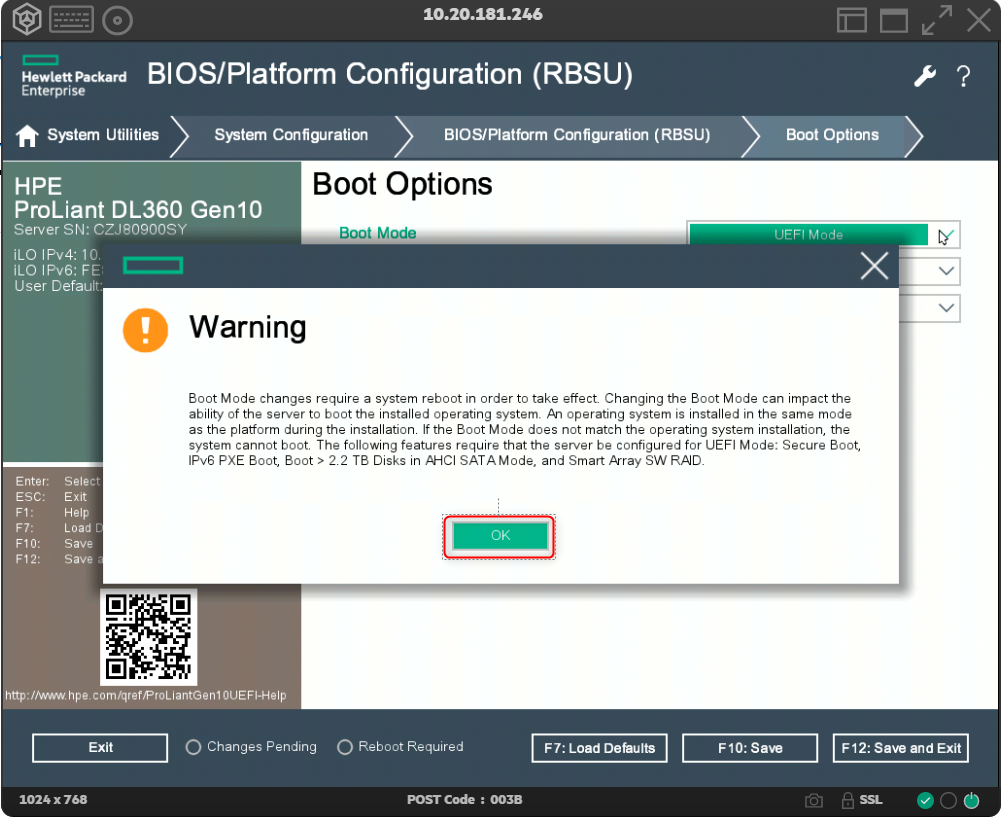
-
At the warning, click OK.
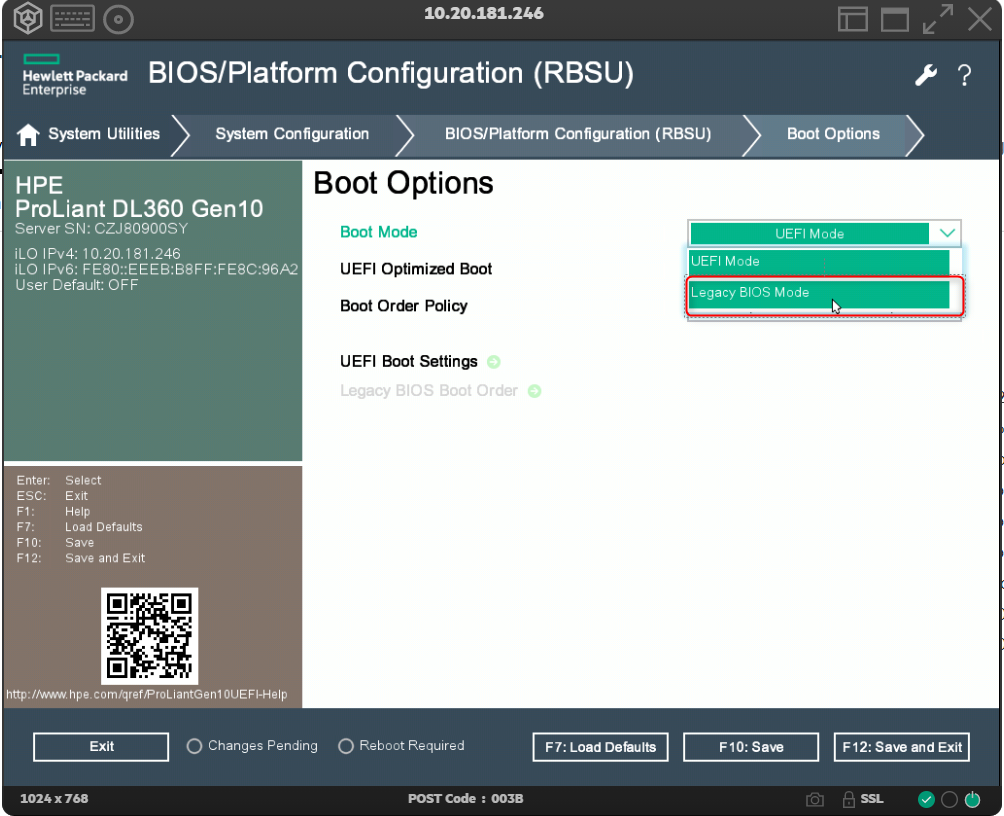
-
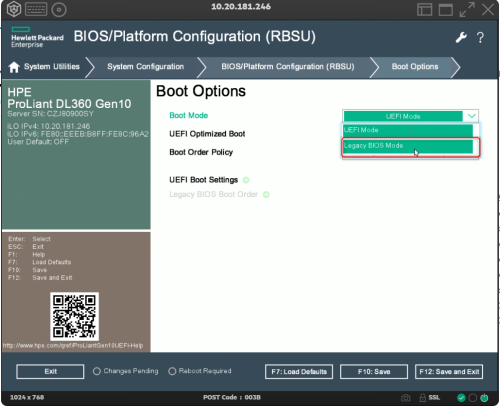
Select Legacy BIOS Mode.
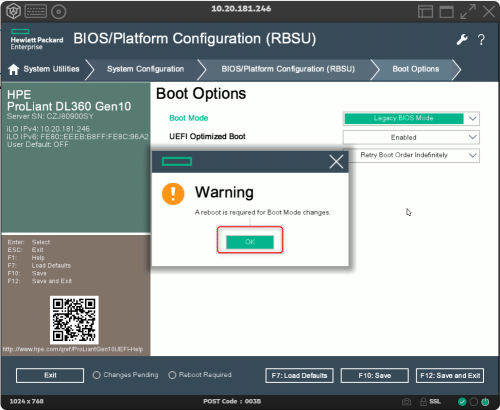
Click OK at warning message.
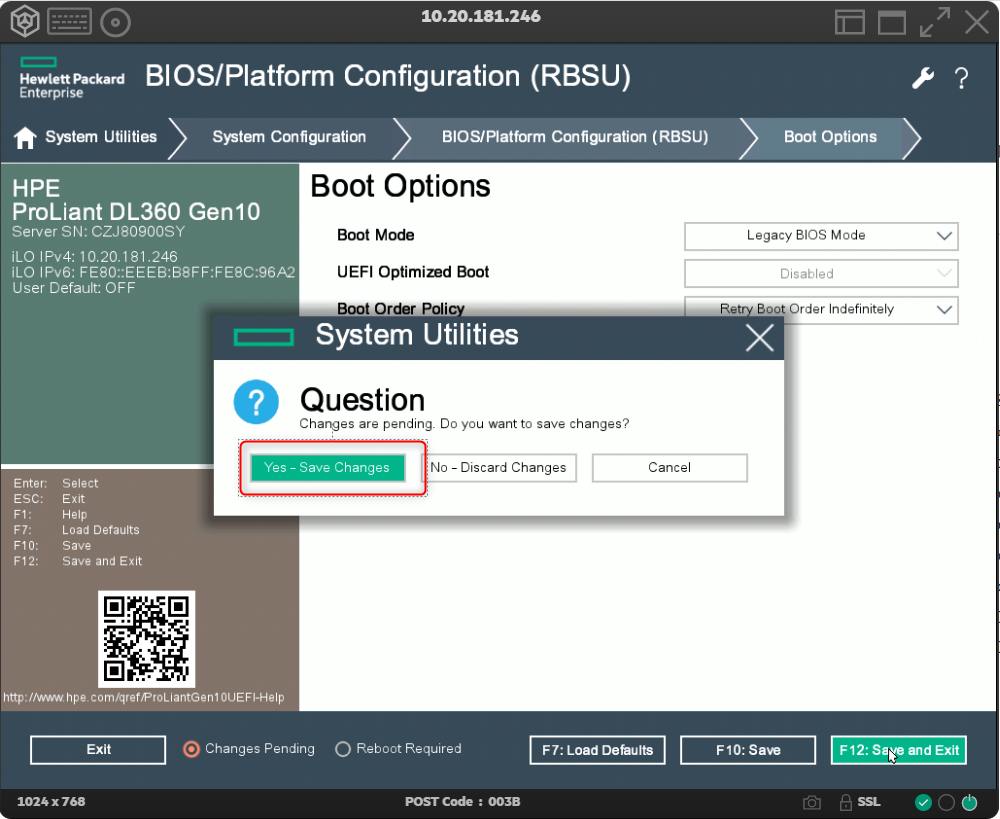
-
Click F12: Save and Exit.
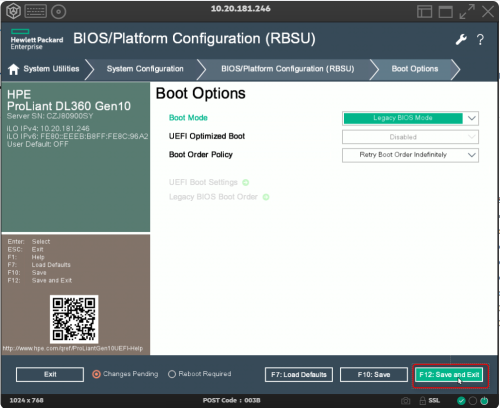
Click Yes - Save Changes to confirm save.

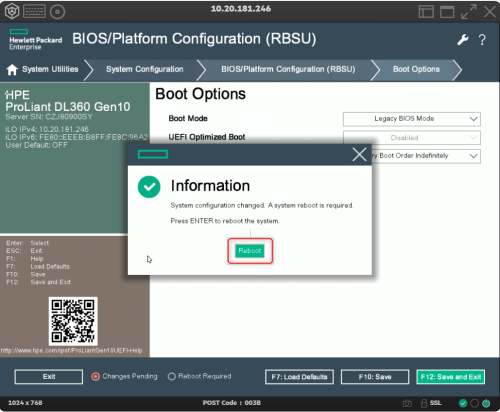
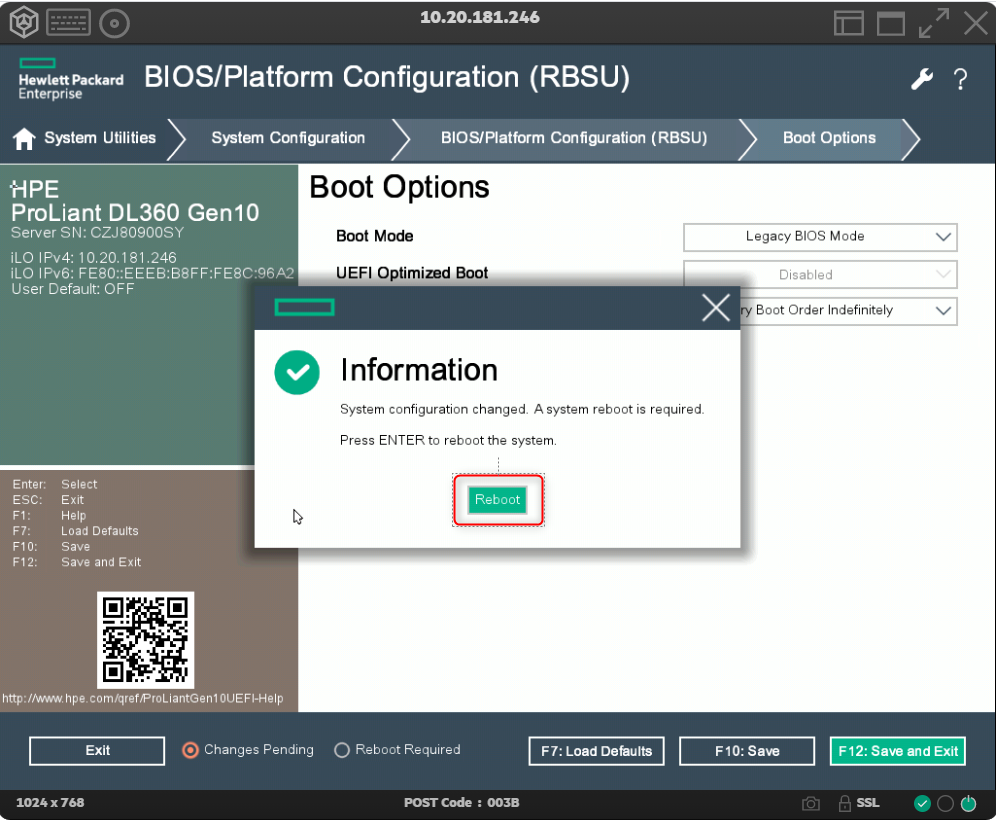
-
Press <ENTER> or click Reboot to reboot the system.
Install ASMS from iLO
Following the steps below, to install ASMS:
-
From the menu bar of the iLO console, reset the appliance again:
-
Click the Reset Icon
at the top left of the console window -
Click Power on the menu that is displayed
-
Click Reset on the power menu that is displayed.
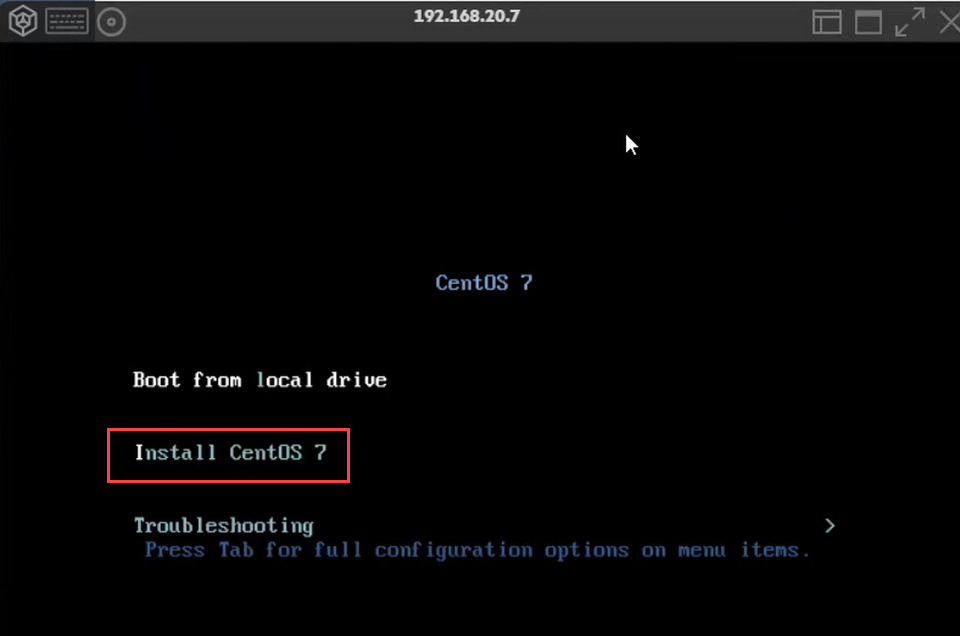
When reset has completed, the CentOS 7 menu is displayed:

-
-
Use your keyboard arrows to select Install CentOS 7 and then press <Enter> on your keyboard.
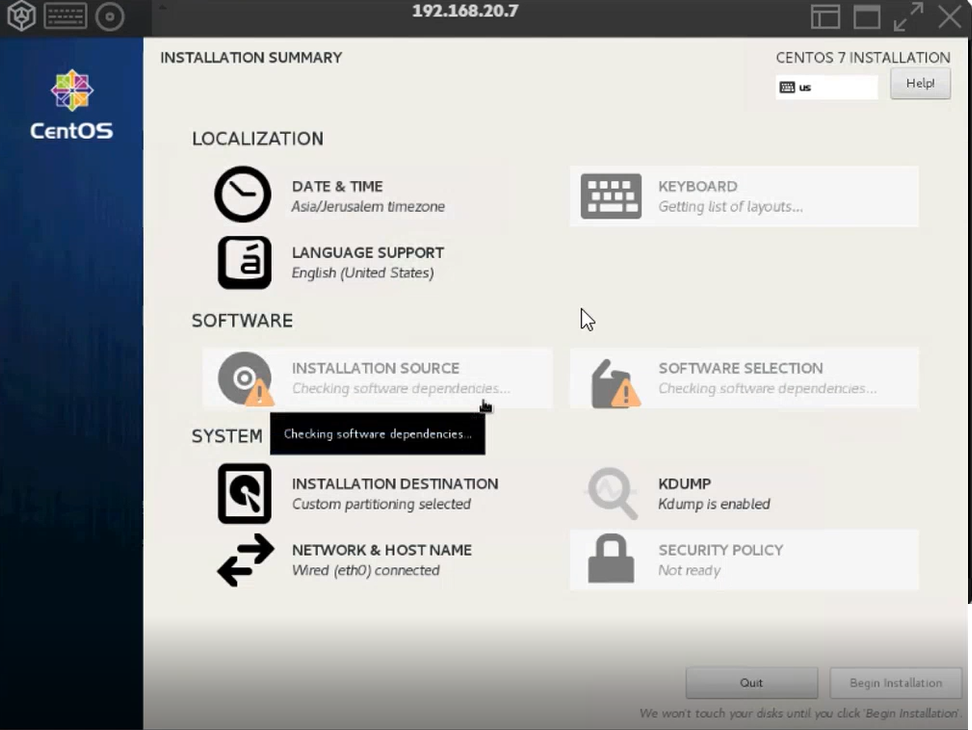
The CentOS 7 installation (duration approximately 1 hour) begins:Note: Ignore any CentOS UI screens (like the following) that may appear on your screen. All choices are made automatically by the script.


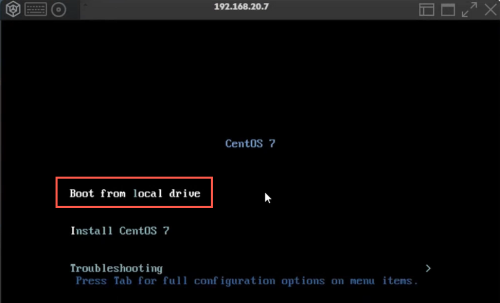
Note: When the Installation of CentOS 7 has completed, there is an automatic reboot in BIOS Legacy mode
-
When reboot has completed, select Boot from local drive from the menu that is displayed:
The ASMS installation process is initiated.
-
At the AlgoSec login prompt, login using your ASMS CLI username and credentials.

Note: Once you have logged into ASMS, the installation begins in the background.
Installation duration is approximately one hour.
-
To track the ASMS installation process, enter the following command at the prompt:
tail -f /root/asms-install.log
Note: A banner message on the console screen will inform you when installation completes.
-
Once the ASMS installation has completed, press Ctrl+C to exit to the Linux Shell.
-
At the prompt, type:
# algosec_conf
The algosec_conf menu of ASMS is displayed.
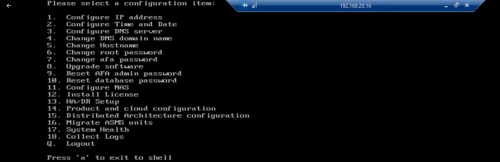
Note: The successful display of the algosec_conf menu is an additional sign that ASMS was installed successfully.
-
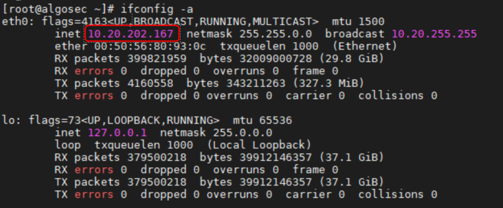
Make sure your management IP is configured (note: network cable must be connected to management port):
Exit to the linux shell command line by pressing a, and run the command:
ifconfig -a

Tip: If no management IP exists, you can return to the algosec_conf menu by entering algosec_conf in the Linux shell command line, and enter option 1. Configure IP Address.
-
In the algosec_conf menu, enter option 17. System Health.
-
From the System Health display, enter option 1. Check services status to verify that all services are running in status OK.
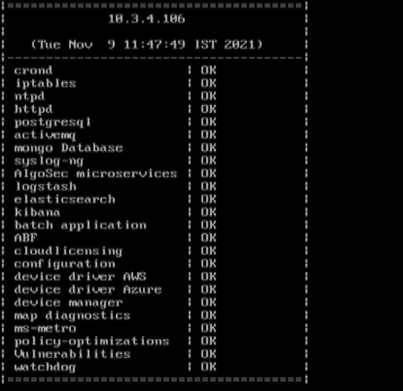


TIP:
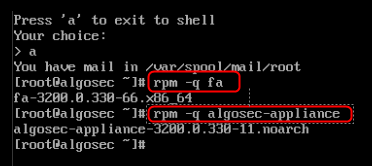
Press a to exit to the shell.
-
To get the name of the AFA build that has just been installed, at the shell prompt, type:
rpm -q fa
The reply is the name of the AFA build that has just been installed.
-
To get the name of the Algosec Appliance build that has just been installed, at the shell prompt type:
rpm -q algosec-appliance
The reply is the name of the Algosec Appliance build that has just been installed.