Respond to change requests
This topic describes how to respond to emails you receive from FireFlow, as well as specific guidelines for responding to rule removal and drop traffic requests.
Respond to FireFlow emails
The Subject line of these email messages will include the change request ID in the format: [FireFlow #<number>]
For example: [FireFlow #49]
Reply to these emails, or write a new email to the FireFlow system directly.
In order for FireFlow to associate your email with the change request, you must include the same ID in the email subject.
For example, if your change request ID is [FireFlow #49], your Subject line might be:
RE:[FireFlow #49] Access to LAN or [FireFlow #49] Everything works fine now.
Reply to a change request
Reply to a change request from within FireFlow at any stage in the lifecycle. Your reply will be added to the change request's history and sent as an email message to both the change request's owner and the requestor.
Do the following:
- View the change request. For details, see View change requests.
-
At the top of the page, click
 , and then click Reply.
Note: The list of option available in the drop-down list may be changed by an administrator, by editing a workflow's available actions.
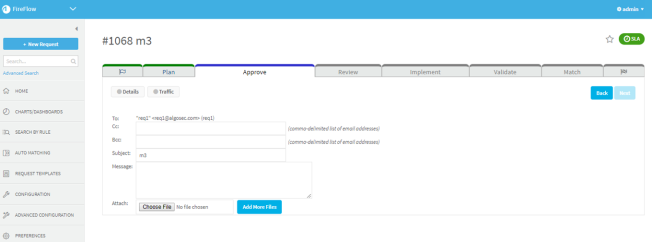
The reply page is displayed.

-
Complete the fields as needed, and then click Next.
Your reply is sent as an email message to the requestor and the change request's current owner.
The following fields are available when replying to a change request from within FireFlow:
|
To |
The change requestor's email address is displayed. This field is read-only; however, you can send the message to additional people by filling in the Cc and Bcc fields. |
|
Cc |
Specify the email addresses of people who should receive a carbon copy of this message, by doing one or more of the following:
|
|
Bcc |
Specify the email addresses of people who should receive a blind carbon copy of this message, by doing one or more of the following:
|
|
Subject |
Type the subject of the message. By default, this field displays the change request name. |
|
Message |
Type your message. |
|
Attach |
To attach files to your message, do one of the following:
To add more attachments, click Add More Files. To remove an attachment, select the check box next to the attachment. The selected attachment will be removed upon sending the message. |
Respond to rule removal and drop traffic requests
Relevant for: Network operations users
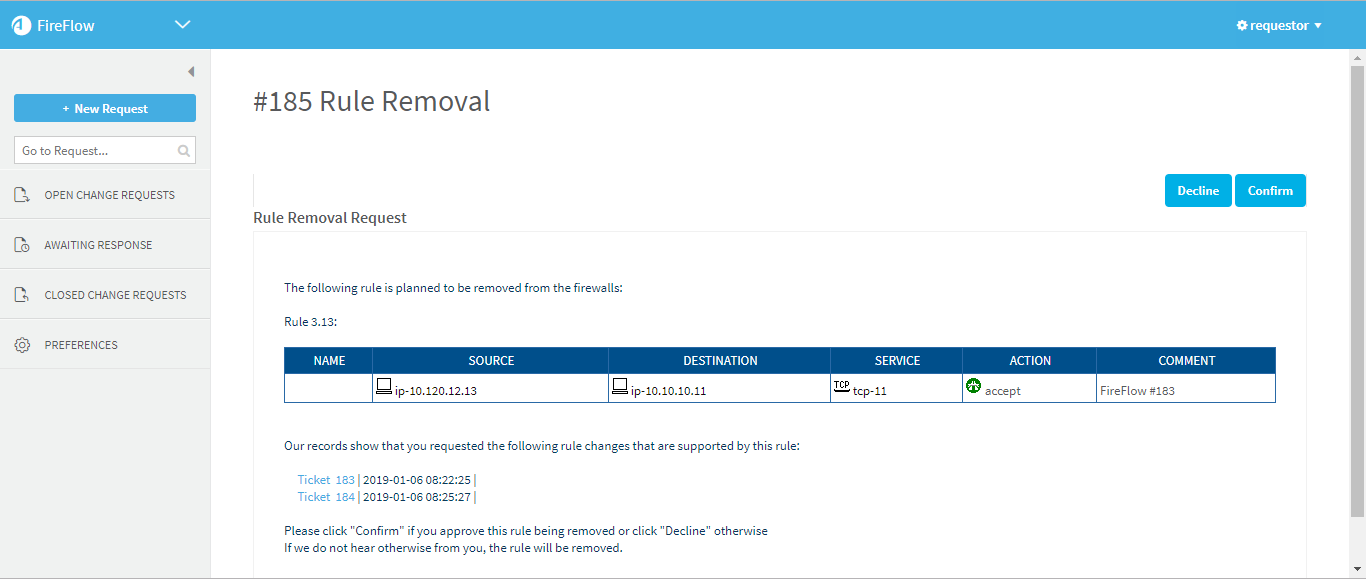
When handling rule removal or drop traffic requests, requestors of related change requests will be notified and given the opportunity to confirm or decline the change.
These notifications have due dates. If you do not respond by the due date, the change is considered to be confirmed.
Note: To determine a change request's stage, view the change request as described in Viewing Change Requests. The stage is indicated by the Change Request Lifecycle Status Bar.
Do one of the following:
Do the following:
-
In the main menu, click Awaiting Response.
The Change Requests Awaiting Response page is displayed.
-
In the Rule Removal Requests Awaiting My Response list, click the change request.
The Rule Removal Request page is displayed.
-
At the top of the page, click Confirm to approve the rule deletion or Decline to decline the rule deletion.
The Confirm Rule Removal or Decline Rule Removal page is displayed.

- Modify the Subject field to describe the subject of your comment.
-
To attach a file to your comment, do one of the following:
- In the Attach field, type the path to the file.
- Click Browse, browse to the desired file, and click Open.
- In the Message text box, type your comment.
- Click Next.
The Requestors Web Interface displays the change request, and your comment appears in the History area.
Your comment is sent as an email message to the change request's current owner.
Do the following:
-
In the main menu, click Awaiting Response.
The Change Requests Awaiting Response page is displayed.

-
In the Change Requests Awaiting My Response list, click the change request.
The Traffic Removal Request page is displayed.
-
At the top of the page, click Confirm to approve the rule deletion or Decline to decline the rule deletion.
The Confirm Rule Removal or Decline Rule Removal page is displayed.
- Modify the Subject field to describe the subject of your comment.
-
To attach a file to your comment, do one of the following:
- In the Attach field, type the path to the file.
- Click Browse, browse to the desired file, and click Open.
- In the Message text box, type your comment.
- Click Next.
The Requestors Web Interface displays the change request, and your comment appears in the History area.
Your comment is sent as an email message to the change request's current owner.


