Customize trusted traffic
This topic discusses customizing trusted traffic.
Note: For changes in trusted traffic to take effect, an analysis must be run.
What is trusted traffic?
Trusted traffic is traffic that does not trigger a risk.
You can create trusted traffic or you can import trusted traffic from a risky rules report.
Note: When importing trusted traffic, you are trusting the traffic that is represented in the rule. You are not importing the rule itself.
Traffic can be trusted on the All Firewalls, group or device level:
-
Trusting traffic at the All Firewalls level trusts the traffic to all the devices in your ASMS system.
-
Trusting traffic at the Group level trusts the traffic for all devices in the group (a management device and its connected devices or a user defined group).
-
Trusting traffic at the Device level trusts the traffic only to the specific device.
Permitted source(s), permitted destination(s) and a permitted service are the required parts that comprise a trusted traffic definition.
When you trust traffic, you can also set an expiration date for the trust.
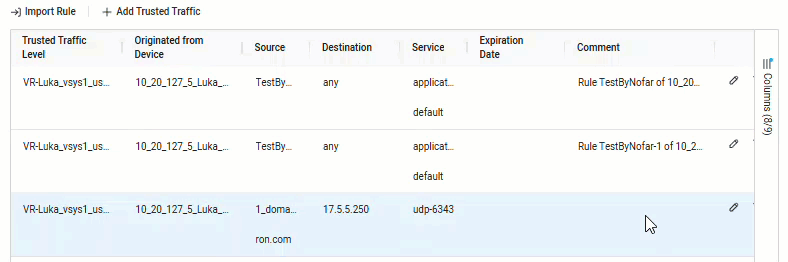
Import trusted traffic
You can import Trusted Traffic rules in three ways:
- Note: Importing more than one rule at a time may increase the time it takes to complete the import process.
When you import trusted traffic from the Reports tab, you can choose from any historical report and import Trusted Traffic based on its Risky Rules.
To import trusted traffic from the Reports tab:
- Select the device in the device tree.
- Click the Reports tab.
- Select the relevant report from the list.
-
Click Trusted traffic.
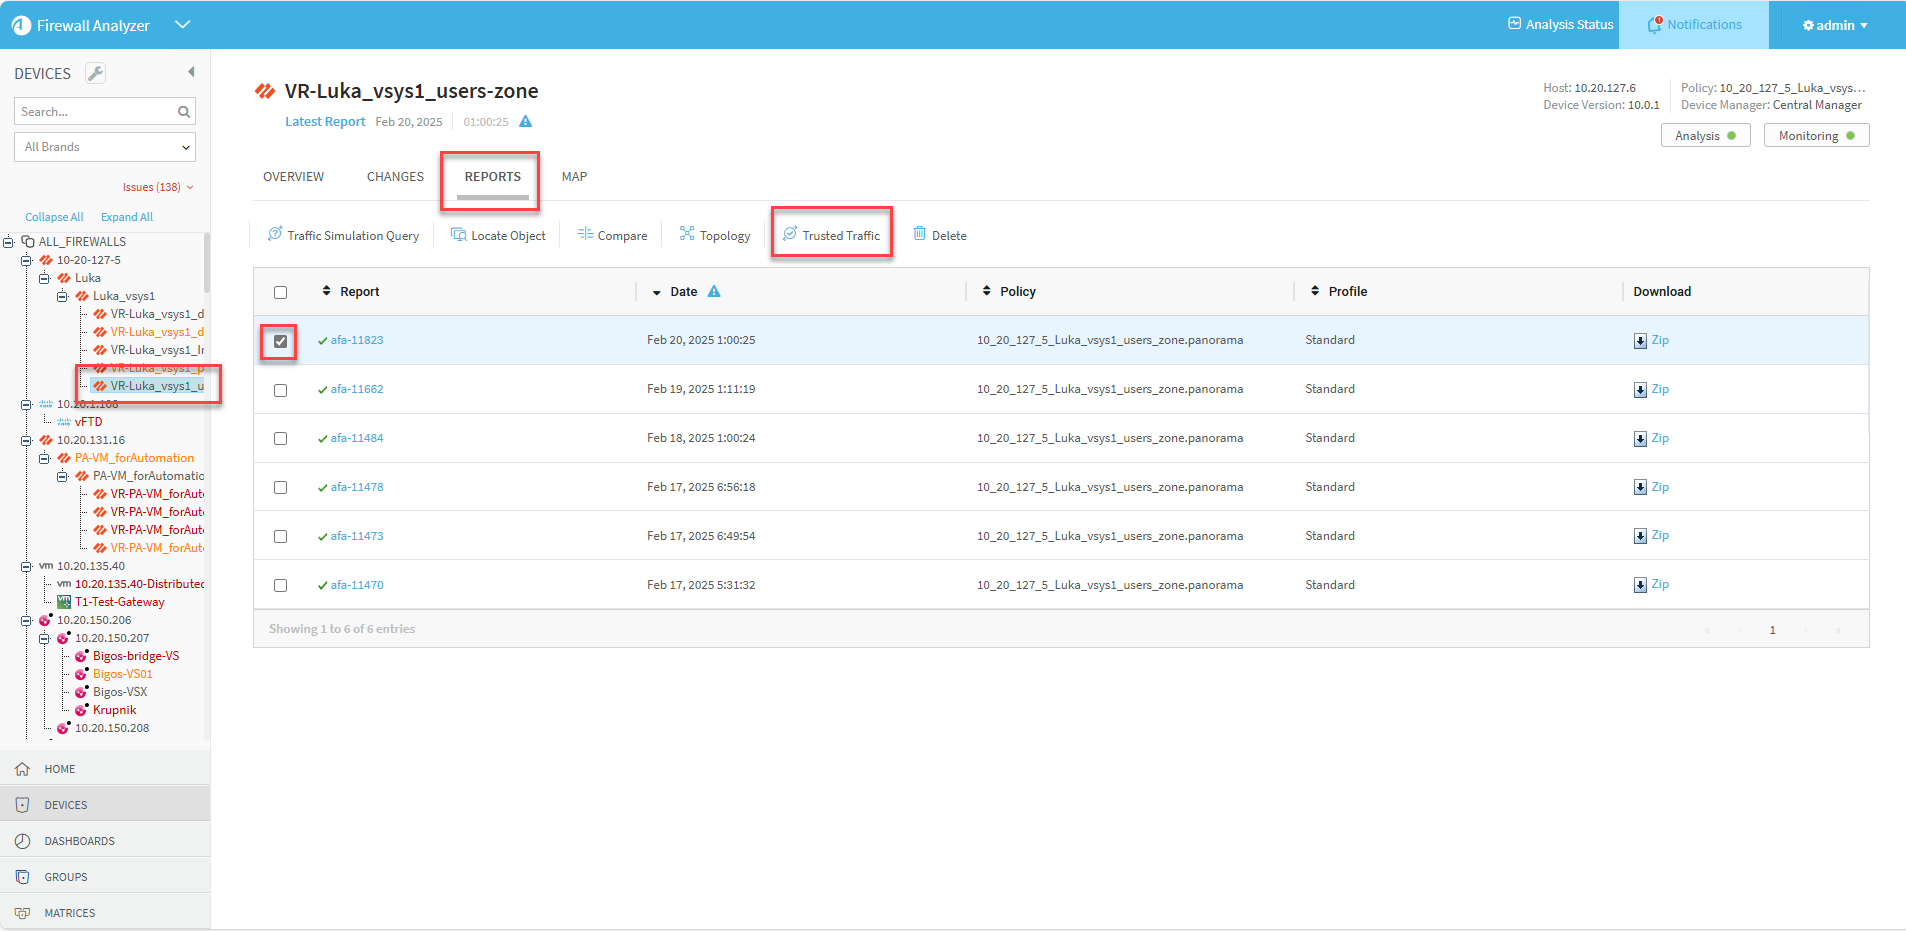
The Trusted Traffic page appears.
Note: For Panorama devices over version 10 and all Check Point devices, you can also see the Rule UUID for the rule-based trusted traffic. To see this information, click the Columns menu on the right side of the grid and check the Originated from Rule checkbox to enable the column.
-
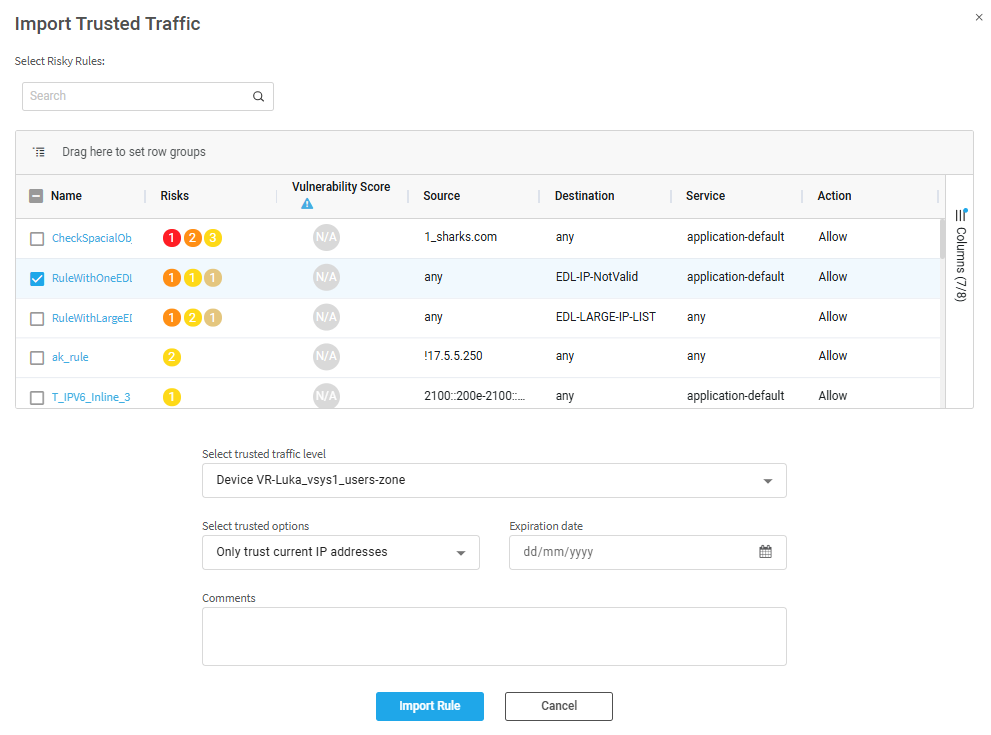
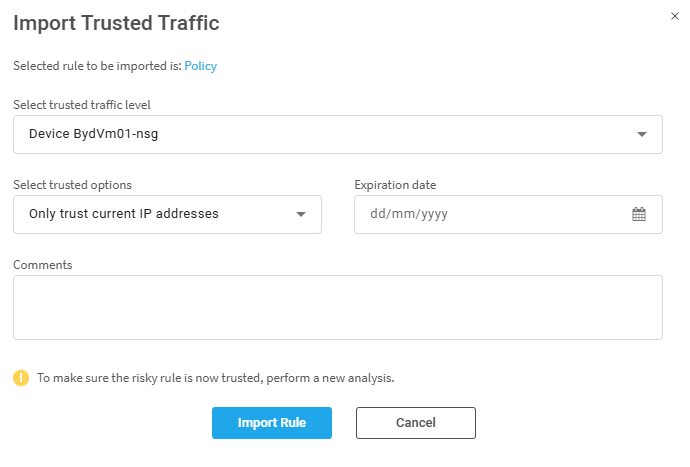
Click the Import rule button. The Import Trusted Traffic dialog appears.
Note: The Import Rule button does not appear in the following cases:
-
There are no risky rules
-
The selected report is a child report that does not have a parent report
Note: For Panorama devices over version 10 and all Check Point devices, you can also see the UUID for each rule. To see this information, click the Columns menu on the right side of the grid and check the Rule UUID checkbox to enable the column.
-
-
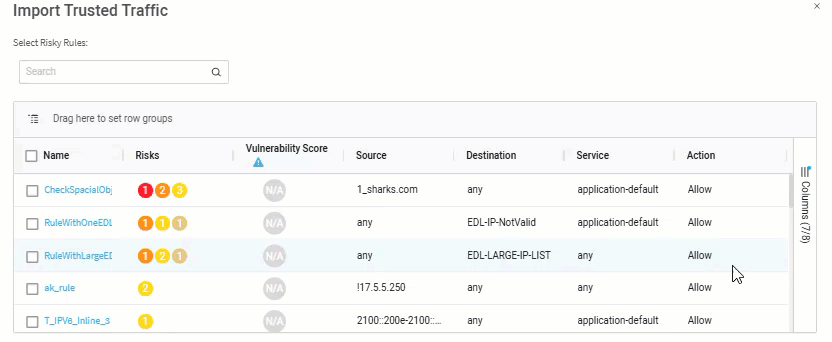
Select the rules whose traffic data you wish to trust.
-
Enter or select values as per the Trusted traffic fields table below.
-
Click Import Rule.
In the Overview tab's Trusted Traffic option, you can import rules from the device's latest Risky Rules report.
To import trusted traffic from the device's latest Risky Rules report:
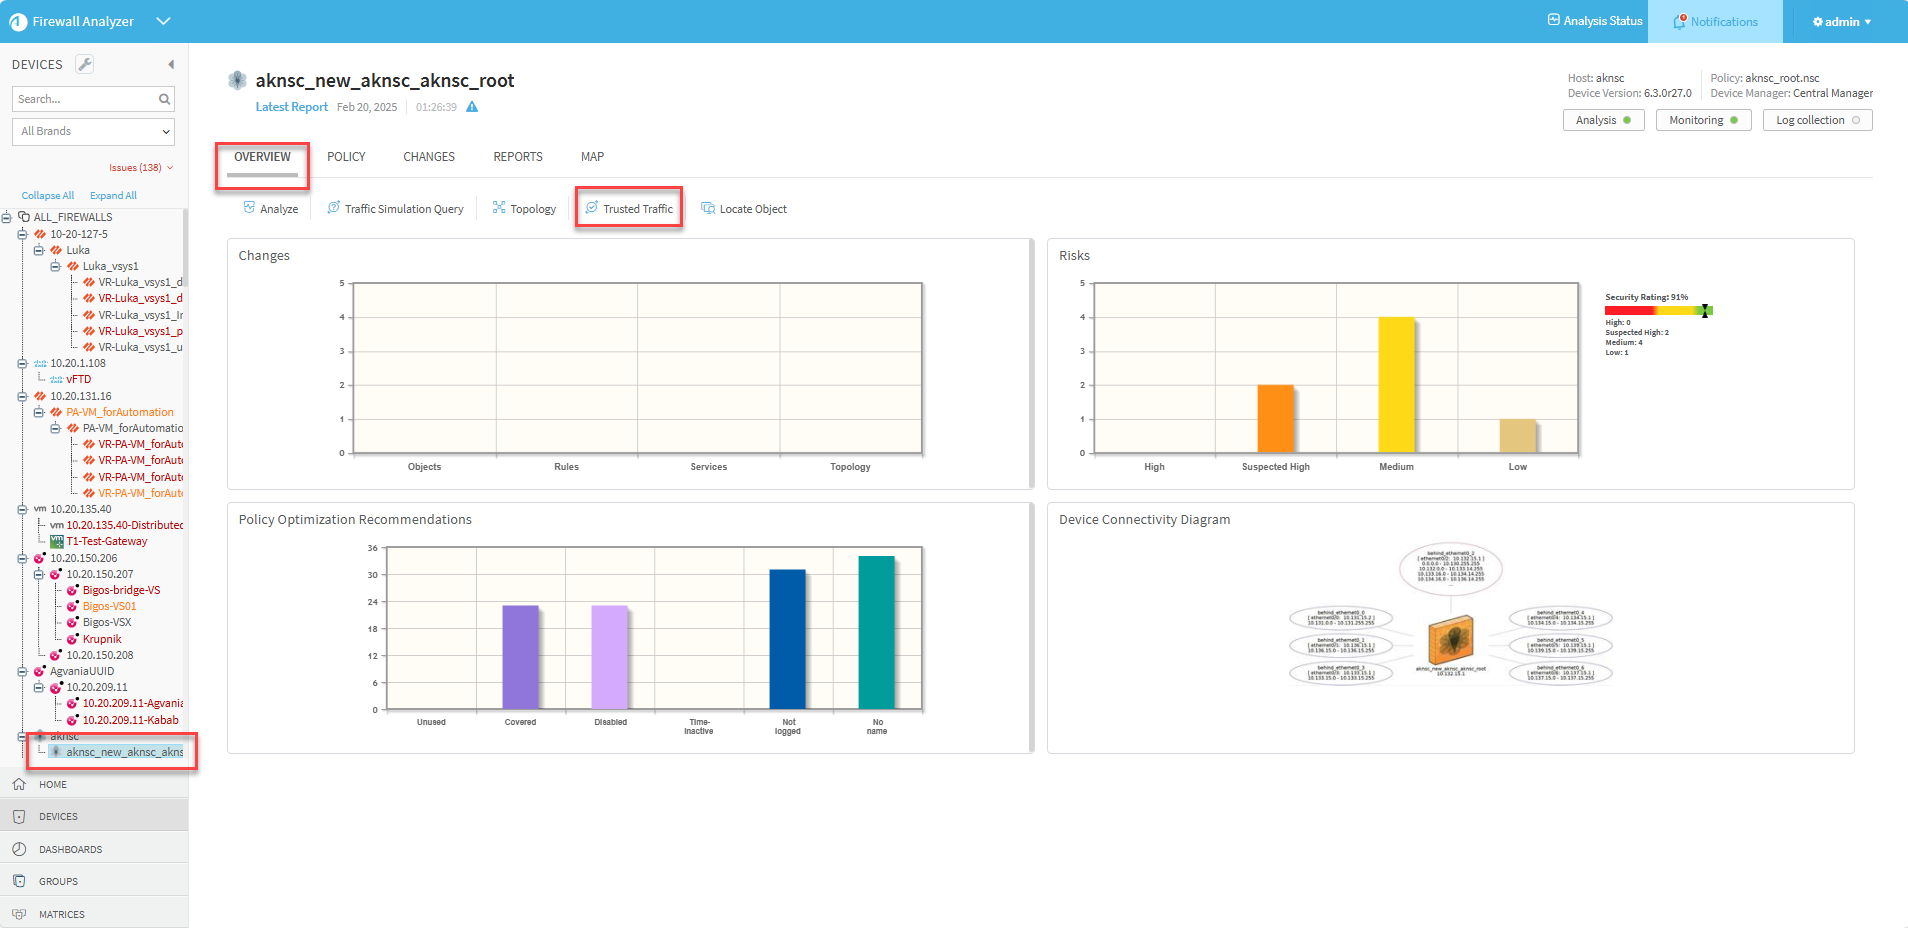
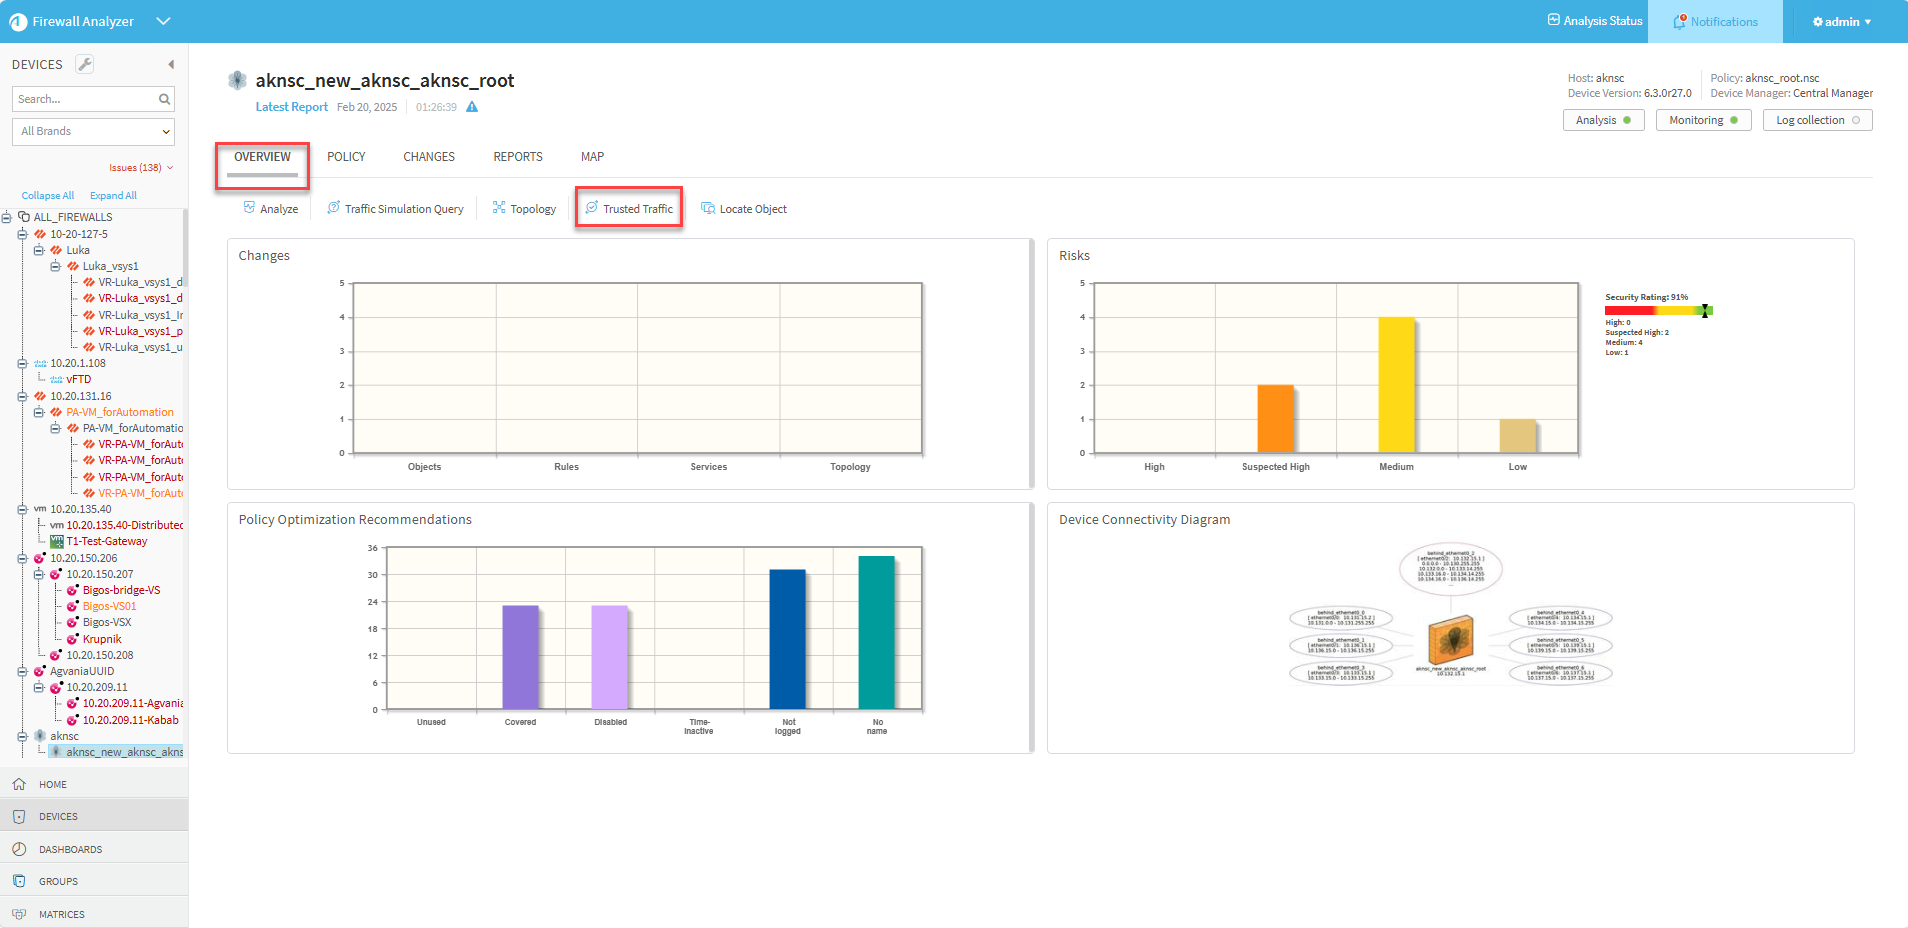
- In the home page of the selected device, click the Overview tab and then click Trusted Traffic. The trusted traffic of the device is displayed.
-
Click the Import rule button.
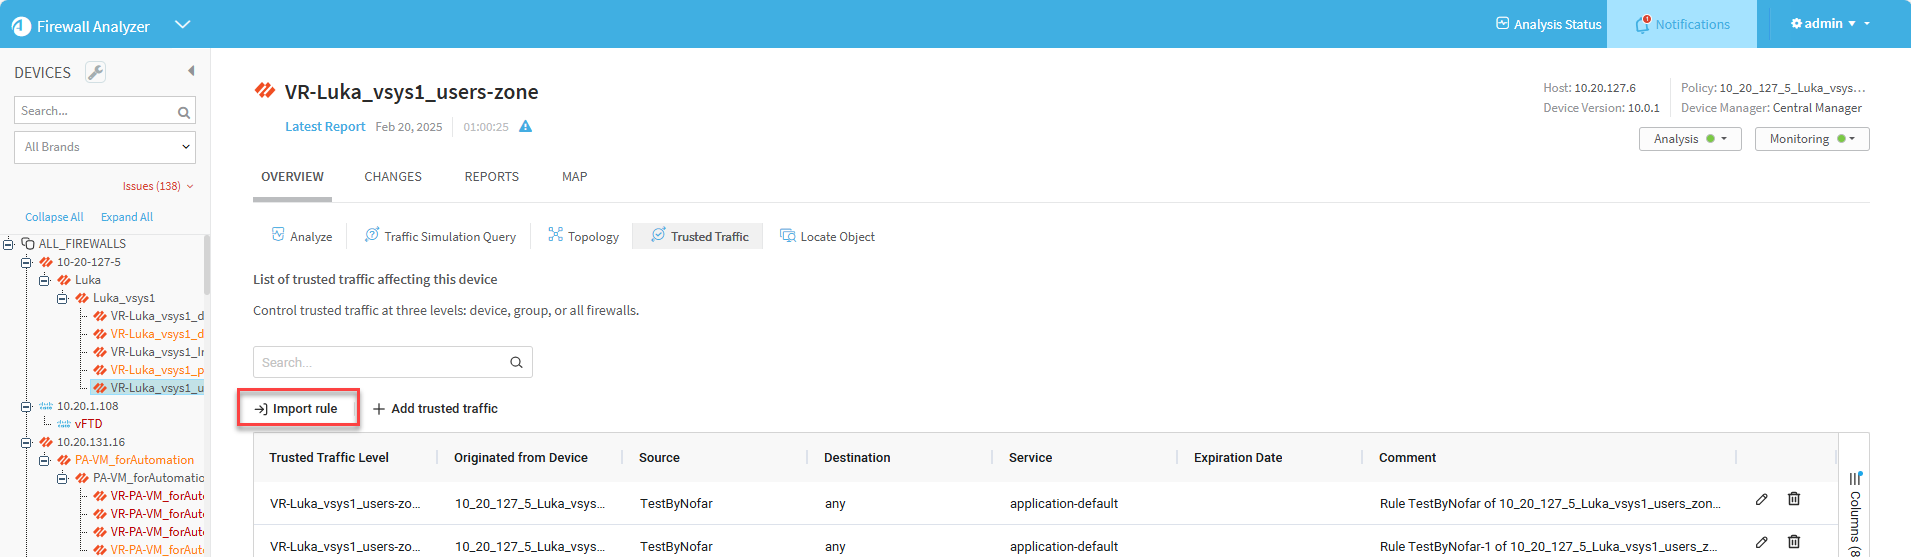
The Import Trusted Traffic dialog appears.
Note: The risky rules displayed in the dialog are the same as those shown in the risky rules page of the latest report.
Note: For Panorama devices over version 10 and all Check Point devices, you can also see the UUID for each rule. To see this information, click the Columns menu on the right side of the grid and check the Rule UUID checkbox to enable the column.
-
Select the rules whose traffic data you wish to trust.
-
Enter or select values as per the Trusted traffic fields table below.
-
Click Import Rule.
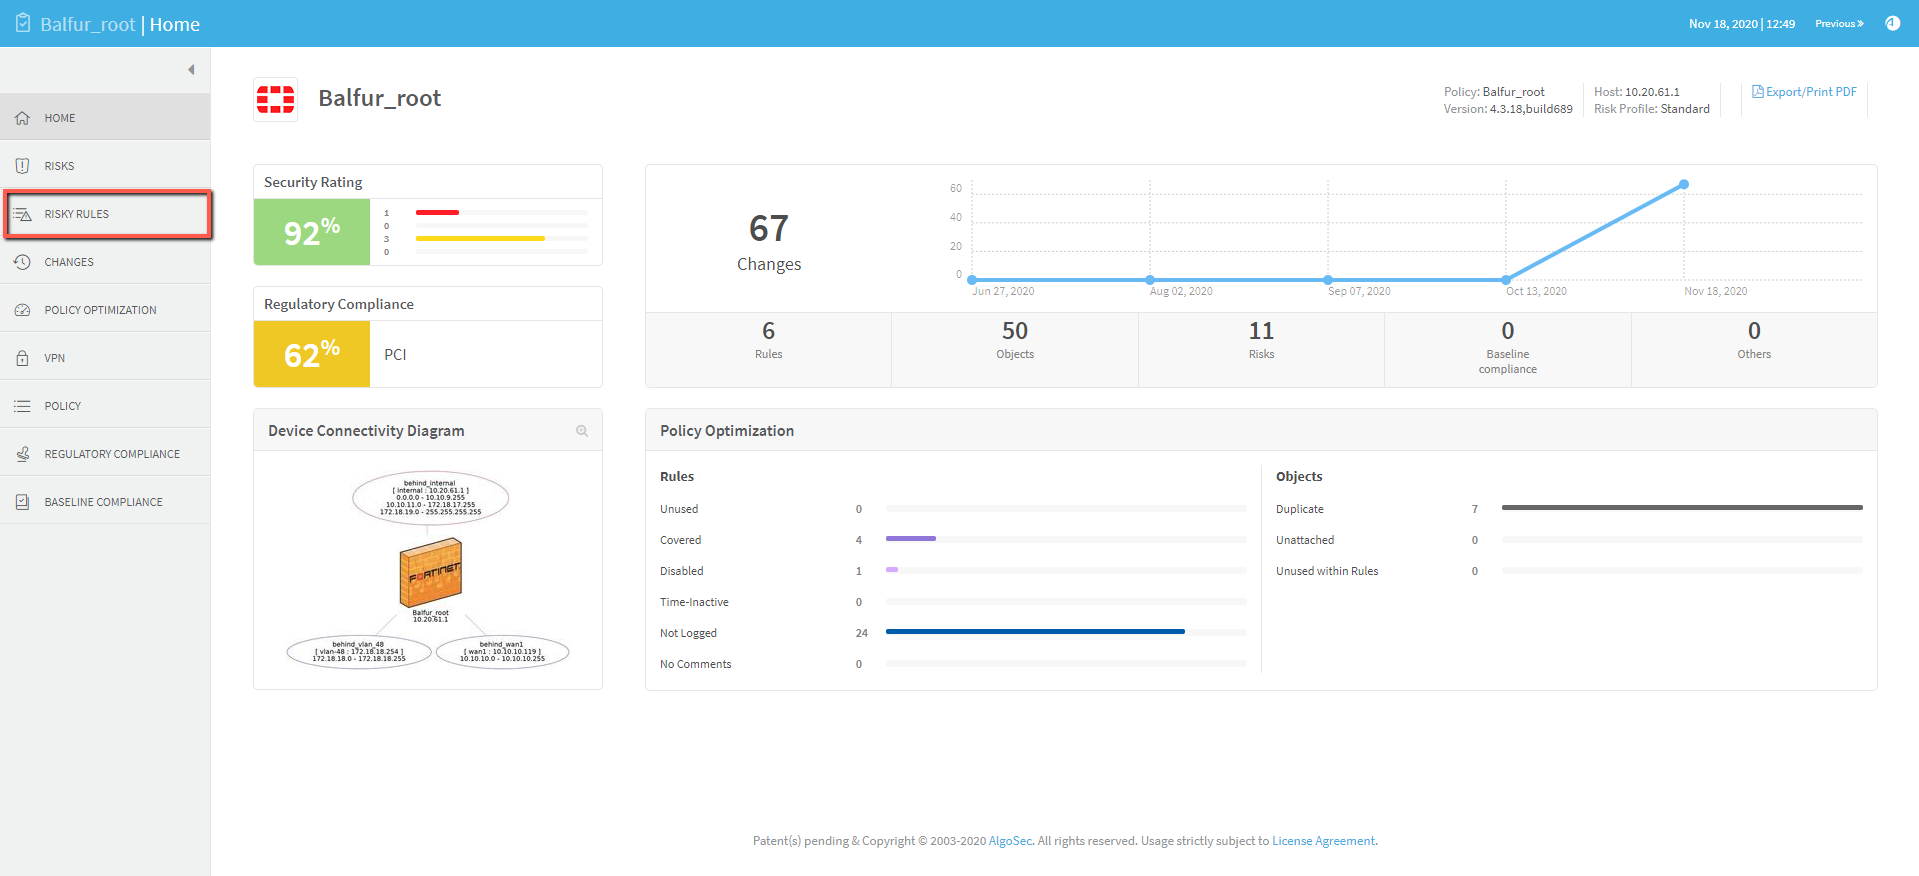
You can also trust traffic from a device's Risky Rules report.
Note: Trusting traffic from reports is only available via the AFA Web interface. This functionality is not available when viewing the downloaded report or a report sent by mail on your computer.
To trust traffic from a Risky Rules report:
-
Open a device's report and click Risky Rules.
-
In the risky rules display, click the Trust button of the rule whose traffic details (source, destination, service) you wish to trust.

The Import Trusted Traffic dialog is displayed.
Note:
-
Click on the name of the rule to see the selected rule in the policy page.
-
For Panorama devices over version 10 and all Check Point devices, the dialog also shows the UUID of the selected rule.
-
-
Fill out the Import Trusted Traffic dialog according to Trusted traffic fields table below.
-
Click Import Rule.
The traffic defined by the rules you selected is added as trusted traffic to the selected device, group or ALL_FIREWALLS level.Note: For changes in trusted traffic to take effect, an analysis must be run.
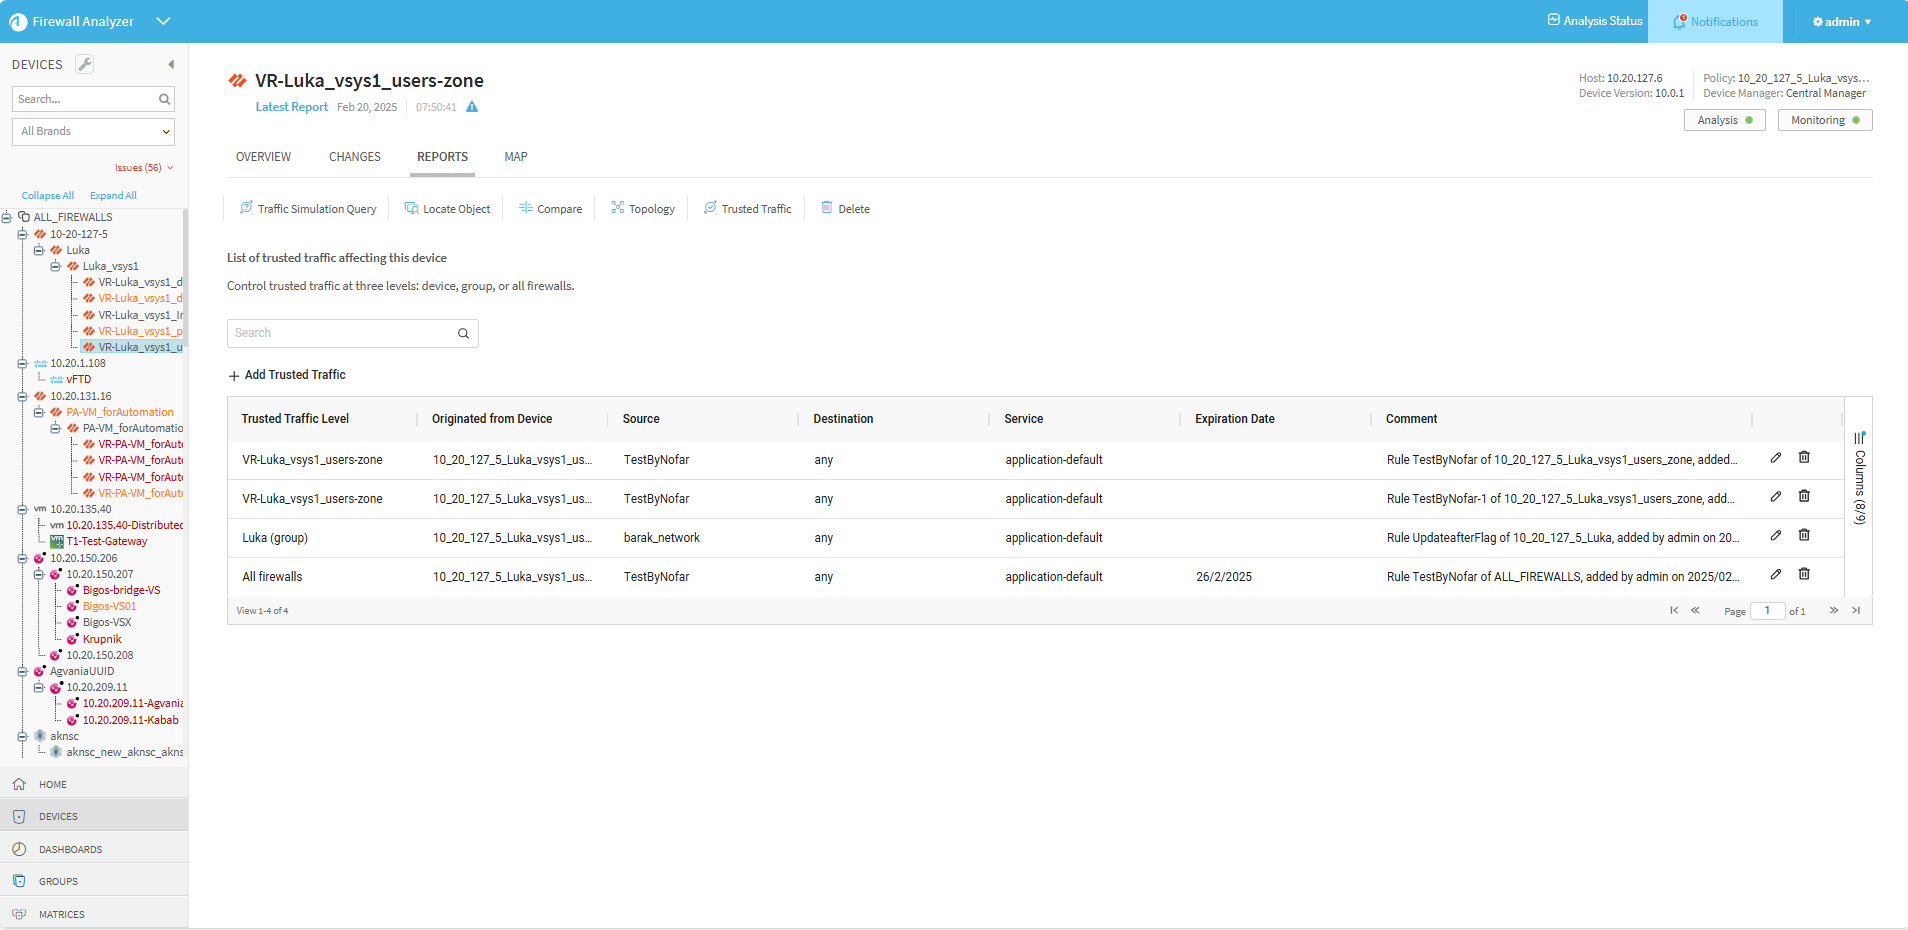
View the trusted traffic of a device
You can view Trusted Traffic rules only from a selected device. Rules affecting ALL_FIREWALLS or the group the device is part of can be seen in the Trusted Traffic Level column in the list of trusted traffic that impacts the device.
Do the following:
- In the home page of the selected device, click the Overview tab and then click Trusted Traffic.
The Trusted Traffic page is displayed, listing the trusted traffic that currently impacts the selected device.
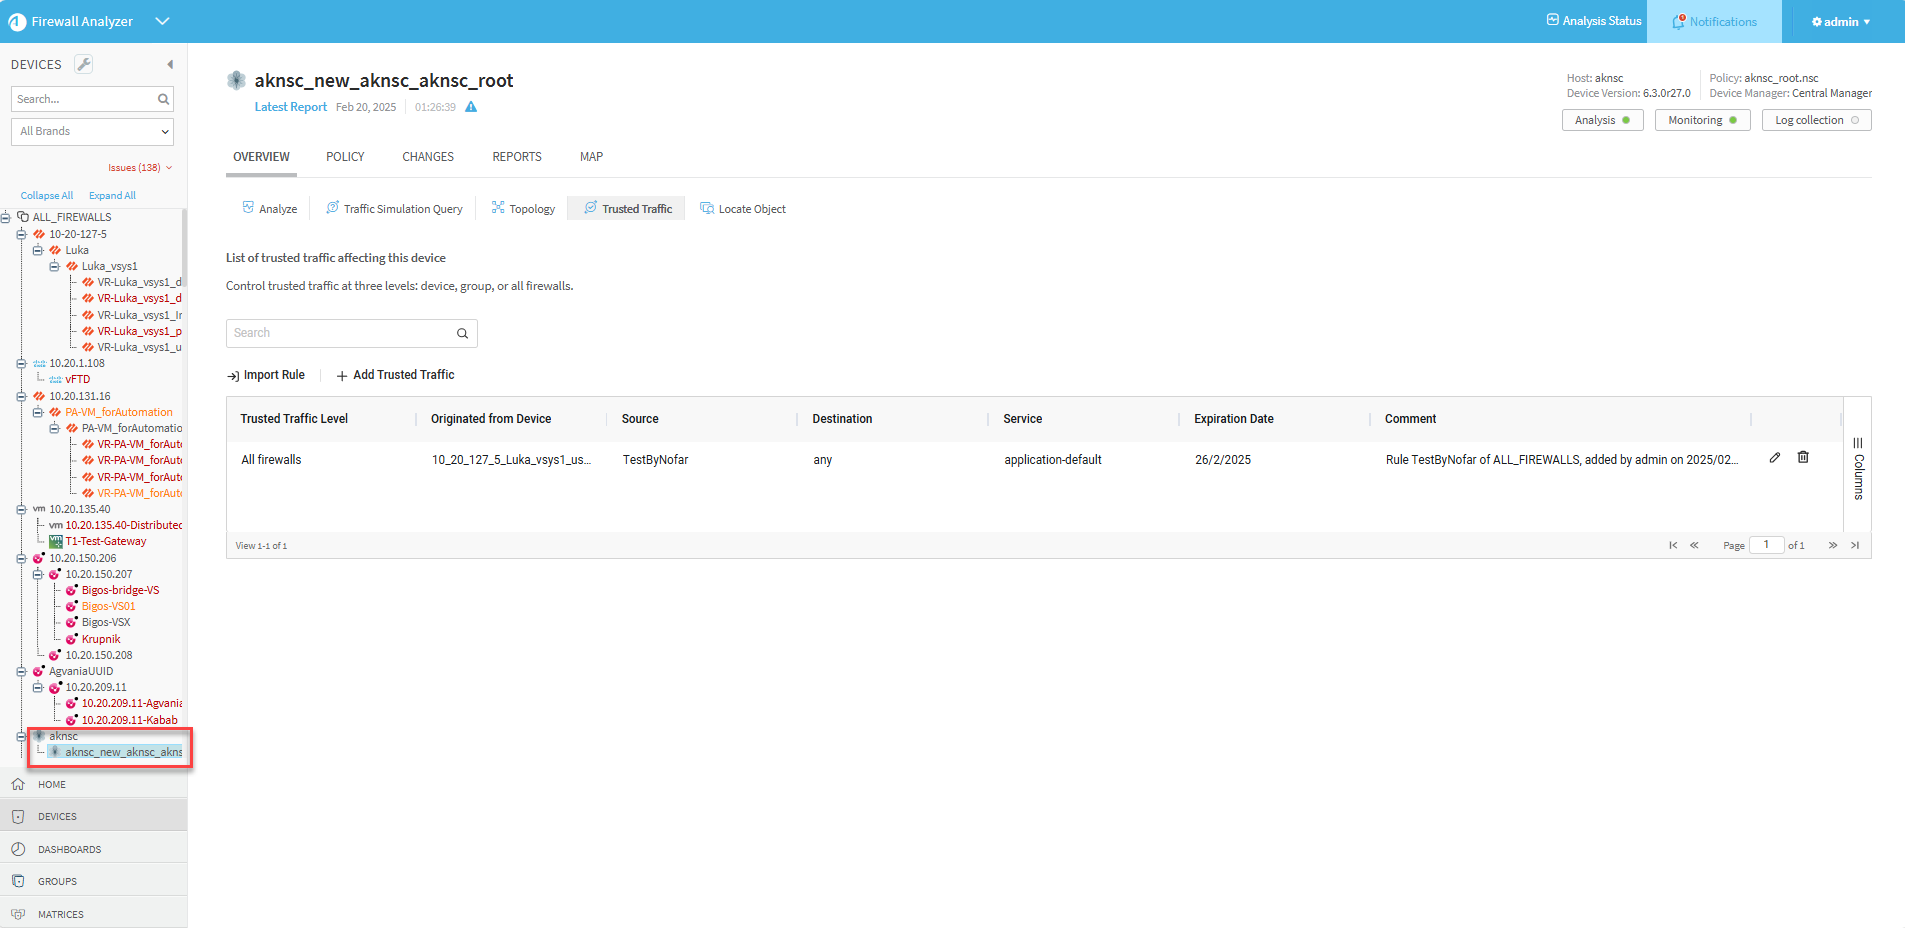
Rules affecting the device only, ALL_FIREWALLS or all devices in the group the device is part of can be seen in the Trusted Traffic Level column.
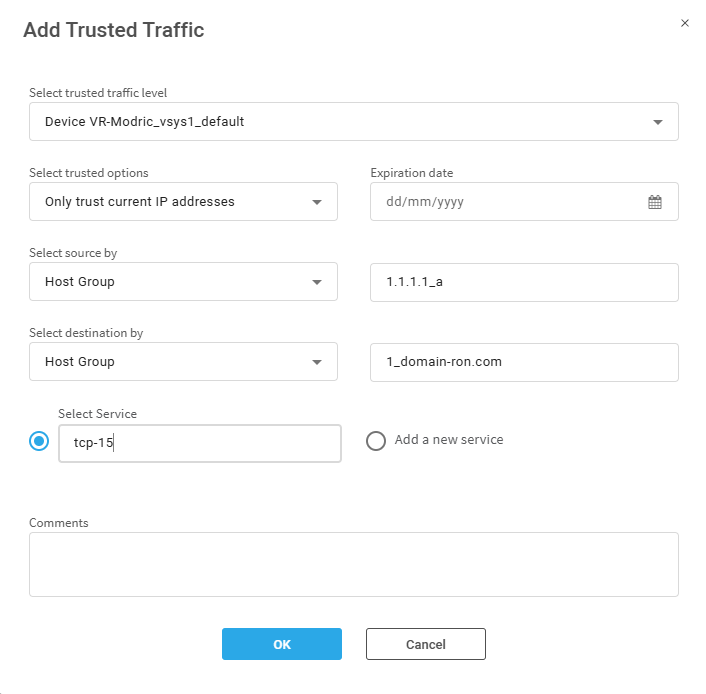
Create trusted traffic
You can create Trusted Traffic rules only from a selected device. Rules can be applied to the device itself, ALL_FIREWALLS or devices in the group the device is part of.
To trust traffic for a device:
-
In the home page of the selected device, click the Overview tab and then click Trusted Traffic. The trusted traffic of the device is displayed.
-
Click the Add trusted traffic button.

-
In the Add Trusted Traffic dialog, enter or select values in the fields according to the detailed table Trusted traffic fields below.
-
Click OK to save your changes.
Note: For changes in trusted traffic to take effect, an analysis must be run.
Edit trusted traffic
To edit trusted traffic:
-
In the home page of the selected device, click the Overview tab and then click Trusted Traffic.
-
Select the trusted traffic that requires editing, and click the Edit icon
 at the right side of its row.
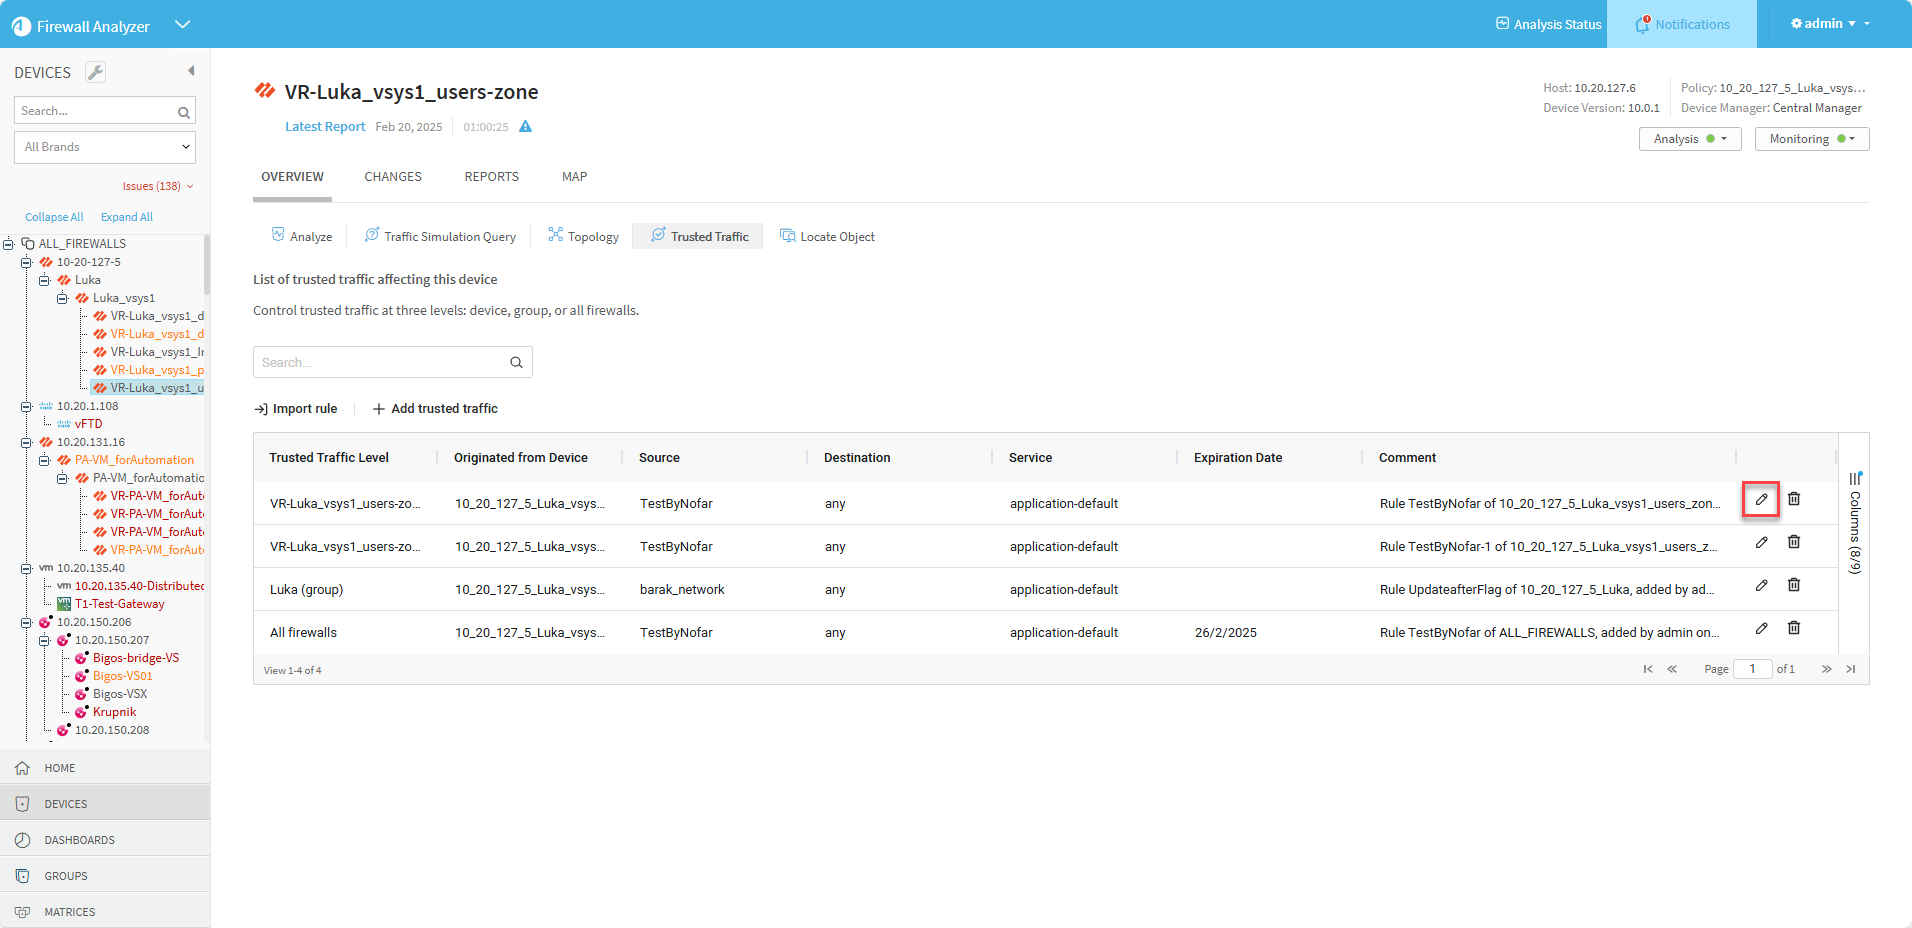
The Edit Trusted Traffic dialog appears.
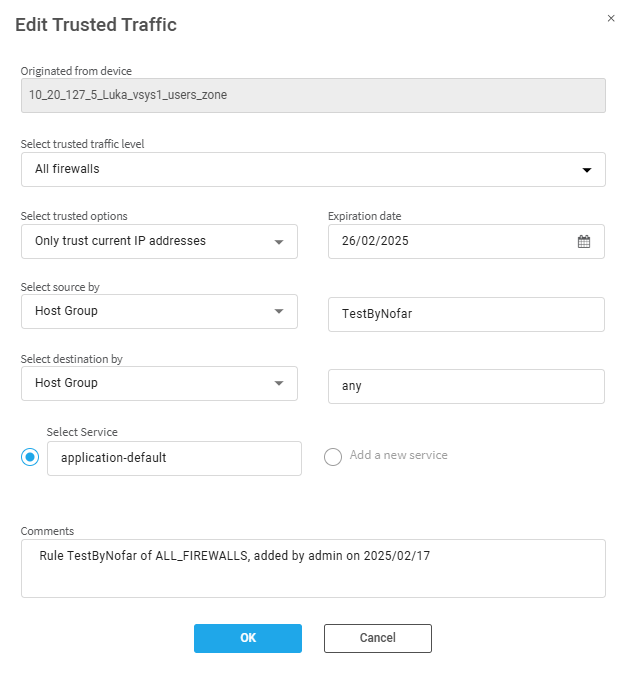
Note: For Panorama devices over version 10 and all Check Point devices, the dialog also shows the Originated from Rule of the selected trusted traffic.
-
In the Edit Trusted Traffic dialog, edit the fields according to the Trusted traffic fields table below.
-
Click OK to save your changes.
Note: For changes in trusted traffic to take effect, an analysis must be run.
Delete trusted traffic
To delete a trusted traffic:
- In the home page of the selected device, click the Overview tab and then click Trusted Traffic.
-
Select the trusted traffic that you want to untrust from the list.
-
Click the Delete icon
 to the right of that trusted traffic row.
Note: For changes in trusted traffic to take effect, an analysis must be run.
Trusted traffic fields
The following fields are applicable when importing trusted traffic.
| Field | Description |
| Select trusted traffic level | Select the level to which the trusted traffic is applied. You can choose from: All Firewalls, a group of devices, or a single device. |
| Select trusted options |
Trust only current IP addresses of the relevant trusted traffic host groups or Trust future changes to the host groups' IP addresses. |
| Expiration Date | Optionally select an expiration date for the trusted traffic. |
| Comment | Free text field. (optional) |
The following fields are applicable when creating and editing trusted traffic.
| Field | Description |
| Select trusted traffic level | Select the level to which the trusted traffic is applied. You can choose from: All Firewalls, a group of devices, or a single device. |
| Select trusted options |
Trust only current IP addresses of the relevant trusted traffic host groups or Trust future changes to the host groups' IP addresses. |
| Expiration Date | Optionally select an expiration date for the trusted traffic. |
| Select source by | Select source type (Host group, IP address or Range of IP Addresses). In the field to the right, enter or select the source host group name, IP address or range of IP addresses. |
| Select destination by | Select destination type (Host group, IP address or Range of IP Addresses). In the field to the right, enter the destination host group name, IP address or range of IP addresses. |
|
Select service (Radio Button) |
Select the relevant Service for your trusted traffic from the list. (Alternatively, add a new service) |
|
Add New Service (Radio Button) |
When you click Add New Service, additional fields are displayed relevant to defining a new service. Enter Service Name and Protocol, and the Source Port and/or the Destination Port ranges.
|
| Comment | Free text field. (optional) |

