This topic describes how to perform an impact analysis to determine the blast radius of security events, configuration changes, or operational issues across applications and assets in your environment.
From one contextual view, quickly identify the scope of impact and export analysis reports:
-
The applications involved and the flows they rely on
-
The security devices the flagged flows pass through
-
Where the risks exist
Note: Impact analysis only returns active, pending, and draft revisions. It does not search history or rejected revisions.
AppViz provides two ways to perform an impact analysis to identify affected applications:
Impact Analysis with quick parameter search
Use the Impact Analysis dialog to quickly identify which applications run on specific servers or use certain devices. This is especially helpful when a server or device is compromised or there’s a security concern, as investigations typically start from that point. To perform an impact analysis using additional search criterion, see Impact Analysis with detailed parameter search /  Perform an advanced search for applications.
Do the following:
-
From the AppViz
 DASHBOARD / HOME page, in the Impact Analysis area, complete the fields of the Impact Analysis widget according to the Impact Analysis fields table, below:
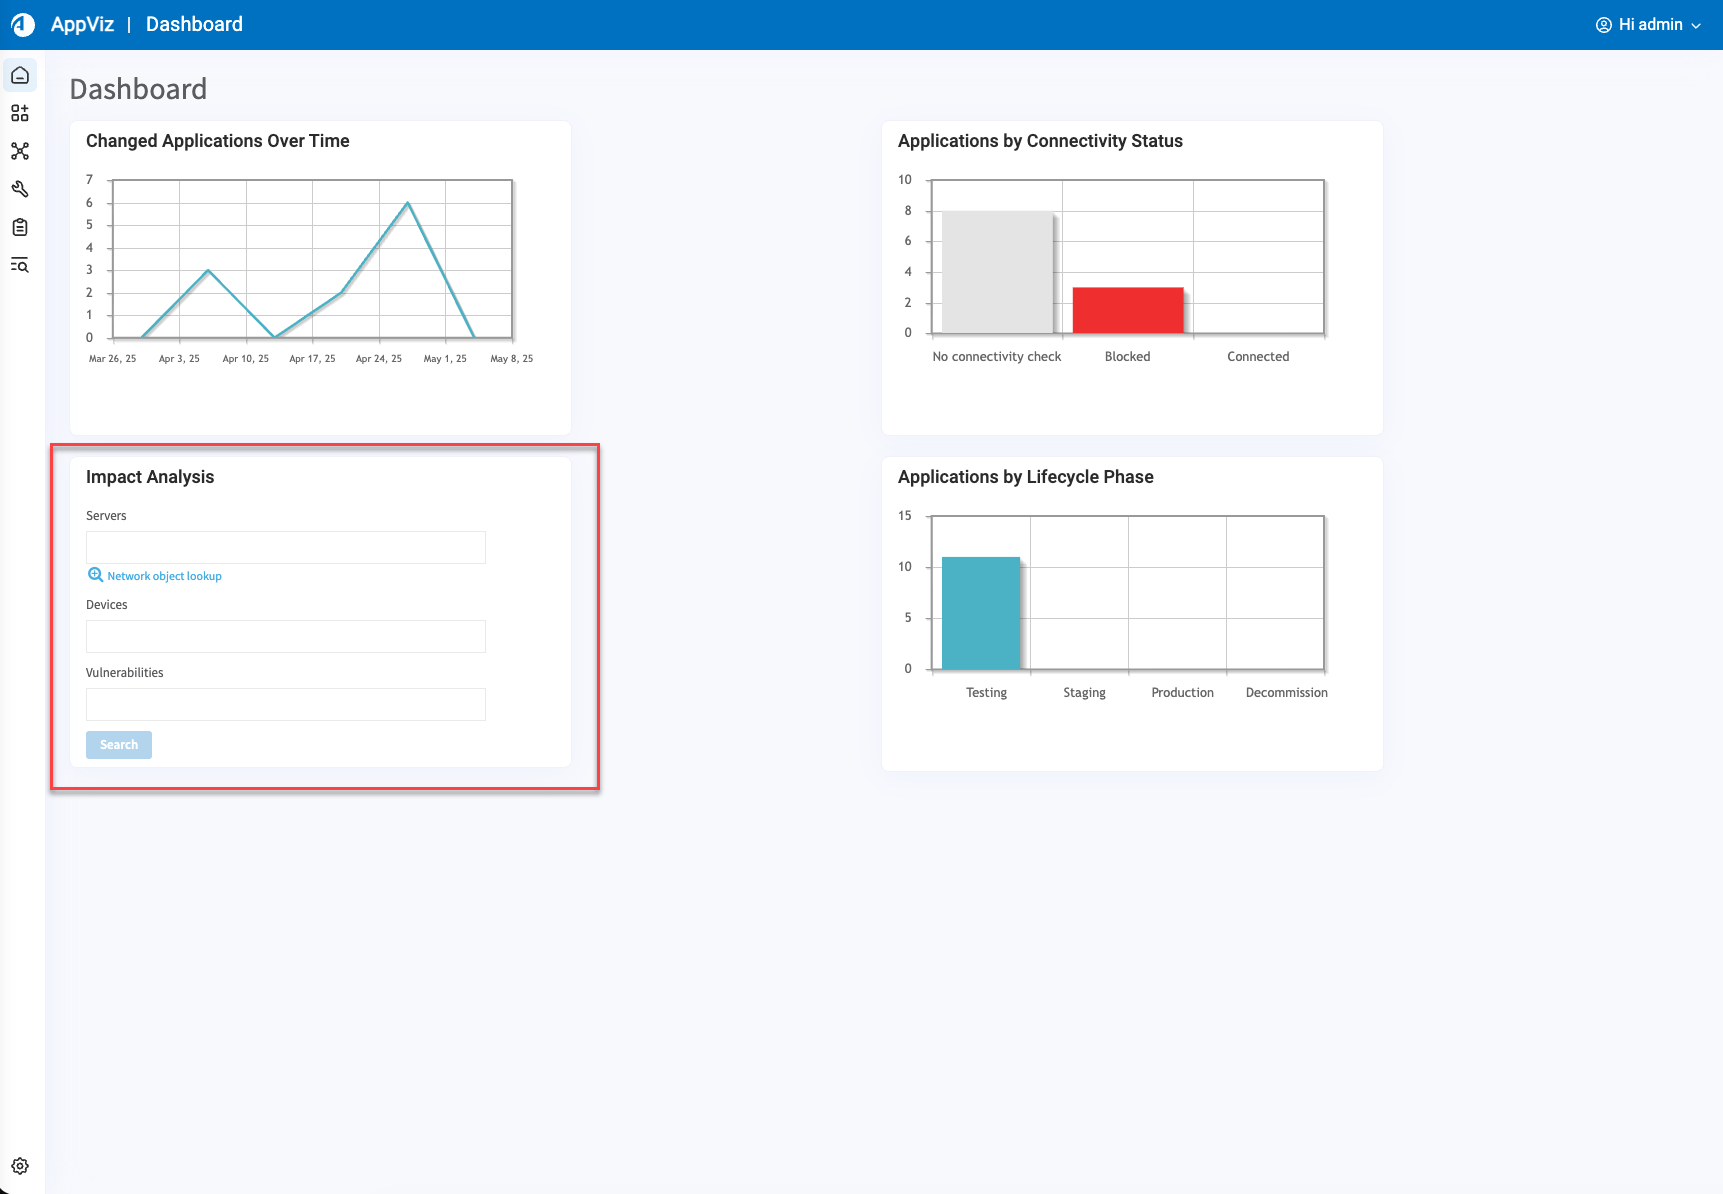
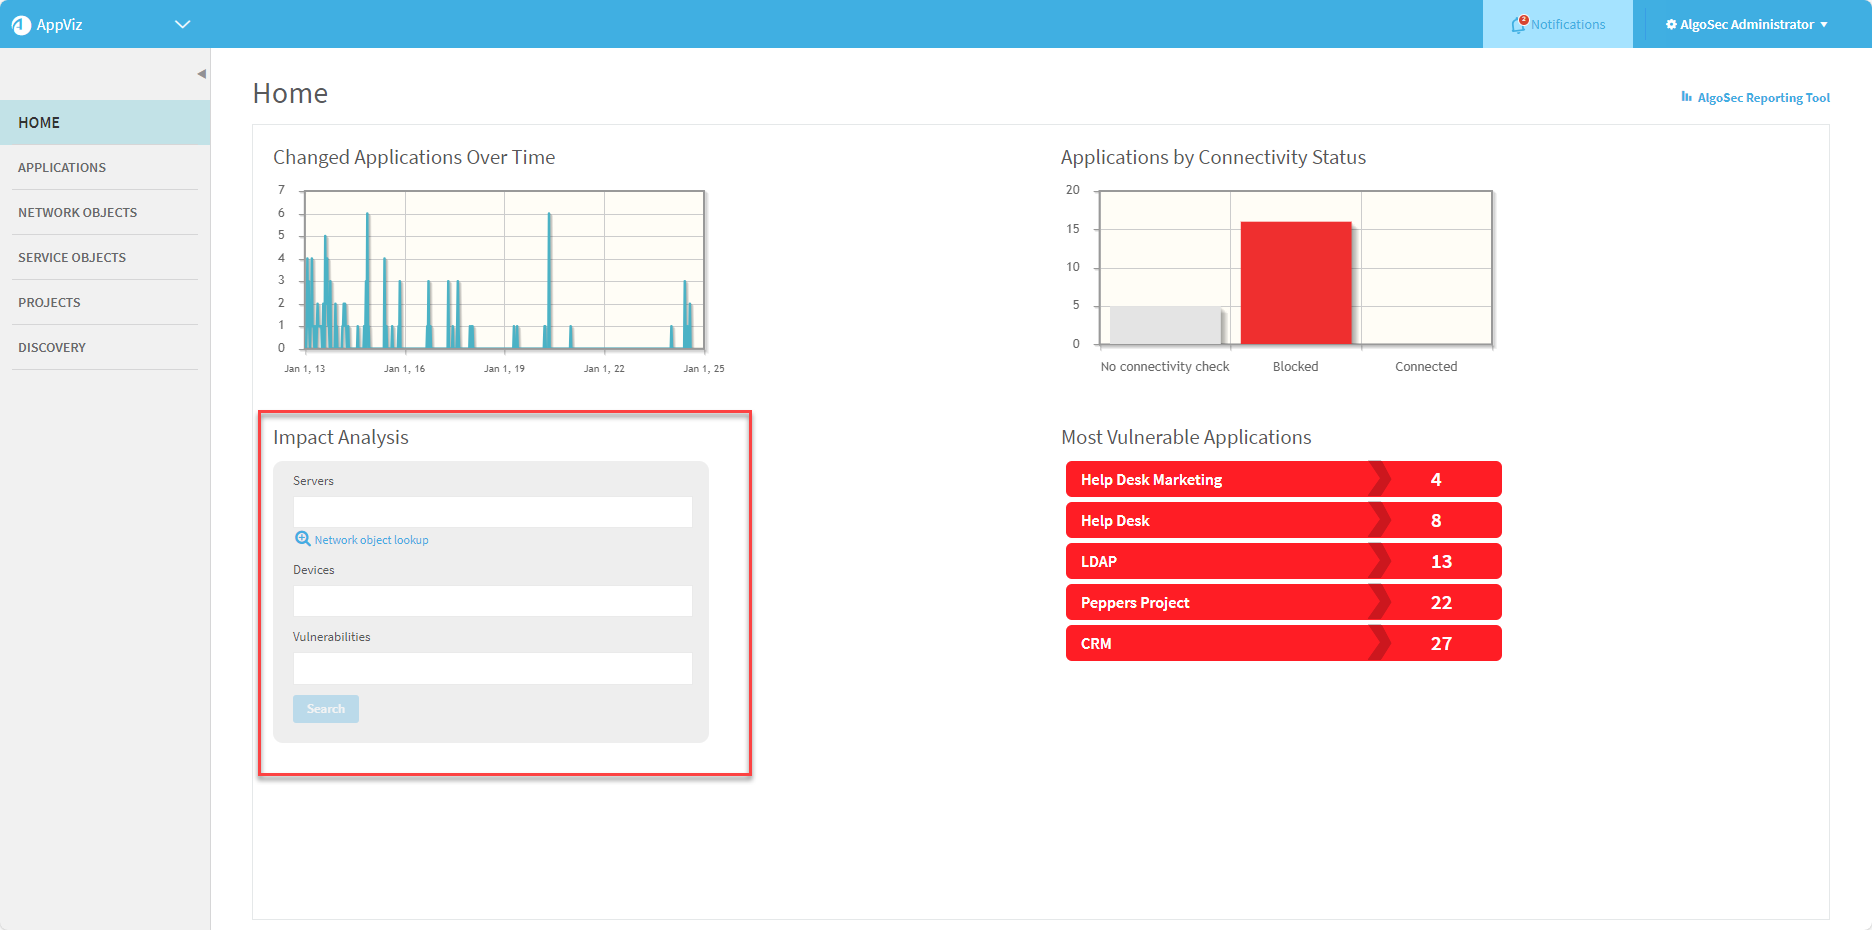
Servers
Type a server name or IP address for the server you want to search for, or click Network object lookup to select a server using the Server Lookup wizard. For details, see Business applications.
Devices
Type a device name.
Vulnerabilities
Type the CVE identifier or vulnerability description.
Note: Relevant only when vulnerability assessment is configured. For details, see Manage vulnerability assessment scanners.
-
Click Search at the bottom of the Impact Analysis widget.
The
Impact Analysis > Search Results / Search Results page appears.
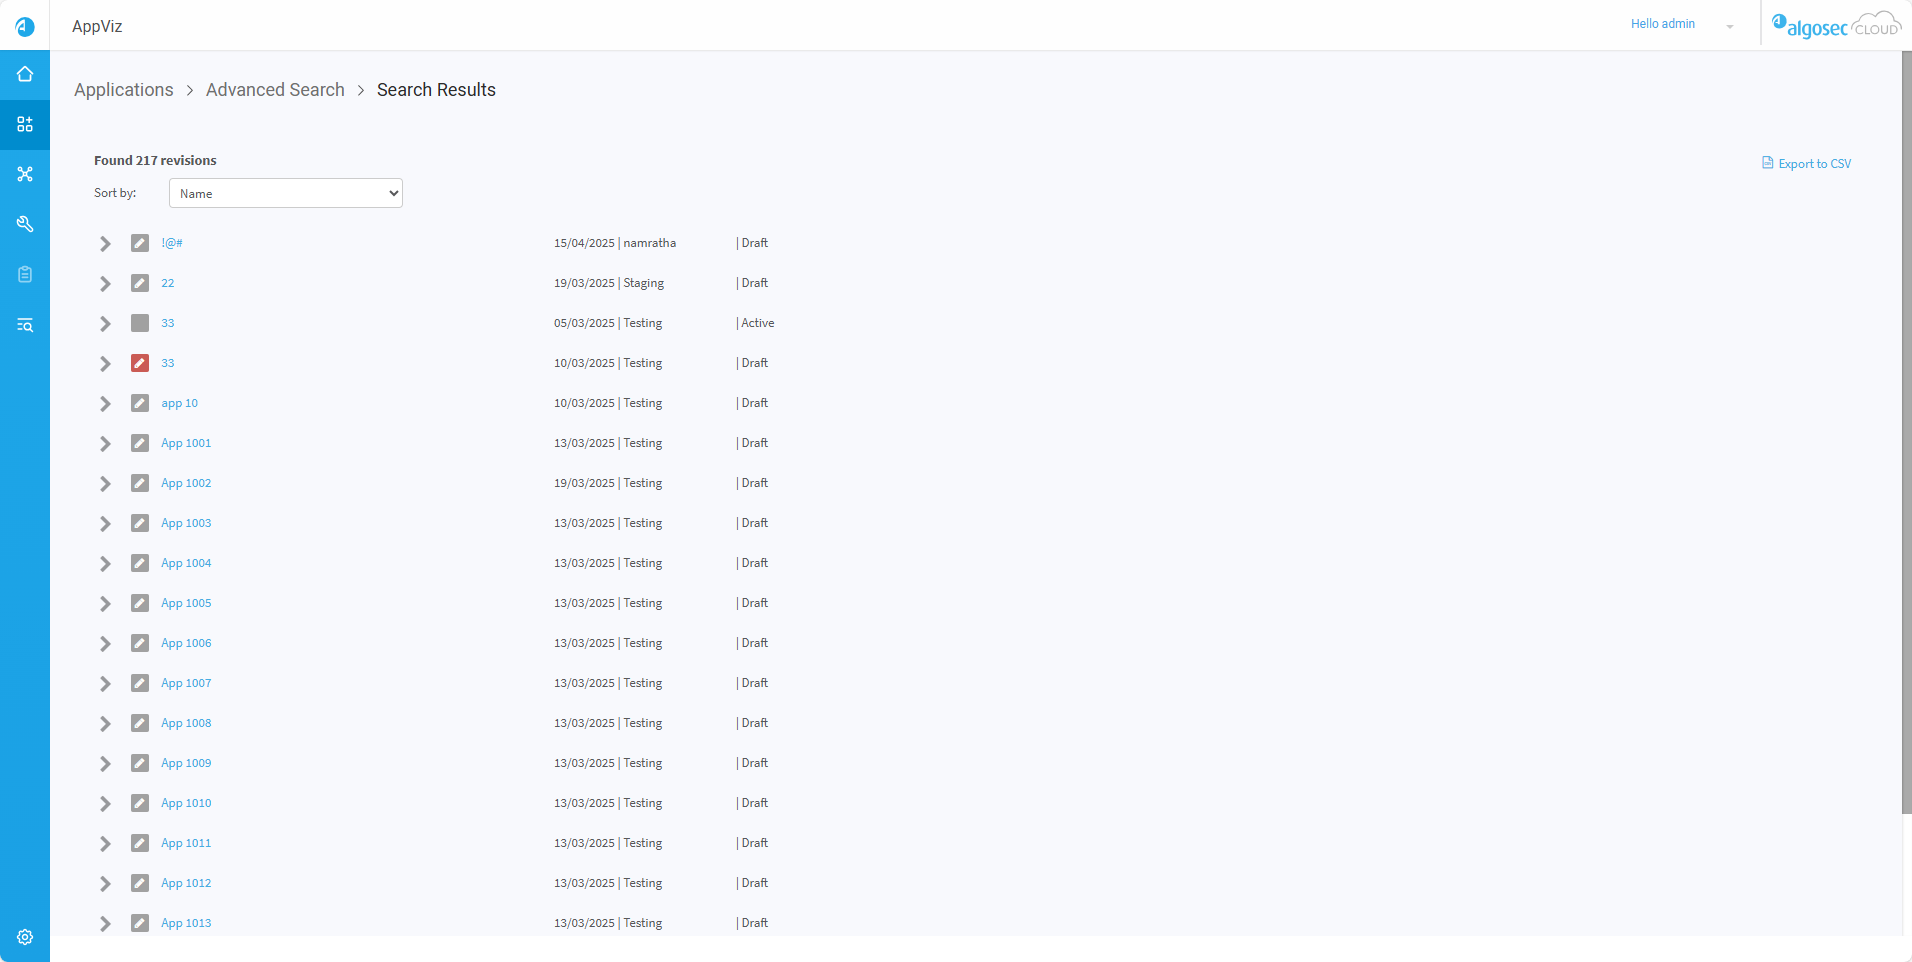
For details on the Search Results page, see Search Results.
Each application appears with the following information:
- Date the application was last modified
- Lifecycle phase
- Revision status
Do any of the following:
- Sort the applications shown. Select an option from the Sort by field at the top of the page.
- View the flows for a specific application that are relevant to your search. Click the
 to the left of the application.
 - Export search result data. Click
 . Exported data includes application, sources, destinations, services, comment, and name.
Impact Analysis with detailed parameter search
This section describes how the Impact Analysis page extends the Impact Analysis with quick parameter search workflow with additional search parameters and filtering options.
These expanded parameters help you more precisely understand the blast radius of an issue, prioritize investigation and remediation efforts, and make informed decisions when responding to security concerns or planning changes.
Do the following:
-
From the AppViz main menu, click Impact Analysis.
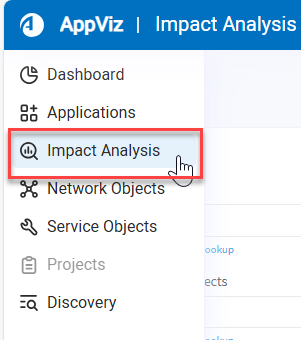
The Impact Analysis page appears.
-
Enter text in any of the fields to find matching applications.
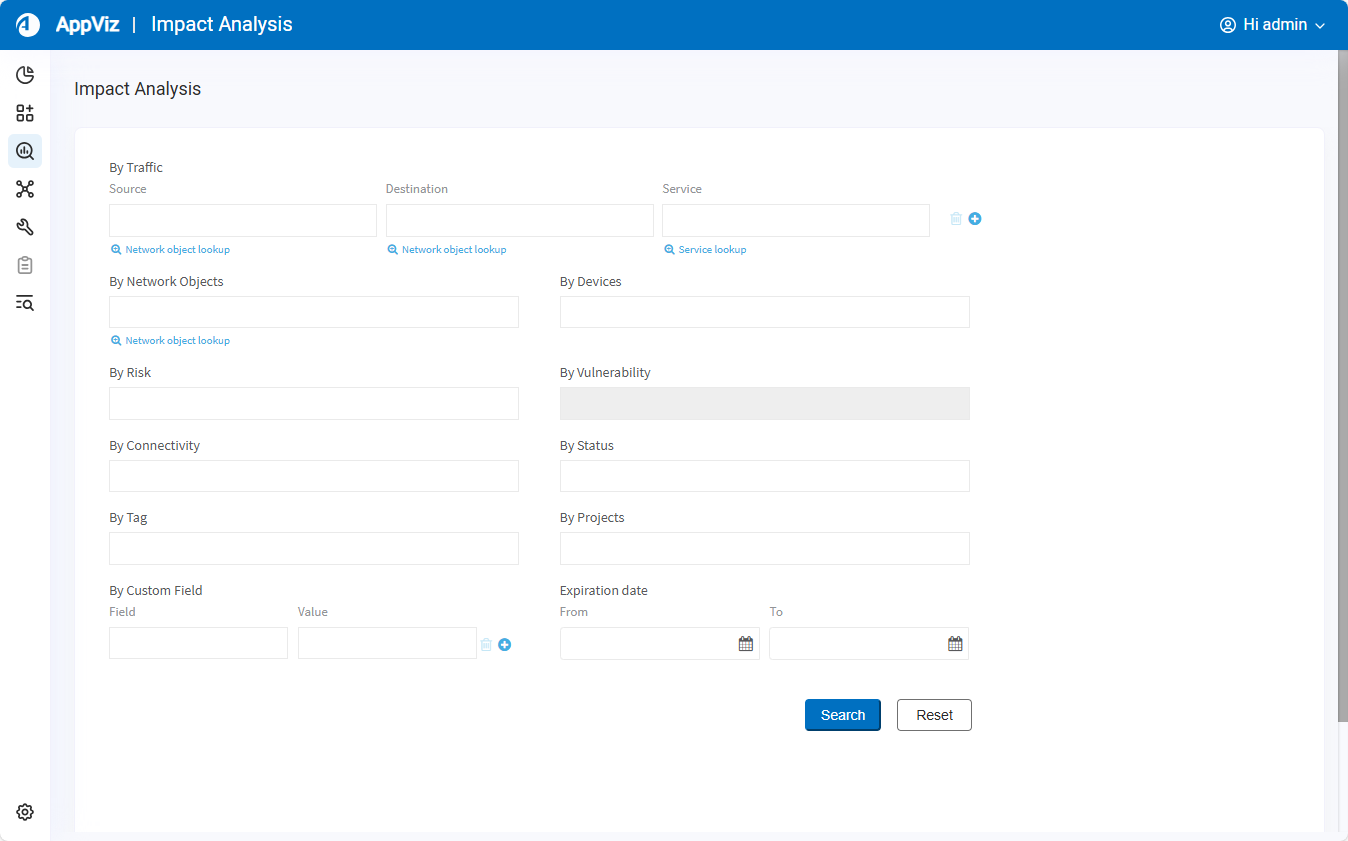
Search fields include:
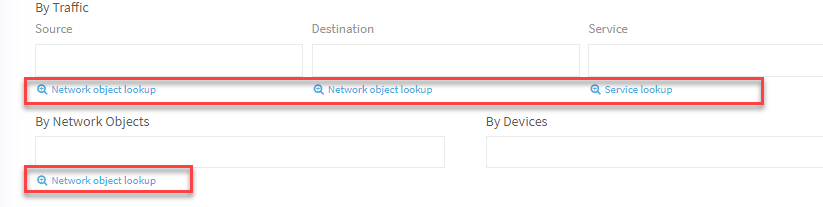
Field Description By Traffic Enter details in any of the following fields:
-
Source. A server name or IP address for the traffic source you want to search for.
-
User. The username for the user of the traffic you want to search for.
-
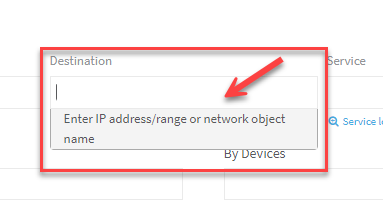
Destination. A server name or IP address for the traffic destination you want to search for.
-
Network Application. A network application name for the traffic source you want to search for.
-
Service. A service name or definition of the service of the traffic you want to search for.
- Click
 to add another traffic line to your search criteria.
 - Click
 to delete a traffic line.
Note: The User and Network Application fields appear only when user or application awareness is configured.
By Network Objects Enter the name of a network object. By Devices Enter the name of a device. By Risk Enter a risk code or title. By Vulnerability Enter a CVE identifier or vulnerability description. By Connectivity Select one or more connectivity statuses for the application's flows.
Note: This search parameter is related to flow connectivity, not application connectivity.The results will include all applications with at least one flow with the specified connectivity.
By Status Select one or more revision statuses.
By tag Enter a tag name. By Projects Enter a project name.
By Custom Field Enter a custom field name and value.
- Click to add another custom field line.
- Click to delete a custom field line.
By Expiration Date Enter a range of application expiration dates. Tip:
-
Start typing to select from a list of auto-complete options.
-
Click in any text box for hint of what should be entered in it:
-
Click the blue lookup links to open dialog boxes to help you find your data.
 Network object lookup dialog
-
Click Network object lookup below the desired field.
The Network Object Lookupdialog appears.
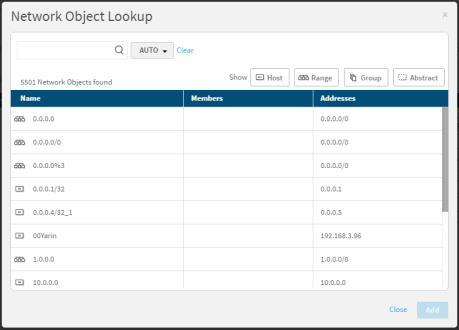
Note: If device objects with the same name (but different content) appear, the device on which the object is defined is indicated.
-
To search for network objects, use the Auto-Search. For details, see Advanced search auto search.
- To filter the results by object type, click one or more of the Show buttons.
- The first Show button you click causes all other buttons to become disabled (and consequently not appear in the results).
- Clicking additional buttons causes the object type you click to toggle: if it was enabled it will become disabled and vice versa.
- By default, all Show buttons are enabled (all objects appear in the results).
-
Select one or more network objects from the list.
The number of network objects selected appears above the list.
-
Click Add.
The selections are added to the field.
Users lookup dialog
Note: If user field validation is not enabled, the only users that appear in this lookup are users that were previously created in AppViz. Administrators can enable user field validation as needed. For details, see Enable validation for the user field .
To select a user using the Users Lookup dialog:
-
Click User lookup below the Users field.
The Users Lookup dialog appears.
-
To search for users, type the search criteria into the search box, and click
 .
. -
Select one or more users from the list.
-
Click Add.
The selections are added to the field.
Service lookup dialog
To select a service using the Service Lookup dialog:
-
Click the link below the desired field.
The Service Lookup dialog appears.
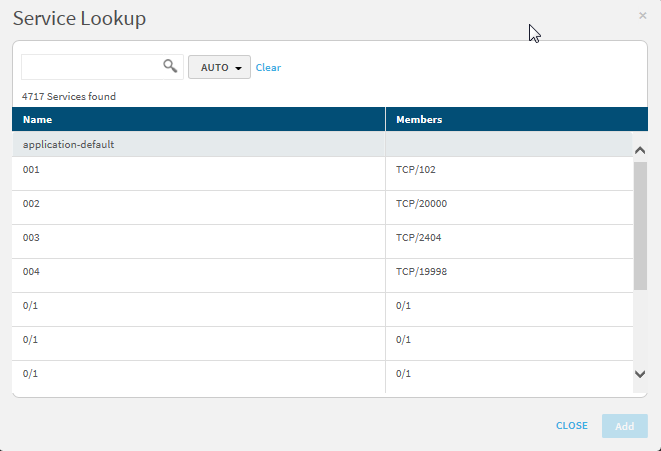
-
To search for services, use the Auto-Search. For details, see Advanced search auto search.
-
Select one or more services from the list.
The number of services selected appears above the list.
-
Click Add.
The selections are added to the field.
Network application lookup dialog
To select an application using the Network Application Lookup dialog:
-
Click + Network Application Lookup.
The Network Application Lookup dialog appears.

-
To search for network applications, type all or part of an application name in the search box, and press enter.
-
Select one or more applications from the list.
The number of network applications selected appears above the list.
To clear all your selections, click Clear.
-
Click Add.
The selections are added to the field.
Advanced search auto search
To use the Auto Search:
-
In the
 drop-down menu, select one of the following options:
Search parameter A search will return... Containing the range
All objects that contain the searched content.
Contained within the range
All objects that are entirely contained in the searched content.
Exact address/service match
All objects that are an exact match of the searched content.
Intersection
All objects that have any overlap with the searched content.
Match as object name
All objects whose name contains the searched phrase.
Auto
All objects whose names contain the searched phrase.
If an IP address/range or service definition is entered, then all servers/services which intersect with the given content.
- Type the search criteria into the search box, and click .
- Select one or more objects from the list below the search box.
Note: You may select multiple objects, but if you perform a search after making a selection, the original selection will not stay selected.
-
-
At the top-right, click Clear all filters to clear your search criteria.
-
-
Click Search to perform your search.
The Search Results appears. For details, see Search Results.
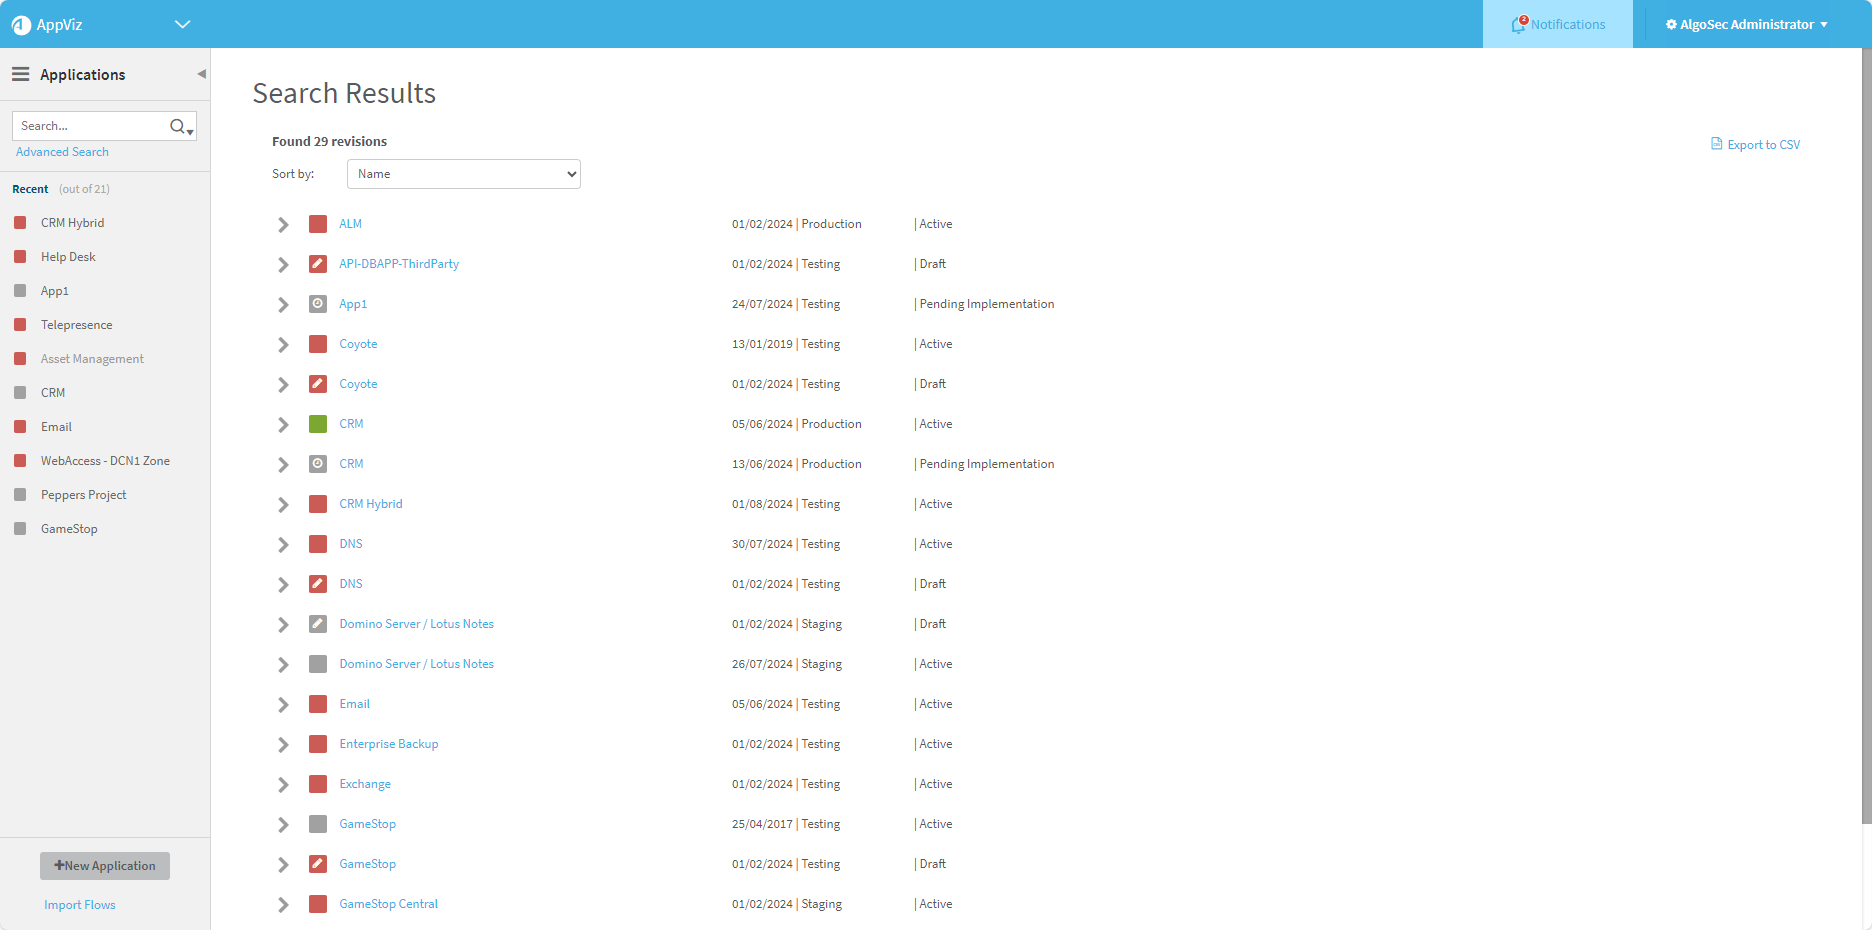
Search Results
The Search Results page displays information about applications and flows matching the search criteria used in the Impact Analysis with quick parameter search or Impact Analysis with detailed parameter search.
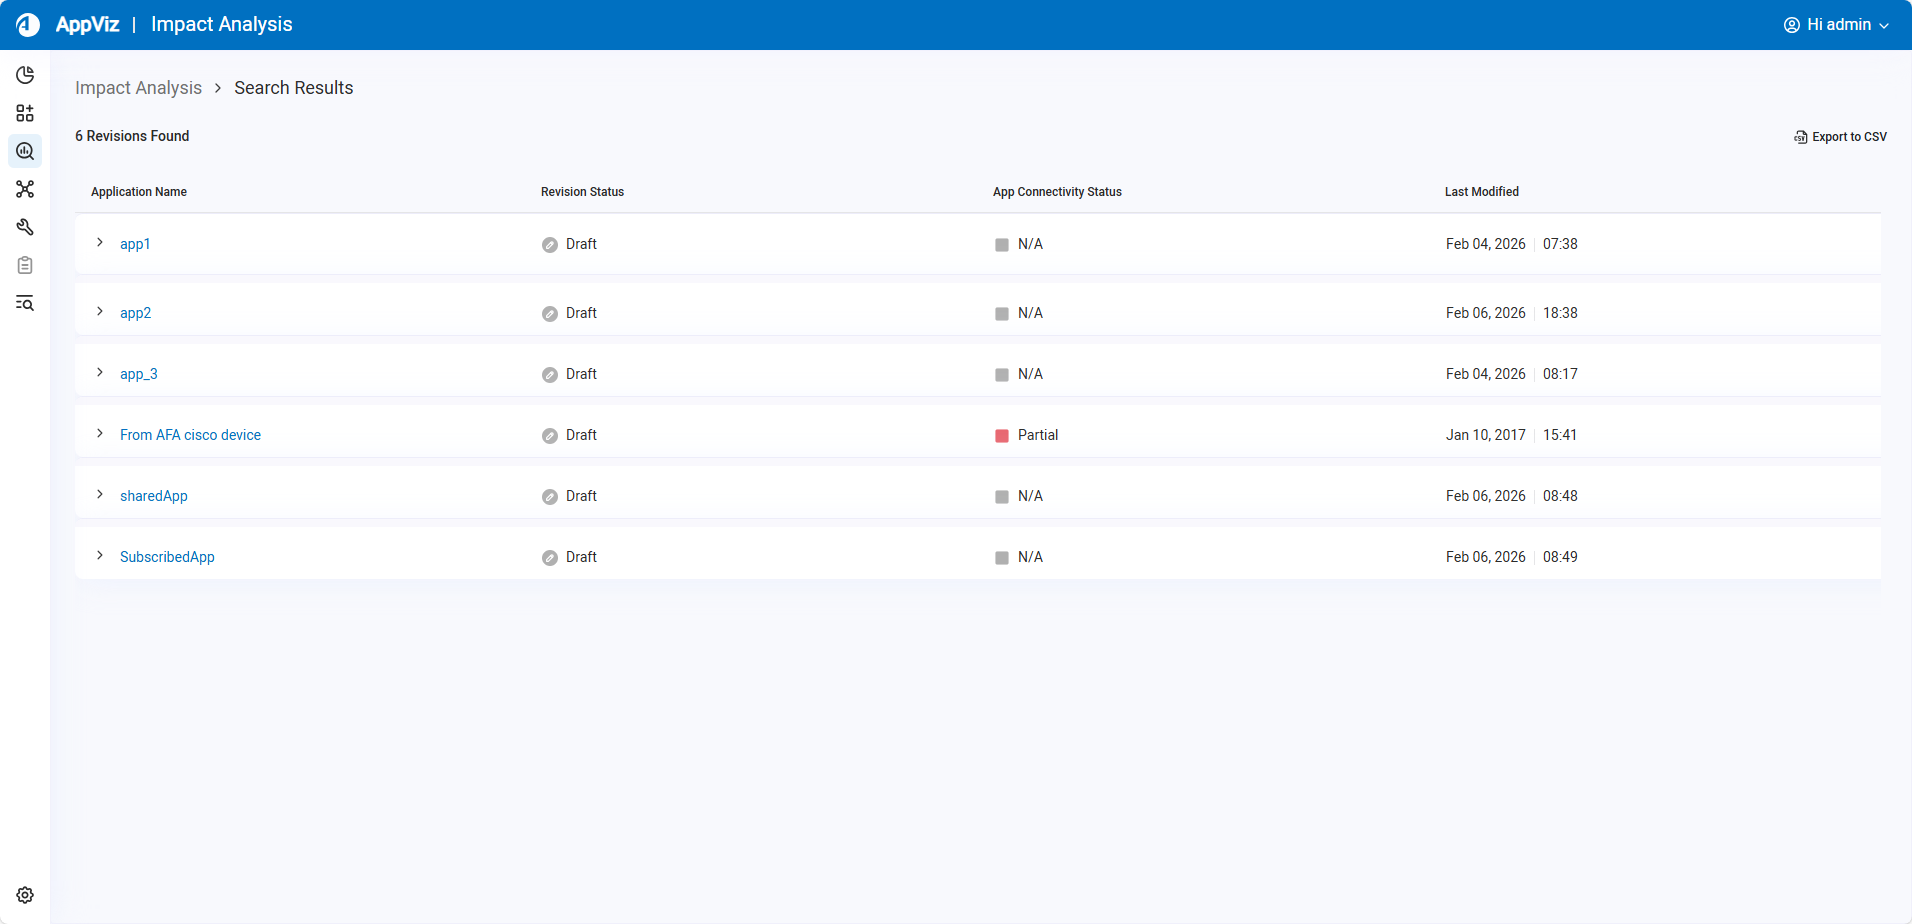
| Column | Description |
|---|---|
| Application Name | The name of the application. Click on the application name to expand the application details to show information about the flows matching the search criteria. For details, see View flow details in search results. |
| Revision Status | Displays the revision status of the application:
|
| App Connectivity Status | Displays the connectivity status of the application. For each flow for which the connectivity status is available, the flow has a colored square indicating the connectivity status:
|
| Last Modified | The date and time when an application was last updated. |
 Allowed
 Blocked or Partially blocked
 No connectivity information
Do any of the following:
- Sort the applications Click on the column headers Application Name or Last Modified to sort the applications based on the selected column.
- View flows details for a specific application in the search results. For more details, see View flow details in search results.
- Export search result data. Click . Exported data includes application, sources, destinations, services, comment, and name.
View flow details in search results
Click to the left of an application name in the Search Results expands the search results to show information about the flows matching the search criteria.
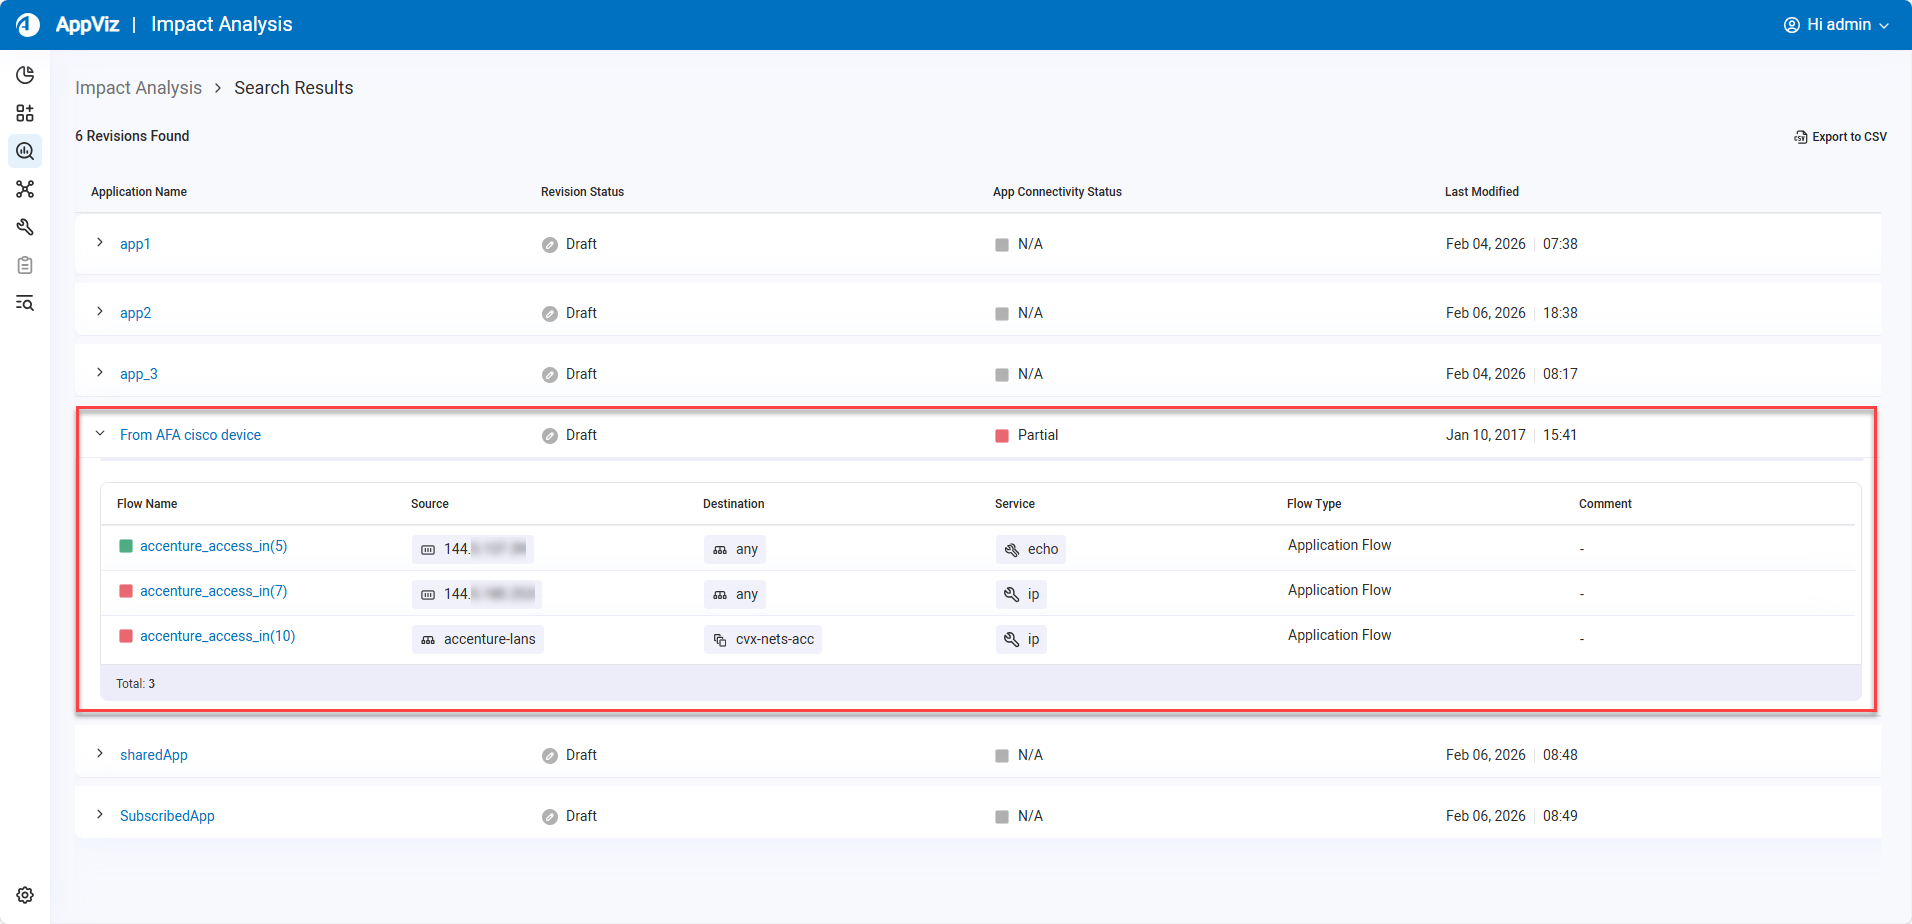
| Column | Description |
|---|---|
| Flow Name | The name of the flow. |
| Source |
The number of source IPs. Tip: Hover over the number to see a tooltip listing all the source IPs. Click on the number to open a dialog containing additional details about the selected source IP. |
| Destination |
The number of destination IPs. Tip: Hover over the number to see a tooltip listing all the destination IPs. Click on the number to open a dialog containing additional details about the selected destination IP. |
| Service |
The number of services. Tip: Hover over the number to see a tooltip listing all the services. Click on the number to open a dialog containing additional details about the selected service. |
| Flow Type | The type of flow. |
| Comment | A user-defined comment about the flow. |
