Create an application migration project
This topic describes how to create an application migration project. For more details, see Projects and Manage projects.
Plan an application migration project
Note: You can save and close the plan at any point. For details, see Save an incomplete plan.
To plan an application migration project:
-
View the project you want to edit. For details, see Projects.
-
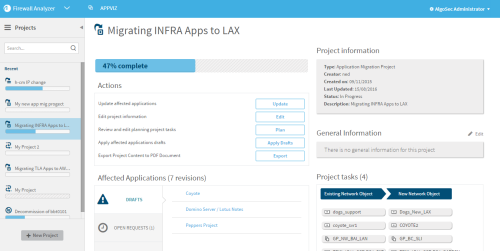
In the Actions area, click Plan.
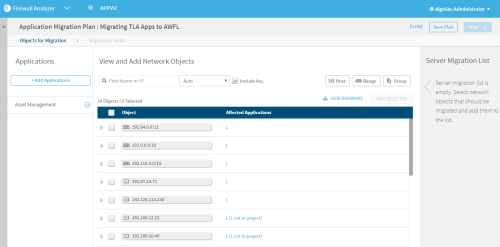
The Application Migration Plan page appears in the Objects for Migration stage. The left menu automatically hides.
- Select applications and network objects to migrate. For details, see Select applications and network objects.
-
Click Next.
The project proceeds to the Migration Tasks stage.
- Select the network objects to migrate to. For details, see Migrate network objects.
-
Click Done Planning.
Note: This option is only enabled once all objects have been assigned.
The project's page appears, displaying the Project Tasks and each task's details.
Save an incomplete plan
You have the option to save a project plan at any time. You can return to the saved plan at any time by clicking Plan in the project's action area.
To save an incomplete plan:
-
In the top right corner, click Save Plan.
The changes you made to the plan are saved and a notification appears at the top of the page.
- To exit the project, click Close.
Select applications and network objects
Note: Only the most recent revision is shown in all services.
To select applications and network objects:
-
Click +Add Applications.
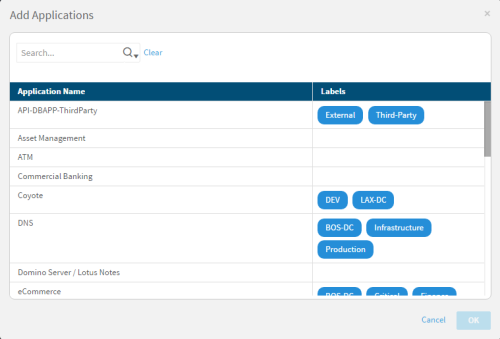
The Add Applications dialog is displayed.
-
Select applications using the information in For details, seeUse the Add Applications wizard.
Selected applications appear in the left panel, in the Applications list.
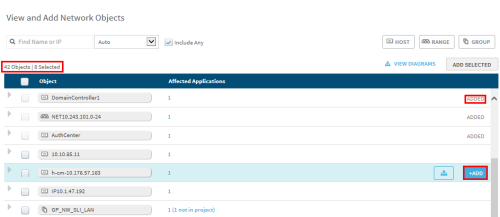
The network objects used in the selected applications appear in the center panel, in the Object column. The Affected Applications column displays the number of affected applications for each object.
Note: If the object affects an application that has not been added to the project, the Affected Applications column additionally contains a notification stating the number of affected applications which are not in the project.
-
To hide an application's network objects, click
 next to the application's name.
Note: Even though the objects do not appear, the application is not removed from the project.
To reveal the application's network objects, click
 next to the application's name.
 - To remove an application and its network object from the project, click
 .
. - To filter the list of network objects, do one or more of the following:
In the search box, type a name or IP address.
Optionally, select an operator in the Auto drop-down list. For details, see Application dashboard.
- Clear or select the Include Any check box.
- To filter by network object type, click one or more of the Show buttons (Host, Range, and Group).
- The first Show button you click causes all other buttons to become disabled (and consequently not appear in the results).
- Clicking additional buttons causes the object type you click to toggle: if it was enabled it will become disabled and vice versa.
- By default, all Show buttons are enabled (all objects appear in the results).
- To add affected applications to the project, do the following:
Click the not in project link in the affected applications column.
The Additional Affected Applications dialog box opens.
All affected applications, including those which are not included in the project, are listed.
- Select the application you want to add to the project.
Click Add Applications.
The application is added to the project. The application appears in the Applications list in the left panel, and all of its network objects appear in the list of network objects in the center panel.
Note: Adding additional applications may result in additional network objects with affected applications not in the project.
- To view the affected applications and flows for a specific network object, do the following:
To view the affected applications, click
 to the left of the object.
The application appears.
To view the affected application's affected flows, click
 .
.The affected flows appear. The network object appears in orange.
The relevant network object appears highlighted in blue. Hovering over any object displays its contents.
To view network object details, double click on an object.
A window opens with network object's information.
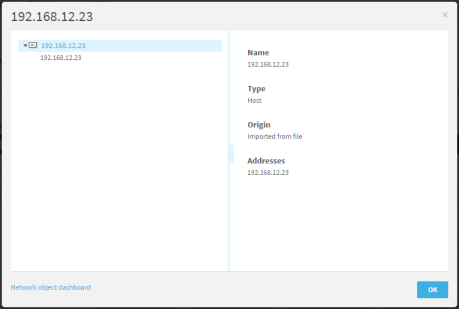
To see the network object's AppViz page, click Network object dashboard.
To view application flow diagrams :
- Do one of the following:
To view the application diagrams relevant to a specific network object, hover over the network object and click the
 icon.
icon.The View instances of page opens for the specified network object.
The specific network object is highlighted in yellow.
To view all the application diagrams for the project's applications, click
 .
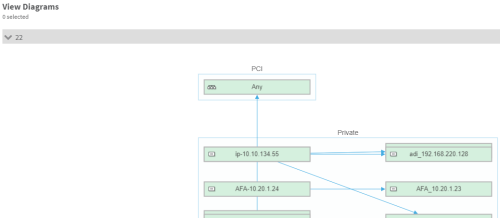
.The View Diagrams page appears.
To view an application's diagram, click
 next to the application's name.
To select objects for migration :
- Do one of the following:
- To migrate all, select the check box at the top of the list and click Add Selected.
- Select the check box at the top of the list and clear the check boxes of those objects to not migrate. Click Add Selected.
Hover over the object to select and click +Add on the right.
At the top are the number of objects and number selected for migration.
The selected objects are added to the Server Migration List and ADDED appears in the object row.
To remove network object and application selections:
- To remove a network object from the Server Migration List:
- Hover in center table row and click Remove, or
- In the Server Migration List, hover over the object and click
 .
.
-
To remove an application from migration, hover over the application and click
 . The associated network objects are removed also.
If an application is deleted only those network objects related only to the application are deleted from the project.
If a network object belongs to non-deleted applications, it remains on the list.
Use the Add Applications wizard
To use the add applications wizard :
- To filter the applications, do one or both of the following:
- Perform a simple search for an application:
To specify whether to search only by tag or only by application name, Click
 and select the desired parameter in the drop-down menu.
By default, both application tags and names are searched.
- Type any part of the application name in the search box and press enter.
(For adding applications to Application LifeCycle projects only) Filter the list of applications by lifecycle phase, by clicking one or more of the Show buttons.
Clicking the Show button excludes applications in that lifecycle phase from the list. If all Show buttons are selected, all applications appear.
- The first Show button you click causes all other buttons to become disabled (and consequently not appear in the results).
- Clicking additional buttons causes the phase you click to toggle: if it was enabled it will become disabled and vice versa.
- By default, all Show buttons are enabled (all applications appear in the results).
- Perform a simple search for an application:
-
Select one or more applications from the list.
The number of selected applications appears in the top of the window.
- To deselect all applications, click Clear.
- Click OK.
Migrate network objects
To assign network objects to migrate to:
-
For each existing network object, in the new network object column, click Create or Lookup Network Object.
The Lookup Network Object wizard opens.
-
Select an existing object, or create a new network object. For details, see Use the network object lookup wizard.
The selected or new object appears in the New network object column.
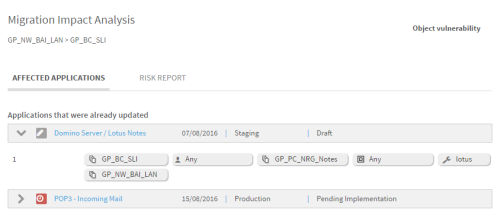
As the assignments are made for each new network object, AppViz performs a Migration Impact Analysis.
-
Click the Affected Applications tab.
The affected applications are listed in the central pane with the application name, date last modified, lifecycle phase, and status.
-
Click
 next to the application to show the details for each application.
 -
Click the Risk Report tab. If a report is not available, AlgoSec performs the risk analysis.
The date the last update to the report is shown. For each Affected Application, the Added Risks, if any, are listed.
For additional information, see Application risks.
- If vulnerability assessment is configured, also view the Vulnerability Analysis (see Application vulnerability) for the vulnerability score of existing and new objects.
- At this point you can:
- Change the network object assignment, by clicking x in the New network object input box and selecting a new object. A new Impact Analysis is performed.
- Remove the Existing network object from the project by clicking
 at the end of the network object row.
Use the network object lookup wizard
Use this procedure while selecting or adding a network object for an Application Migration or Application Lifecycle Projects.
To select a network object using the Network Object Lookup wizard:
-
Click the Create or Lookup Network Object link below the field in the new network object column.
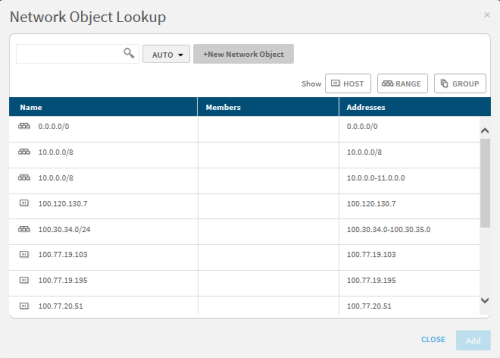
The Network Object Lookup wizard appears.
Note: If device objects with the same name (but different content) appear, the device on which the object is defined is indicated.
- Do one of the following:
- Select one or more network objects from the list, and click Add.
To filter the list, click one or more of the Show buttons to exclude the type of object from the list. For example, to not show servers of the type Group, click Group.
If all Show buttons are selected, all objects appear.
- Search for a network object, by doing the following:
(Optional) Select a search parameter by clicking
 and selecting one of the following options from the drop-down menu.
Search parameter
A search will return...
Containing the range
All network objects that contain the searched content.
Contained within the range
All network objects that are entirely contained in the searched content.
Exact address match
All network objects that are an exact match of the searched content.
Intersection
All network objects that have any overlap with the searched content.
Match as object name
All network objects whose name contains the searched phrase.
Auto
All network objects whose names contain the searched phrase.
- Type the search into the search box, and click
 .
. - Select a network object from the list below the search box.
- Add a new network object by clicking +New Network Object and following the directions Add a network object for migration.
- Click OK.
Add a network object for migration
To add a new network object:
-
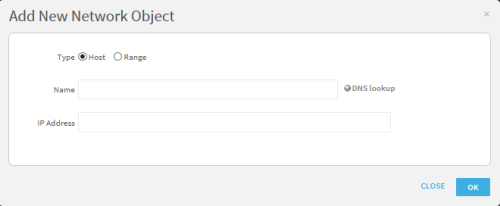
The Add New Network Object dialog box opens.
- Select the type.
- In the Name field, type the name of the new object.
-
To perform a reverse DNS lookup on the network object Name, click DNS lookup.
If the IP address is found for the object, the address is inserted in the IP Address field.
- If reverse DNS lookup was not used or was unsuccessful, type a the IP address in the field.
- Click OK.


