Relevant for: Privileged users
This topic describes how to manually match a change request to device changes, when FireFlow was unable to do so automatically.
Note: FireFlow administrator.
In this topic:
To resolve an individual change and change request, follow one of the following procedures, depending on the item's matching status:
Resolve a change where no matching request was found by doing one of the following:
Do the following:
In the main menu, click Auto Matching .
The Auto Matching page appears displaying lists of change requests and changes.
In the change's row, click No Request .
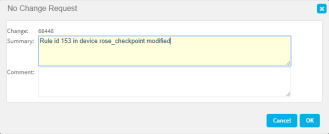
The No Change Request dialog box opens.
To change the rule's description, edit the text in the Summary field as desired.
In the Comment field, type an explanation of why you are resolving the change in this manner.
Click OK .
In the Auto Matching page, the change will now appear in the Matched list's Changes Without Request- Approved sub-list.
Close ⌃
In the main menu, click Auto Matching .
The Auto Matching page appears displaying lists of change requests and changes.
In the change's row, click Match .
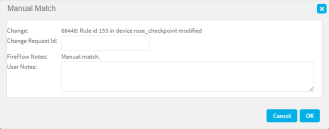
The Manual Match dialog box opens.
In the Change Id field, type the ID number of the change request that should be associated with this change.
In the User Notes field, type an explanation of why you are resolving the change request in this manner.
Click OK .
The change is matched with the change request. In the Auto Matching page, the change request will now appear in the Matched list's Manual Match, Last X Days sub-list.
Close ⌃
Mismatched changes are items with differences between the change made and the change request approved, including:
Change <-> Change Request Mismatch
Changes Wider than Request
Change Requests Partially Implemented
Handle these items by doing one of the following:
View the relevant match record. For details, see View and edit match records .
Click Match OK .
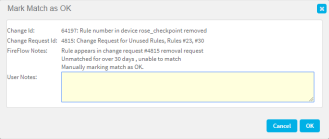
The Mark Match as OK dialog box opens.
In the User Notes field, type an explanation of why you are resolving the discrepancy in this manner.
Click OK .
The change request is matched, and its status changes to "resolved".
In the Auto Matching page, the change request will now appear in the Matched list's Manual Match, Last X Days sub-list.
Close ⌃
View the relevant match record. For details, see View and edit match records .
Click Wrong Change Request .
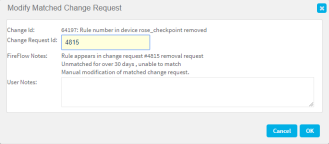
The Modify Matched Change Request dialog box opens.
In the Change Request Id field, type the ID number of the change request with which the change should be associated.
In the User Notes field, type an explanation of why you are resolving the discrepancy in this manner.
Click OK .
The change request is matched, and its status changes to "resolved".
In the Auto Matching page, the change request will now appear in the Matched list's Manual Match, Last X Days sub-list.
Close ⌃
View the relevant match record. For details, see View and edit match records .
Click Remove Match .
A confirmation message appears.
Click OK .
The match record is deleted, and the change and change request are no longer associated.
In the Auto Matching page, the change will now appear in the Action Required list's Changes Without Request sub-list, and the change request will appear in the Matching in Progress list's Change Requests Pending Auto Matching sub-list.
Note:
Close ⌃
The Matching in Progress list's Requests Pending Auto Matching sub-list displays requests that are currently pending auto matching.
If scheduled FireFlow auto matching passes, and the change requests still appear in this list, handle them by doing one of the following:
View the relevant match record. For details, see View and edit match records .
Click No Change Record .
The No Change Record dialog box opens.
In the Comment field, type an explanation of why you are resolving the change request in this manner.
Click Next .
The change request is matched, and its status changes to "resolved".
In the Auto Matching page, the change request will now appear in the Matched list's Manual Match, Last X Days sub-list.
Close ⌃
View the relevant match record. For details, see View and edit match records .
Click Manually Match .
The Manual Match dialog box opens.
In the Change Id field, type the ID number of the change that should be associated with this change request.
In the User Notes field, type an explanation of why you are resolving the change request in this manner.
Click Next .
The change request is matched, and its status changes to "resolved".
In the Auto Matching page, the change request will now appear in the Matched list's Manual Match, Last X Days sub-list.
Close ⌃
Back to top
Resolve multiple change requests and changes simultaneously, such as when you want to perform a cleanup across all devices.
Resolve multiple changes as follows, depending on the matching status:
Resolve all changes where no matching requests were found by doing one of the following:
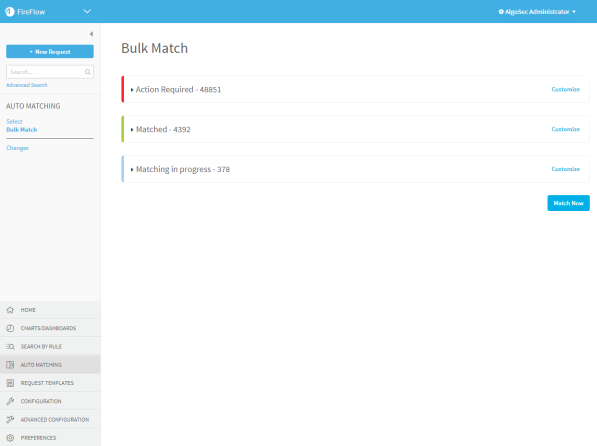
In the main menu, click Auto Matching , and then click Bulk Match .
The Bulk Match page appears displaying lists of change requests and changes.
Do one of the following:
Select the check boxes next to the desired changes.
Click Check All to select all changes, at the bottom of the sub-list.
Click Clear All to deselect all changes, at the bottom of the sub-list.
At the bottom of the sub-list, click No Change Request .
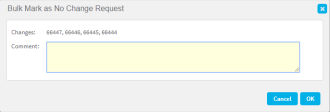
The Bulk Mark as No Change Request dialog box opens.
In the Comment field, type an explanation of why you are resolving the selected changes in this manner.
Click OK .
In the Bulk Match page, the changes will now appear in the Matched list's Changes Without Request - Approved sub-list.
Close ⌃
In the main menu, click Auto Matching , and then click Bulk Match .
The Bulk Match page appears displaying lists of change requests and changes.
Do one of the following:
Select the check boxes next to the desired changes.
Click Check All to select all changes, at the bottom of the sub-list.
Click Clear All to deselect all changes, at the bottom of the sub-list.
At the bottom of the sub-list, click Match .
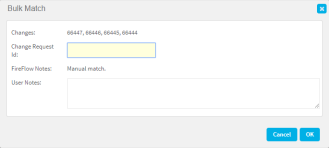
The Bulk Match dialog box opens.
In the Change Request Id field, type the ID number of the change request that should be associated with the selected changes.
In the User Notes field, type an explanation of why you are resolving the selected changes in this manner.
Click OK .
The changes are matched with the change request. In the Bulk Match page, the change request will now appear in the Matched list's Manual Match, Last X Days sub-list.
Close ⌃
Mismatched changes are items with differences between the change made and the change request approved, including:
Change <-> Change Request Mismatch
Changes Wider than Request
Change Requests Partially Implemented
Do the following to handle all of these items at once:
In the main menu, click Auto Matching , and then click Bulk Match .
The Bulk Match page appears displaying lists of change requests and changes.
Do one of the following:
Select the check boxes next to the desired change requests.
Click Check All to select all change requests, at the bottom of the sub-list.
Click Clear All to deselect all change requests, at the bottom of the sub-list.
At the bottom of the sub-list, click Match OK .
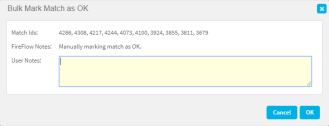
The Bulk Mark Match as OK dialog box opens.
In the User Notes field, type an explanation of why you are resolving the discrepancy in this manner.
Click OK .
The change requests are matched, and their statuses change to "resolved".
In the Bulk Match page, the change requests will now appear in the Matched list's Manual Match, Last X Days sub-list.
Close ⌃
The Matching in Progress list's Change Requests Pending Auto Matching sub-list displays change requests that are currently pending auto matching.
Handle these items by doing one of the following:
In the main menu, click Auto Matching , and then click Bulk Match .
The Bulk Match page appears displaying lists of change requests and changes.
Do one of the following:
Select the check boxes next to the desired change requests.
Click Check All to select all change requests, at the bottom of the sub-list.
Click Clear All to deselect all change requests, at the bottom of the sub-list.
At the bottom of the sub-list, click No Change .
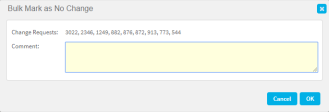
The Bulk Mark as No Change dialog box opens.
In the Comment field, type an explanation of why you are resolving the change requests in this manner.
Click OK .
The change requests are matched, and their statuses change to "resolved".
In the Bulk Match page, the change requests will now appear in the Matched list's Manual Match, Last X Days sub-list.
Close ⌃
In the main menu, click Auto Matching , and then click Bulk Match .
The Bulk Match page appears displaying lists of change requests and changes.
Do one of the following:
Select the check boxes next to the desired change requests.
Click Check All to select all change requests, at the bottom of the sub-list.
Click Clear All to deselect all change requests, at the bottom of the sub-list.
At the bottom of the sub-list, click Match .
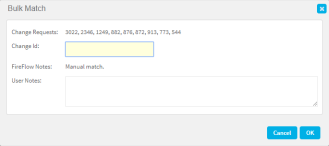
The Bulk Match dialog box opens.
In the Change Id field, type the ID number of the change that should be associated with these change requests.
In the User Notes field, type an explanation of why you are resolving the change requests in this manner.
Click OK .
The change requests are matched, and their statuses change to "resolved".
In the Bulk Match page, the change requests will now appear in the Matched list's Manual Match, Last X Days sub-list.
Close ⌃
Back to top

