Relevant for AppViz administrators
AppViz critical processes are groups of applications that support a crucial business function. Defining Critical Processes allows you to schedule connectivity and risk checks for the applications which matter most. Additionally, all applications which are a part of a critical process are tagged with a system tag, indicating the critical process to which the application belongs.
 Defining Critical Processes: Watch to learn how to define specific application flows as critical processes.
Critical Process scope
AppViz supports defining up to 20 applications as a part of Critical Processes, in any of the following configurations:
- 20 Critical Processes with one application each
- One Critical Process with 20 applications
- Any other combination which does not exceed 20 applications
Each application may only be added to a single Critical Process.
Note: Vulnerability checks are run on the entire environment and not per application, and therefore are not specific to Critical Processes. For details, see Manage vulnerability assessment scanners.
Supported tag actions
Possible tag actions are:
- Add. Create a new Critical Process, assign it one or more applications, and schedule its connectivity and risk checks. For details, see Add a new critical process
- Edit. Modify the Critical Process. For details, see Edit a critical process .
- Delete. Delete a Critical Process from the system and all its applications and scheduled checks. For details, see Delete a critical process.
- Export. Export a CSV file of all the Critical Processes in the system. For details, see Export all critical processes to CSV .
The change request summary for any FireFlow change request which is opened for a critical application indicates the relevant Critical Process, signifying the importance of the process the requested traffic supports. If desired, you can customize the default summary. For details, see Customize interactions with AFA and FireFlow.
Add a new critical process
Adding a new Critical Process allows you to define a group of applications that are necessary for a crucial business function. The following occurs for all applications defined as a part of a Critical Process:
- The connectivity and risk checks scheduled for the Critical Process run on the applications' Active revisions.
- Each application is tagged with the Critical Process's system tag, which appears in the applications' Dashboard tab.
- Any change request opened for the application is created with the default summary for critical applications. For details, see Customize interactions with AFA and FireFlow.
To add a Critical Process:
-
Navigate to the Administration area.
-
 Hover over the
  SETTINGS icon at the bottom left of the screen. After the panel expands, click
  ADMINISTRATION.
 -
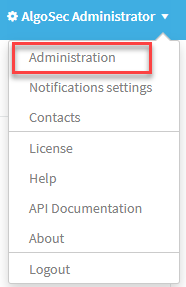
 In the toolbar, click your username. From the drop-down menu, click ADMINISTRATION.
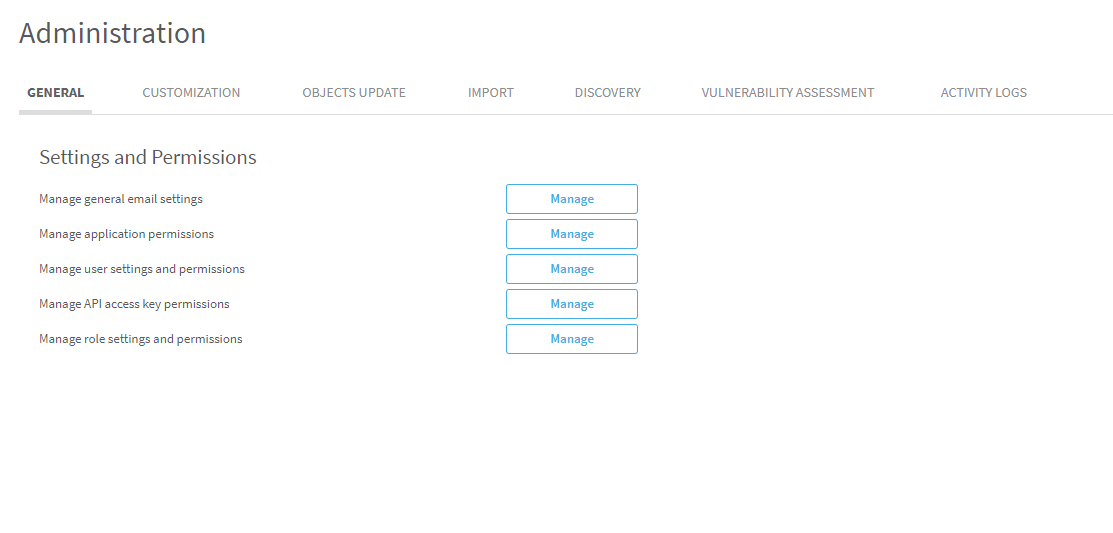
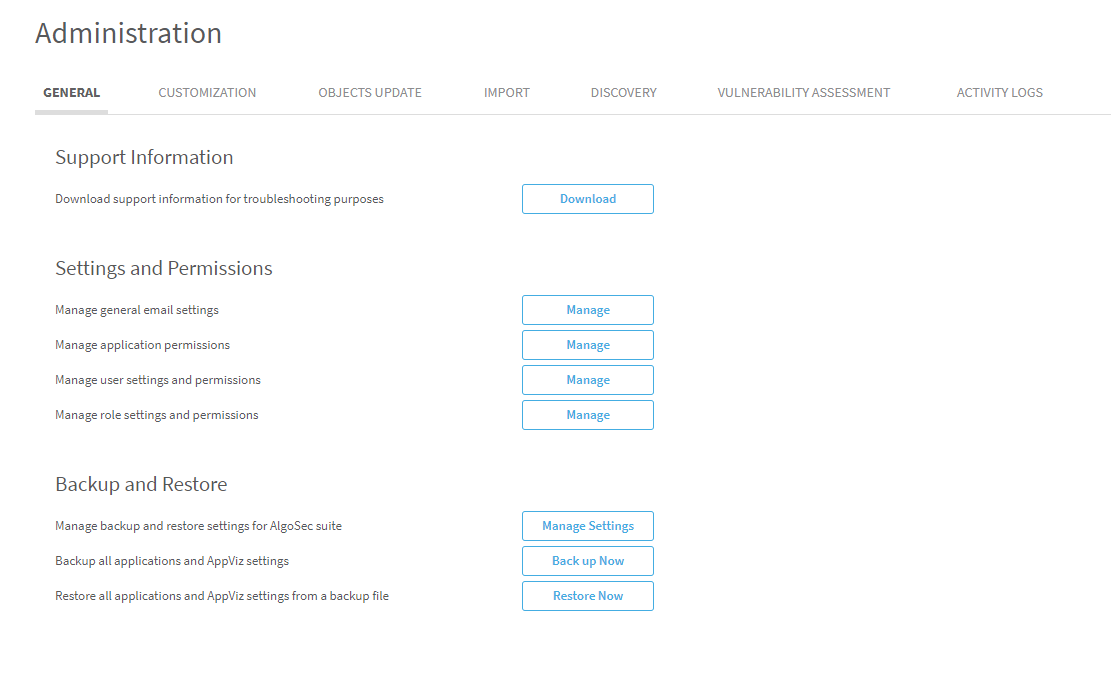
The Administration area appears in the workspace.
-
-
Click the CUSTOMIZATION tab.
-
In the Critical Processes area, click Manage.
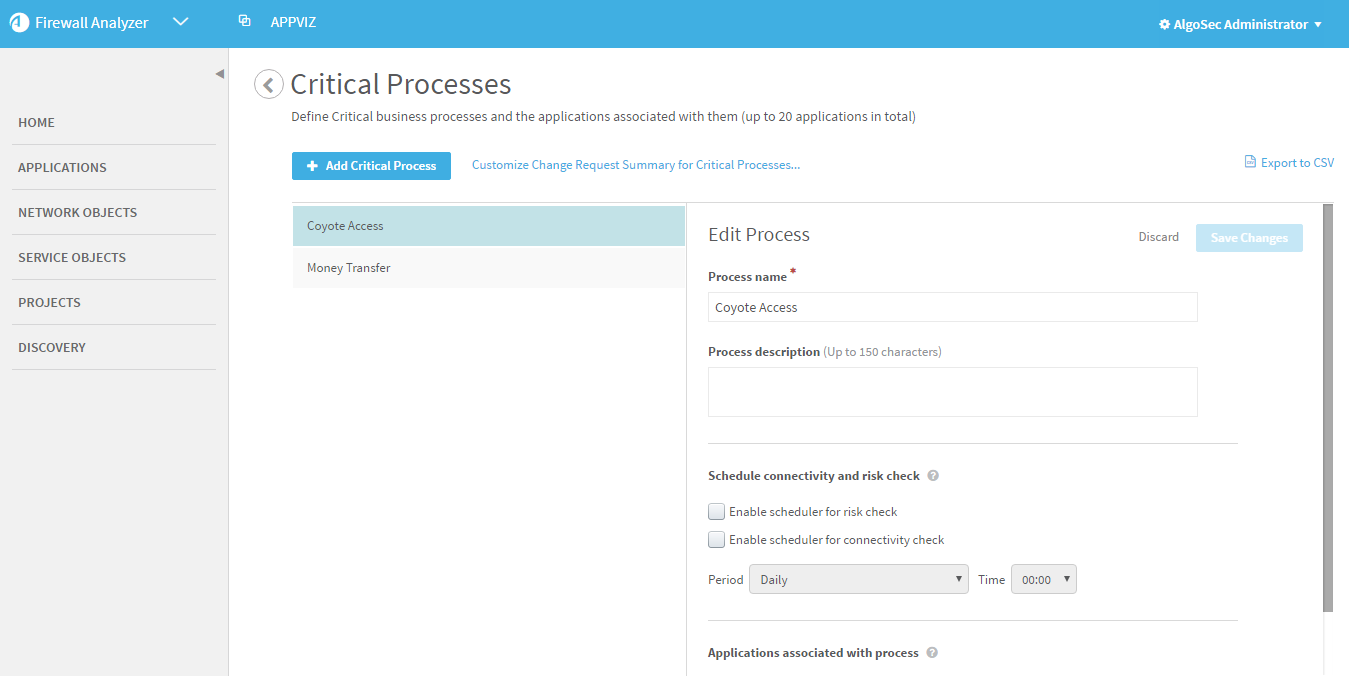
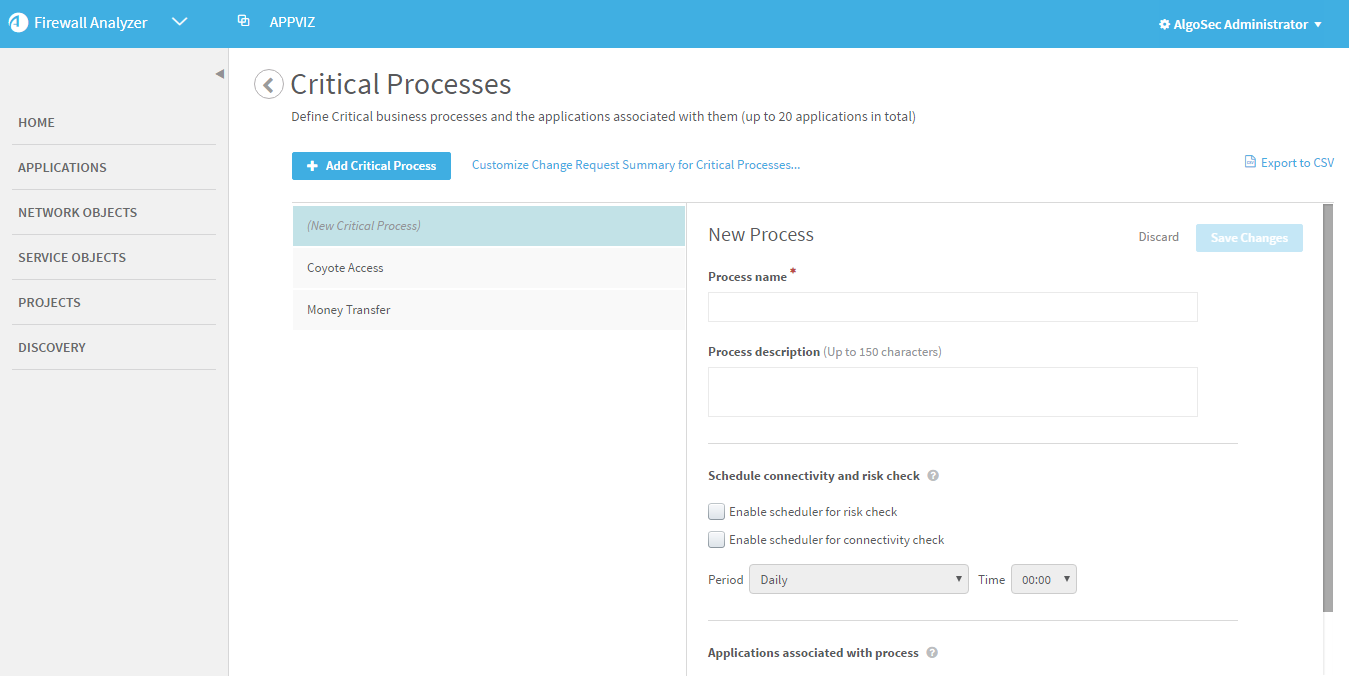
The Critical Processes page appears.
-
Click
 .
.The New Process area appears.
-
Complete the fields using the information in Critical Process Fields (see Critical process fields).
Note: If desired, you can customize the default summary for all FireFlow change requests created for an application that is a part of a Critical Process. Click the Customize Change Request Summary for Critical Processes... link. For details, see Customize interactions with AFA and FireFlow.
- Click Save Changes.
The Critical Process is created.
|
In this field... |
Do this... |
|---|---|
|
Process name |
Type a name for the process. Each process must have a unique name. |
|
Process description |
Type a description of the process. |
|
Schedule connectivity and risk check |
Note: The checks are performed on each application's active revision. |
|
Enable scheduler for risk check |
Select this check box to enable risk checks performed at the times you specify. |
|
Enable scheduler for connectivity check |
Select this check box to enable connectivity checks performed at the times you specify. |
|
Period |
Select the frequency to perform checks in the drop-down menu. |
|
Day |
If the selected period is weekly, select the day of the week to perform the checks in the drop-down menu. |
|
Time |
Select the time of day to perform the checks in the drop-down menu. |
|
Applications associated with process |
|
|
+ Add Applications |
Click this icon to add an application to the Critical Process. For details, see Create an application migration project. |
|
|
To remove an application from the process, click this icon next to the desired application. |
|
Remove all |
Click this link to remove all the applications associated with the Critical Process. |
Edit a critical process
To edit a Critical Process:
-
Navigate to the Administration area.
-
 Hover over the
  SETTINGS icon at the bottom left of the screen. After the panel expands, click
  ADMINISTRATION.
 -
 In the toolbar, click your username. From the drop-down menu, click ADMINISTRATION.
The Administration area appears in the workspace.
-
-
Click the CUSTOMIZATION tab.
-
In the Critical Processes area, click Manage.
The Critical Processes page appears, with a list of all Critical Processes on the left.
-
Select the desired Critical Process.
The process's information appears on the right.
-
Edit the fields as needed. For details, see Critical process fields.
Note: If desired, you can customize the default summary for all FireFlow change requests created for an application that is a part of a Critical Process. Click the Customize Change Request Summary for Critical Processes... link. For details, see Customize interactions with AFA and FireFlow.
-
Click Save Changes.
The Critical Process is saved with the modifications you specified.
Delete a critical process
To delete a Critical Process:
-
Navigate to the Administration area.
-
 Hover over the
  SETTINGS icon at the bottom left of the screen. After the panel expands, click
  ADMINISTRATION.
 -
 In the toolbar, click your username. From the drop-down menu, click ADMINISTRATION.
The Administration area appears in the workspace.
-
-
Click the CUSTOMIZATION tab.
-
In the Critical Processes area, click Manage.
The Critical Processes page appears, with a list of all Critical Processes on the left.
-
Hover over the desired Critical Process, and click
 .
.A confirmation message appears.
-
Click OK.
Export all critical processes to CSV
To export all Critical Processes:
-
Navigate to the Administration area.
-
 Hover over the
  SETTINGS icon at the bottom left of the screen. After the panel expands, click
  ADMINISTRATION.
 -
 In the toolbar, click your username. From the drop-down menu, click ADMINISTRATION.
The Administration area appears in the workspace.
-
-
Click the CUSTOMIZATION tab.
-
In the Critical Processes area, click Manage.
The Critical Processes page appears.
- Click
 .
.
