Application flows
The application's FLOWS tab enables you to manage an application's traffic flows.
Flows describe traffic to and from servers, which are represented by network objects, via a specific service. Flows may also specify a user or network application, and include other fields, such as comments.
Note: Adding, removing, or editing an application's flows changes the application's revision to draft. The flow is not updated in the related network security policy until the draft revision is returned to active. For more details, see Application dashboard.
Tip: AppViz also enables you to import flows from a discovery server or a CSV file. Importing flows also matches, or updates matching details, with AppViz applications. For more details, see Discover applications.
In this topic:
- Accessing application flows
- Flow types
- Flows tab interface
- Filtering Flows
- Flow connectivity status
- Add flows to your application
- Adding a shared flow
- Remove flows from your application
- Subscribe to another application's shared flows
- Verify flow connectivity
- Export an application's flows
Accessing application flows
-
From the AppViz home screen, click Applications in the left navigation.
The applications are listed in the left navigation. -
Click on the required application.
The application's dashboard is displayed.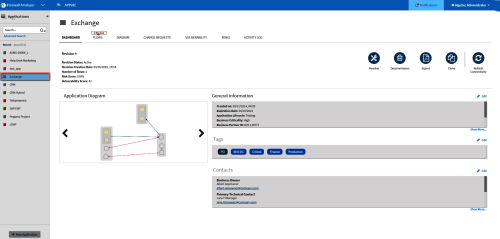
-
Click on the FLOWS tab.
Three groupings of Application Flows are displayed (Application flows, Shared Flows, Subscribed Flows) with an indication of the number of flows of each type. Filters above the Application Flows enable finding specific flow of interest in long lists of flows.
Tips:
-
Use the filters to search for Flows by Flow Name, Source, Destination and Service.
-
Expand or collapse each table section to expose or hide the contained flows.
Flow types
AppViz application flows include the following types:
| Application flows | Flows that are custom-built for a specific application. |
| Shared flows |
A semi-custom flow that can be relevant for many applications. Shared flows are templates with empty source and destination values, which are provided by a subscribing application. Note: For shared flows when user awareness is enabled, the User field will be treated the same way as the Source field. When the source is the place holder, the user will also be a place holder. |
| Subscribed flows | An instance of a shared flow that's customized for a specific application, with its source and destination fields provided by the application. |
Flows tab interface
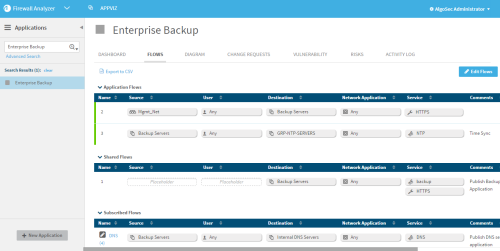
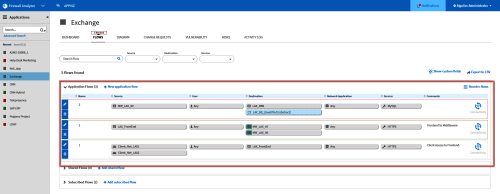
The FLOWS tab displays application's flows of one application and their details in a series of tables (Application Flows, Shared Flows, Subscribed Flows) which you can expand to view or collapse.
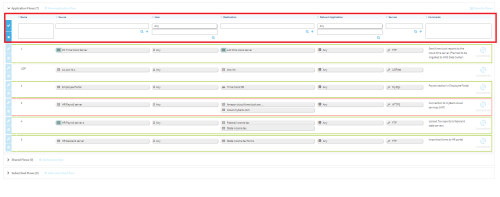
An expanded table looks like this:
On an expanded table, you can:
- Click a column heading to sort the table by that column, and click it again to reverse the sort order.
- Hover over a network object or service to display its protocol and port.
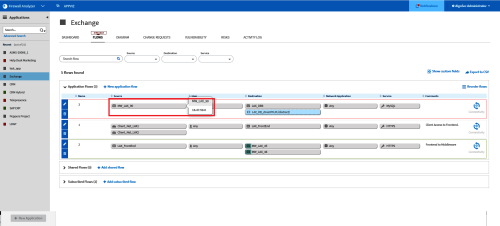
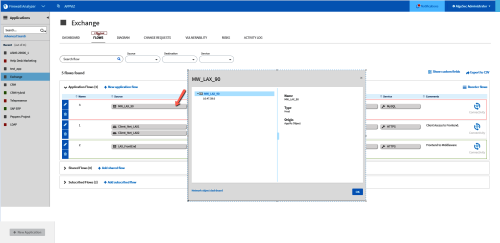
- Click a network object to display further details, including its name, type, origin, and addresses.
- Use the features listed here:
For more details, see:
- Filtering Flows
- Flow connectivity status
- Add flows to your application
- Application flows
- Remove flows from your application
- Export an application's flows
- Subscribe to another application's shared flows
- Verify flow connectivity
Filtering Flows
Use Filters to isolate the flow or flows of interest:
-
Use the Search Flow filter to search for a flow by name.
Start typing text into the Search field. Click in the checkbox of the required value when it appears. Then start typing another name, for searching multiple names. -
Use the Source, Destination and Service filters to locate the required flow quickly.
-
Start typing a name the required value and check the required value from a presented list
or -
Click the Lookup icon and choose a value from the values presented in the list that opens.
Note: Each filter accepts multiple values.
-
-
Click Clear Filters to start a fresh search/filtering process.
Flow connectivity status
Every flow has a connectivity status. The traffic each flow represents may be allowed or blocked by the current network security policy. For each flow for which the connectivity status is available, the flow is encircled with a with a red or green outline. See the colors table below.
Note: The connectivity status of each flow contributes to the connectivity status of the application. For more details, see Business applications.
|
|
Allowed |
|
|
Blocked or Partially blocked. |
|
No strip |
No connectivity information |
Note: Abstract flows are indicated with pale blue stripes, but this is not a connectivity status for the flow. An abstract flow is a flow that does not represent any real traffic. Therefore, connectivity information is not relevant. For details, see View a network object.
Add flows to your application
This procedure describes how to add an application or shared flow to your application.
Tip: Alternately, subscribe to another application's shared flows. For more details, see Subscribe to another application's shared flows .
Do the following:
-
In the left panel, click on the application to which you want to add a flow.
-
Click the FLOWS tab, and then, in the relevant section, click +New application flow, +Add shared flow or +Add subscribed flow.
A blank editable flow form is displayed above the other flows (if existing) of the relevant section. The other flows for the section are displayed as disabled for editing.
-
After editing and accepting the new flow, you can re-order the flows:
-
display by clicking on the
 .
. -
In the window that opens, drag-drop objects into their new display order.
-
Click Done.
-
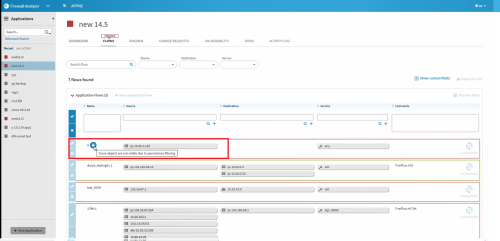
Note: Objects viewer has no permission to see are represented by the lock-icon indication ![]() with a hover-tool-tip informing them that an object that they do not have permission to view due to permissions filtering is present in the flow. For more about object permissions see Managing Object Permissions Using Tags.
with a hover-tool-tip informing them that an object that they do not have permission to view due to permissions filtering is present in the flow. For more about object permissions see Managing Object Permissions Using Tags.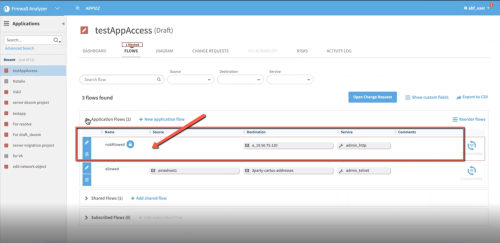
Adding a shared flow
-
For a shared flow, select the placeholder, follow the instructions above. Note that the empty form for the new shared flow is different than that for the new application flow.

The placeholder is the field that is customizable for any application subscribing to it.
Note: When user awareness is enabled, the User field will be treated the same way as the Source field. When the source is the placeholder, the user will also be a placeholder.
-
Complete the fields as needed. For details, see Flow fields.
Note: Whenever a flow is added or updated, the application is saved as a draft revision.
Remove flows from your application
To remove a flow:
- View the application for which you want to remove a flow. For more details, see Business applications.
-
Click the Flows tab to view the flows.
- Click
 on the row of the flow you want to remove.
A confirmation message is displayed.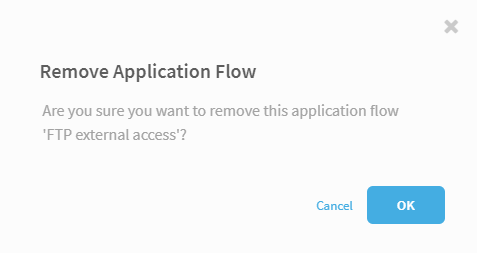
-
Click OK if you are sure you want to remove the application flow from the specified application.
Subscribe to another application's shared flows
Applications can subscribe to another application's shared flows. The subscribing application specifies a custom value for the shared flow's placeholder/missing field. For more details, see Add flows to your application.
By default, the application containing the shared flow is responsible for all of the shared flow's subscriptions. If desired, you can configure AppViz to treat the applications subscribed to the shared flow as responsible for the traffic. For more details, see Configure advanced AppViz properties
To subscribe to an application:
-
View the application for which you want to add subscribed flows (the "subscriber" application). For more details, see Business applications.
-
Click the Flows tab.
The Flows tab appears.
-
Click Edit Flows.
All the flows for the application appear in an editable format.
-
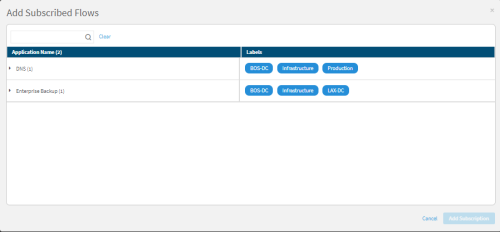
In the Subscribed flows section, click +Add subscription flow.
- To subscribe to an entire application(s) (all of its shared flows), select the desired application(s).
- To subscribe to individual flows, do the following:
Next to the desired application, click
 .
.The applications flows appear.
- Select the desired flows.
-
Click Add Subscriptions.
The subscribed flows appear in the application's Flows tab.
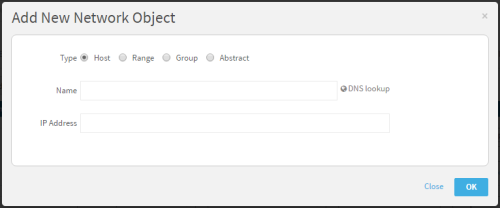
- Complete the required fields as needed. For details, see Add a new network object.
-
Click Save Changes.
A confirmation message appears.
- Click Save.
Verify flow connectivity
Verifying flow connectivity checks whether the network security policy allows the traffic that the flow specifies. Additionally, it creates and updates the business application field of the flow (a.k.a. rule) visible throughout ASMS systems with AppViz.
See Business application visibility.
To verify flow connectivity:
- View the application which contains the flow for which you want to verify flow connectivity. For more details, see Business applications.
-
Click the Flows tab.
The Flows tab appears.
-
Click
 next to the flow.
AppViz checks whether the network security policy allows the traffic flow. This may take a few minutes, depending on the complexity of the flow and network policy.
If the flow is blocked, red stripes appear around the flow.
Note: Clicking the connectivity check icon also sets or updates Business Application Visibility throughout ASMS. See Business application visibility.
-
To view details regarding the flow's connectivity, click the Connectivity link.
A new window opens with details of the traffic simulation query from AlgoSec Firewall Analyzer.
Note: If the Connectivity link is not enabled for a flow, the last connectivity check failed or has expired. If you run a new check, the link will be re-enabled.
Export an application's flows
You can export an application's flows to a CSV file.
Note: If desired, you can configure all flow exports to include connectivity information. For more details, see Configure advanced AppViz properties
To export an application's flows:
- View the application for which you want to add a flow. For more details, see Business applications.
-
Click the Flows tab.
The Flows tab is displayed.
-
Click
 .
.The CSV file is exported.
Your browser will prompt you to open or save the file.


 to keep the changes or
 to discard the changes.


