Application dashboard
The application's DASHBOARD tab provides the ability to:
- Quickly and easily view a summary of an application's status and history
- Apply or discard changes to an application
- Resolve an application's blocked flows
- Decommission applications
-
 Delete a decommissioned application
-
 Recertify an Application
- Export application content to PDF
- Clone applications
- Verify/Refresh application connectivity
- View multiple versions of the same application
- Edit general application information
- Edit contact information
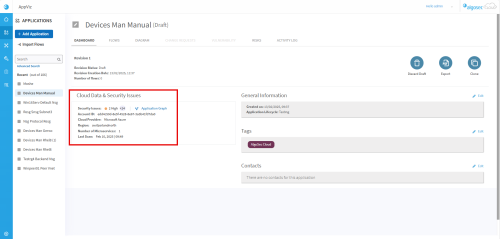
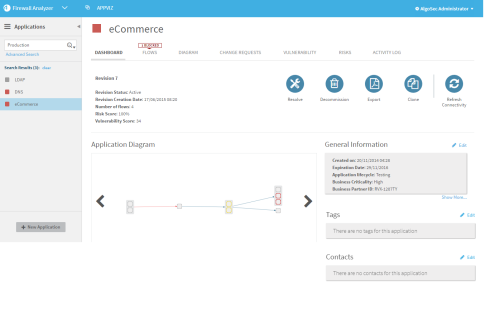
Application DASHBOARD tab interface
Dashboard Tab Areas
Apply application drafts
Applying an application draft activates changes to the application that you have made in the draft revision. You can apply all of the changes in a draft or only some of the changes. A FireFlow change request is created to apply the specified changes to the network security policy.
- When you apply all the changes in a draft revision, the draft enters the Pending Implementation status.
- When you apply some of the changes in a draft revision, a new application revision with only the selected changes is created and enters the the Pending Implementation status. The original draft revision remains intact (as a draft revision) with both the changes that were and were not applied.
Note: When applying a draft where some of the changes in the draft have already been applied, only the changes that have not yet been applied will appear as options to be applied with the FireFlow change request.
To apply an application draft:
Do the following:
-
View the application for which you want to apply a draft. For details, see Business applications.
-
In the Actions area of the Application Dashboard tab, click
 .
.The Apply Flows Changes dialog appears, describing the FireFlow change request that will be created to add or remove traffic flows for the application in the network security policy.
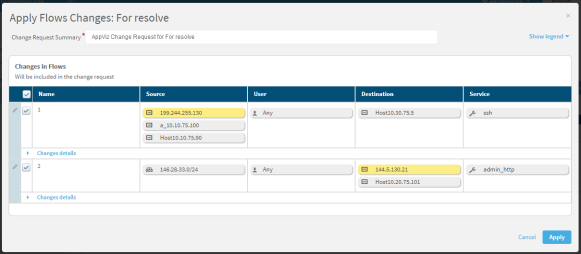
- Flows to be added to the application and objects to be added to a flow appear highlighted in
 .
. - Flows to be removed from the application and objects to be removed from a flow appear highlighted in
 .
. - Flows to be edited in the application and objects to be edited in a flow appear highlighted in
 .
.
Note: If traffic flows have been removed from the application, but the traffic intersects the needs of another application, a FireFlow change request will not be created to remove the traffic.
Note: If the draft that is being applied includes changes that have already been applied, only the changes that have not yet been applied will appear in the Apply Flows Changes dialog.
- Flows to be added to the application and objects to be added to a flow appear highlighted in
-
Clear the check boxes next to the flows that you do not want to apply.
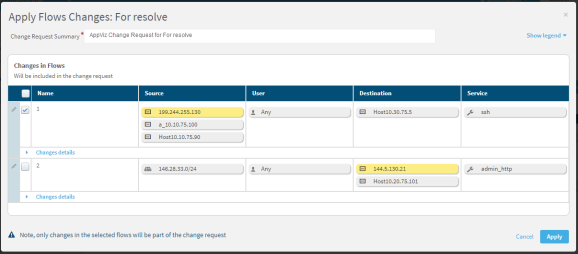
Note: Only the selected changes will be included in the FireFlow change request.
-
(Optional) Edit the Change Request Summary field.
The contents of this field will be the subject of the FireFlow change request(s).
-
Click Apply.
The draft is applied. This may take a few minutes.
The relevant change request is created. The FireFlow change request will include a link to the application, the application's diagram, and details of the changes to the application's flows.
Note: The application information in FireFlow will only be visible to users with the required AppViz permissions.
When the change request is resolved in FireFlow, the new revision of the application will be Active.
Discard application drafts
Discarding an application draft deletes all changes to the application you have made in the draft revision. No record of changes you have made to the draft revision is kept, as the changes were never active.
To discard an application draft:
Do the following:
- View the application for which you want to remove an application revision. For details, see Business applications.
-
In the Actions area of the Application Dashboard tab, click
 .
.The Discard Draft dialog appears.
-
Click OK.
The draft is discarded.
Resolve an application's blocked flows
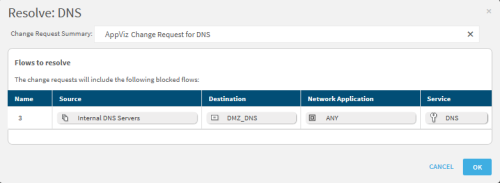
When some or all of an active application revision's flows are blocked, you have the option to resolve the application. This action issues a change request to open blocked flows.
To resolve active applications:
Do the following:
- View the application you want to resolve. For details, see Business applications.
-
In the Actions area of the Application Dashboard tab, click the
 icon.
icon.The Resolve dialog appears, describing the FireFlow change request that will be created.
- Click OK.
The relevant change request is created. The FireFlow change request will include a link to the application, the application's diagram, and details of the changes to the application's flows.
Note: The application information in FireFlow will only be visible to users with the required AppViz permissions.
Decommission applications
Decommissioning an application deactivates the application. A FireFlow change request is created to block traffic that was allowed for the sake of the application, and the application enters the Pending Decommission revision status.
When an application enters the Pending Decommission revision status, the following occurs:
- A change request opens in FireFlow to close any relevant traffic.
- No actions that initiate change requests can be performed on the application.
- The application will appear grayed out in the Applications tab of any network or service objects associated with the application.
-
If the application is currently used in a critical process, project or discovery search, the application will appear grayed out. You will no longer be able to use the application in any of these processes.
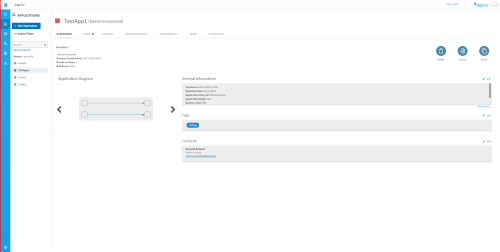
If the change request is resolved in FireFlow, the application enters the Decommissioned revision status, and the following occurs:
- The network and service objects that were associated with the application lose the association. The objects will still appear in the application's Flows tab, but the application will not appear as an affected application for its objects in the Application tab or for a search or impact analysis.
- If the application is used in a critical process, project or discovery search, the application will be removed.
- The application's history will still be visible in the activity logs in the Administration area. For details, see Application activity log.
- Any rules in AFA that were associated with the application will lose their associations.
If the decommissioning change request is rejected, the application will revert to its previously active revision.
To decommission an application:
Do the following:
- View the application you want to decommission. For details, see Business applications.
-
In the Actions area of the Application Dashboard tab, click the
 icon.
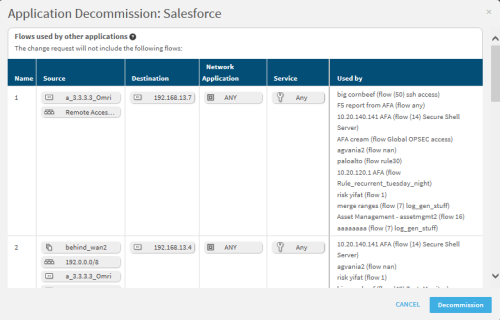
icon.The Application Decommission dialog appears, describing the FireFlow change request that will be created to block traffic in the network security policy. If the traffic slated to be blocked intersects the needs of another application, a FireFlow change request will not be created to remove the traffic.
-
Click Decommission.
The relevant change request is created and the application enters the Pending Decommission revision status. After the change request is approved, the application status updates to Decommissioned.
-
 Optional: Delete decommissioned applications. See Delete a decommissioned application.
 Delete a decommissioned application
Deleting an application removes it permanently from AppViz (SaaS) and allows you to reuse an application name.
Note: This feature is currently in Early Availability.
Warning: Exercise caution when performing this action, as deleted data cannot be recovered.
Note: Only decommissioned applications can be deleted. For details on decommissioning an application, see Decommission applications.
To delete an application:
Do the following:
-
View the application you want to delete. For details, see Business applications.
-
In the Actions area, click
 .
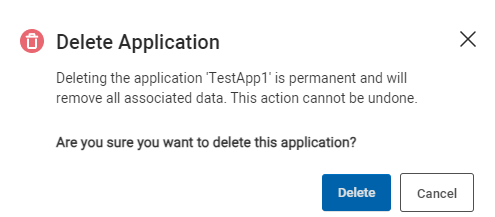
.A confirmation prompt will appear to prevent accidental deletion.
Warning: Deleted applications can not be recovered.
-
Confirm the action by clicking Delete to permanently remove the application and all associated data.
 Recertify an Application
Recertifying an application is a critical process in maintaining the security and compliance of your network management system. This process ensures that applications continue to meet organizational standards and regulatory requirements by verifying their validity and relevance periodically. The recertification process updates the application’s status, records the recertification details, and allows administrators to track the history of certifications.
Before initiating the recertification process, ensure that you have the following:
-
Permissions to Edit Applications: Only users with the necessary permissions to edit applications can perform recertifications.
-
Up-to-Date Information: Gather the latest information about the application, including any changes in functionality, ownership, or compliance requirements.
To recertify an application:
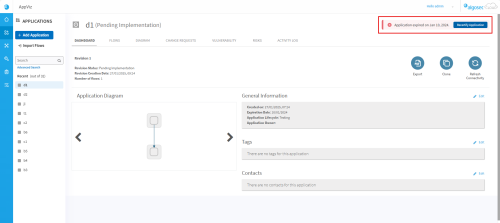
When an application is nearing expiration or has already expired, a notification appears in the upper-right corner of the application's Dashboard tab, along with a button to initiate the recertification process.
Tip: By default, the expiration date is set to 12 months after the recertification date, as defined by the configurable user property application.default.expiration.period.configuration.in.months.
Tip: Editing the Expiration Date: In the General Information area of the application's Dashboard page, you can modify the expiration date to an earlier one, but it cannot be extended beyond the existing expiration date to ensure compliance with organizational policies. See General Information
Do the following:
-
View the application you want to recertify. For details, see Business applications.
-
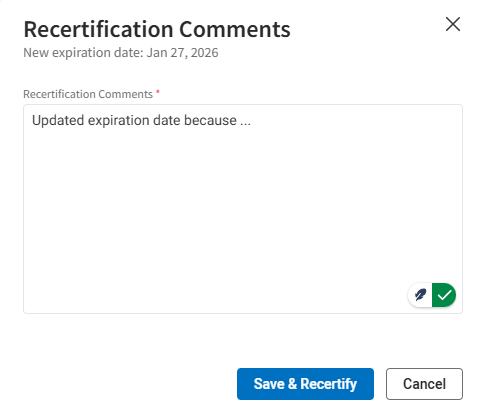
Click Recertify Application. The Recertification Comments dialog appears.
-
In Recertification comments area, type in the necessary details (mandatory).
-
Click Save & Recertify. The application is recertified and a confirmation notification appears in the upper right hand of the application's Dashboard tab, for example:
As well, recertification details are added to the Recertification area of the application's Dashboard tab.
Export application content to PDF
To export application content:
Do the following:
-
View the application you want to export. For details, see Business applications.
-
In the Actions area, click
 .
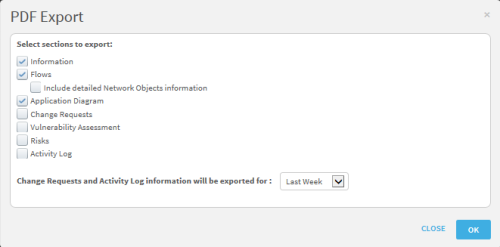
.The PDF Export dialog appears.
- Select the information to export, and click OK.
You can chose specific tabs and/or all Change Request and Activity Log information for the last week, month, or quarter.
Your browser will prompt you to save or open the PDF file.
Clone applications
To facilitate the creation of a new application that is similar to an existing one, you can clone the application and edit it to meet the new requirements.
There are two options for cloning an application:
- From the New Application page
- From the Actions area of the application's Dashboard tab
Note: When you clone an application, any user-defined tags will be cloned, but the system tags will not be cloned. For example, if an application has one user-defined tag and one tag indicating it is part of a Critical Process, only the user-defined tag will be created with the clone.
To clone an application from the New Application page:
Do the following:
-
In the Applications panel, click +New Application.
The New Application area appears.
- Click the Based on existing tab.
- In the Base Application box, type the name of the application to clone. Or, click Application lookup to search for the base application or select from the Application Name list.
- Modify data fields as needed. For details, see Business applications.
To clone an application from the Applications Dashboard:
-
View the application that you want to clone. For details, see Business applications.
-
In the Actions area of the application's Dashboard tab, click
 .
.The Edit Name dialog appears.
- Type the name for the cloned application and click OK.
- Modify data fields as needed. For details, see Business applications.
Verify/Refresh application connectivity
Refreshing application connectivity checks whether the network security policy allows all the traffic flows that an application requires and updates all the connectivity information AppViz has for the application. To verify the application connectivity per traffic flow, see Application flows.
Note: You must have permission to refresh connectivity to perform this procedure.
To refresh application connectivity:
Do the following:
-
View the application for which you want to verify the connectivity. For details, see Business applications.
- In the Dashboard tab, click
 .
.
AppViz checks whether the network security policy allows all the application's required traffic flows. This may take a few minutes.
The color of the icon next to the application's name is updated to reflect the current connectivity of the application. For more details, see Business applications.
View multiple versions of the same application
When you are viewing an application with more than one revision, you can navigate between the different revisions. You can identify applications with more than one revision because the icon to the left of the application's name appears with an arrow: ![]() .
.
To view different revisions of the same application:
-
View the application. For more details, see Business applications.
-
Click the icon to the left of the application's name.
A drop-down menu appears.
-
Select the icon that represents the revision you want to view.
This icon...
Indicates this revision...

Active or Decommissioned

Pending implementation or Pending decommission

Draft Note: The color of the icon indicates the connectivity status, not the revision status. For more details, see Business applications.
The revision you selected appears.
Edit general application information
To edit general information:
Do the following:
-
View the application for which you want to edit the general information. For more details, see Business applications.
- In the General Information area of the Application Dashboard tab, click
 .
. -
Edit the desired fields as needed. For more details, see Business applications.
Other fields may appear, depending on your custom field configuration.
Note: Renaming an application is disabled when a connectivity check is running for the application.
- To edit or delete an existing attachment, click the Attachment link.
- To add an attachment, click Attach files and follow the instructions.
- Click Save Changes.
The edits are saved.
Edit contact information
To edit contact information:
Do the following:
-
View the application for which you want to edit the contact information. For more details, see Business applications.
- In the Contacts area of the Application Dashboard tab, click
 .
. - To associate a new contact with the application, do the following:
Click Add contact.
The Add contact wizard appears.
Use the wizard to select the contact. For more details, see Business applications.
- To remove a contact from the application, click the X next to the contact.
-
Click Save Changes.
The edits are saved.
 appears in the upper right corner of the application details page..