Deploy ASMS on the cloud
This topic describes how you can deploy ASMS on Amazon AWS or Microsoft Azure to manage your devices from the cloud.
Note: Each installation package includes software for the full AlgoSec Security Management Suite. Functionality for each ASMS product is enabled via license, and not by installation.
Deploy ASMS on AWS
Deploy ASMS on an AWS instance using an ASMS AMI available from the AlgoSec Portal.
Refer to Hardware minimum requirements.
For AWS deployments, we also recommend:
-
Using machines from the Amazon EC2 General Purpose M5 family, compatible with CentOS 7.
-
Ensuring that your AWS instance includes high-performance storage. Use Amazon gp3 volumes (SSD-based).
-
When deploying your first AWS AMI, you need to accept the CentOS 7 image (CentOS 7 (x86_64) with updates HVM by CentOS org) in your AWS console. You only need to do this once and not for every VM.
-
Note: AWS recommends using the CentOS image available on the AWS Marketplace (free of charge).
For more details, see the AWS Documentation![]() .
.
Do the following:
-
Deploy your AWS AMI.
-
On the Download AlgoSec Security Management Suite > AMI page, select an AWS Region and enter your AWS Account ID. The AlgoSec AMI is shared with your account. For details, see Download ASMS software packages.
- During the Add Storage phase of the setup process, increase disk space on your AWS instance. See Increase disk space of a new AWS instance.
- When the setup process is complete, you are notified and provided with the details required to access your new instance with ASMS.
-
-
After launching your instance from AMI, run the following command in order to get better disk performance:
sudo dd if=/dev/nvme0n1 of=/dev/null bs=1M
Note: this step may take several minutes up to several hours, depending on your EC2 instance bandwidth, the IOPS provisioned for the volume and the size of the volume.
-
If you are deploying clusters or distributed architectures, continue with Deploy clusters and distributed architectures.
Otherwise, continue with deploying ASMS products, including populating your environment with devices and users. For details, see ASMS deployment checklist.
Deploy ASMS on Microsoft Azure
The following instructions explain how to deploy ASMS over an Azure VM.
Note: Currently, the following Microsoft Azure regions are supported:
-
North Europe
-
West Europe
-
East US
-
South Central US
-
Central US
-
US West 3
-
Australia East
-
UAE North
If your region is not currently supported, contact your AlgoSec Account Manager.
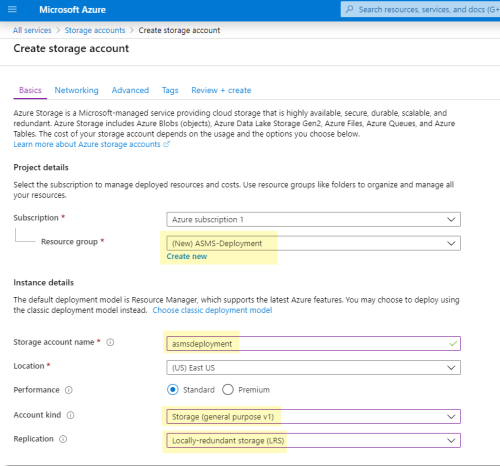
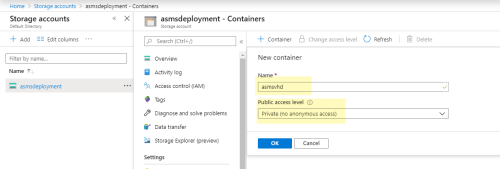
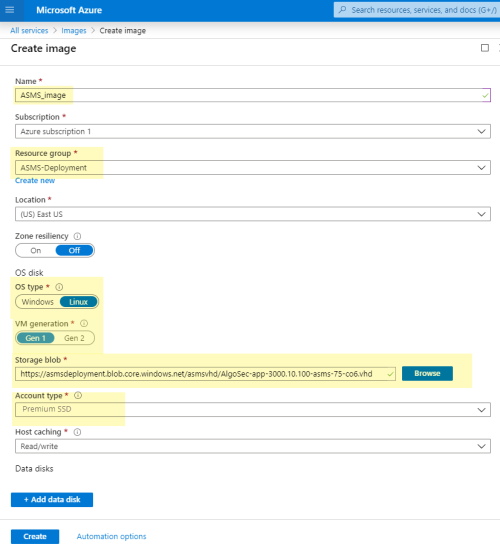
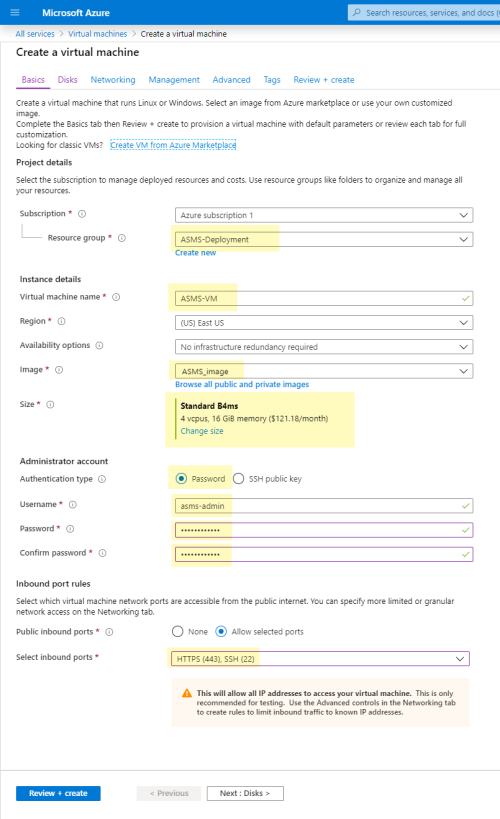
Deploy ASMS on Microsoft Azure by converting a VHD file available from the AlgoSec portal to an Azure image.
Refer to Hardware minimum requirements.
For Azure deployments:
-
Ensure that your machine is compatible with CentOS 7. We recommend machines from D-series.
-
Ensure that your Azure instance includes high performance storage, specifically Premium SSD P-20 and above.
-
It is highly advised that you disable hyper-threading on Azure VMs running ASMS prior to deploying the machine. AlgoSec has observed improved performance under heavy workloads. See Disable Hyper-threading on Azure Instance.
Note: ASMS supports deployment of the AlgoSec VHD into Azure on any General Purpose VM-Type. Many customers choose the VM-Type to deploy based on the resource requirements set forth for ideal performance & scalability in their specific AlgoSec Architecture Recommendation, received from AlgoSec. Since ASMS does not make use of Hyper-threading at this time, ensure that the VM-Type selected for an Azure based deployment provides sufficient logical CPU cores, as outlined in your AlgoSec Architecture Recommendation.
For more details, see the Azure Documentation.
Do the following:
-
When the Azure VM is available, unlock the root user as follows:
-
Log in to the virtual machine via CLI using the Azure VM user credentials.
-
Run the command:
echo "<Azure VM user password>" | sudo -S echo;echo "<new root password>" | sudo passwd --stdin root
The root user is now unlocked and you can log into it using the password you gave in the command.
-
-
Disable hyper-threading (best practice). See Disable Hyper-threading on Azure Instance.
If you are deploying clusters or distributed architectures, continue with Deploy clusters and distributed architectures.
Otherwise, continue with deploying ASMS products, including populating your environment with devices and users. For details, see ASMS deployment checklist.
â See also:

 to add a new container.
 .
.
