In AppViz, an application is a business need that may require specific traffic flows to be allowed in your network security policy. Typically, an application is associated with the various user communities that use its services and manage the application.
From the AppViz main menu, click APPLICATIONS to search for and view the applications added to AppViz.
|
|
|
|
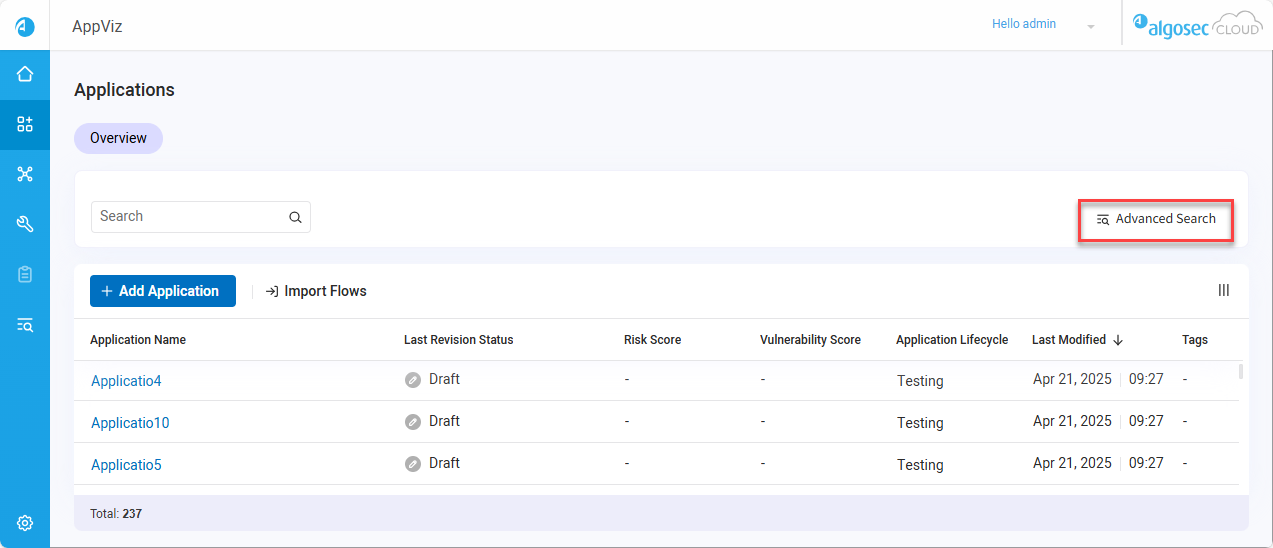
The Applications page opens with an overview of all of the applications added to AppViz . For more details, see View applications | Applications page. |
The Applications list appears on the left. Click an application name to view its details in the workspace and manage application workflow. For more details, see List of applications. |
 View applications | Applications page
Use the Applications page to manage applications added to AppViz . The page provides two tabs, as follows:
Overview tab
The Overview tab provides an overview of all the applications added to AppViz .
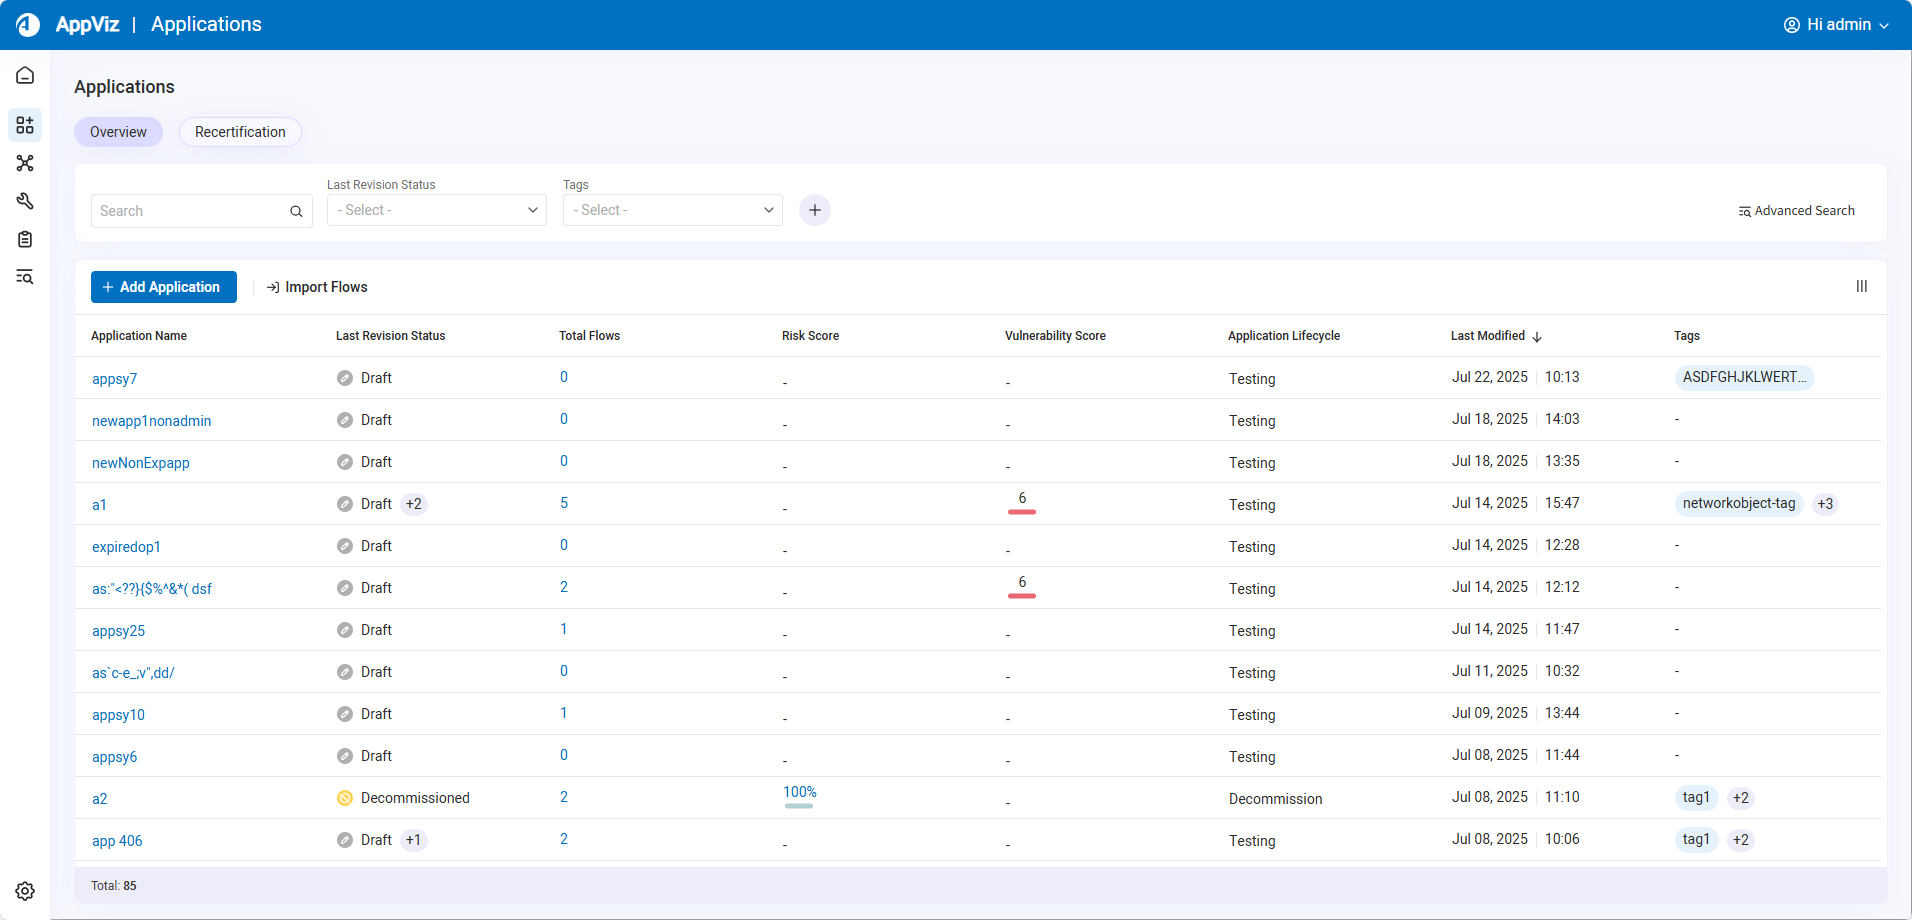
| Column Name | Description |
|---|---|
| Application Name |
The user-defined name of the application. Long application names are truncated. Hover over the name to see a tool tip with the full name. Click an application name to view its details in the workspace and manage application workflow. For details see Application dashboard. Note: For details on changing the application name, see Edit general application information. |
| Last Revision Status |
The latest revision status of the application. A chip indicates the number of previous revision statuses contained in the application. Hover over the chip to see a tooltip listing the previous revision statuses and the date the status was set. |
| Total Flows |
Displays the number of flows present in the last revision status of the application. Click on the number to navigate to the Flows tab where you can see details about all of the flows in the application. |
| Risk Score |
The potential security risk the application poses to the organization:
Click on a risk score to open the application risk tab to view risk information. |
| Vulnerability Score |
A metric indicating the number of vulnerabilities present in the application:
|
| Application Lifecycle | The current phase of the application in its lifecycle, such as Testing, Staging, Production, and Decommission, in addition to user-defined names. Long lifecycle names are truncated. Hover over the name to see a tool tip with the full name. |
| Last Modified | The date and time when an application was last updated. |
| Tags | User-defined and system tags associated with the application. For more information see Tags. |
-
By default, the most recently modified applications are listed first.
-
To sort by Application Name, Total Flows, or Last Modified date, click on its column name.
-
Reorder columns by clicking and dragging their headers. Application Name is fixed as the first column.
-
To hide or show columns, click
 and use the checkboxes to select the columns to display. Application Name cannot be hidden. Click Reset View to show all of the columns.
Search and filter applications on the Overview tab
Use the search bar and dropdown filters located above the application list to quickly find specific applications.
-
For details on adding additional application filters, see Add additional filters.
-
For more advanced search options, see Perform an advanced search for applications.
The built-in search and dropdown fields are as follows:
| Field | Description |
|---|---|
| Search |
Enter partial or full names to search for application names.
|
| Last Revision Status | Select one or more revision statuses. |
| Tags |
Select one or more tags. Tip: Use the Search tags search field in the Tags dropdown to locate tags matching partial or full tag names. |
To remove search or filter conditions from a field, click the X next to it.
To remove all the search and filter conditions, click Clear All.
You can add additional filters to filter applications based on data from other columns.
Do the following:
-
Click +, located to the right of the current filters.

A new dropdown field with placeholder text Select Filter appears.
-
Click Select Filter in the new dropdown and select the filter you want to add.
You can now use this dropdown to filter results by the selected option.
Note: Additional filters disappear if you refresh the page, or click Clear All or Reset Filters. Additional filters cannot be removed individually.
Recertification tab
The Recertification tab lists the applications added to AppViz with the details most relevant to understanding the application recertification status.

By default, applications are listed based on their expiration date, with expired applications listed first, followed by those about to expire and then valid applications.
| Column Name | Description |
|---|---|
| Application Name |
The user-defined name of the application. Long application names are truncated. Hover over the name to see a tool tip with the full name. Click an application name to view its details in the workspace and manage application workflow. For details see Application dashboard. Note: For details on changing the application name, see Edit general application information. |
| Last Revision Status |
The latest revision status of the application. A chip indicates the number of previous revision statuses contained in the application. Hover over the chip to see a tooltip listing the previous revision statuses and the date the status was set. |
| Expiration Status |
Displays the expiration status of the application:
|
| Expiration Date | The date when the application expires. This is set when the application is created. For details see, Add applications. |
| Last Recertified | The date and time when an application was last recertified. |
| Last Recertified By | Displays the username of the user who performed the last recertification. |
| Tags | User-defined and system tags associated with the application. For more information see Tags. |
-
To sort by Application Name or Expiration Date, click on its column name.
-
Reorder columns by clicking and dragging their headers. Application Name is fixed as the first column.
-
To hide or show columns, click
and use the checkboxes to select the columns to display. Columns with integral details about application recertification cannot be hidden. Click Reset View to show all of the columns.
Search and filter applications on the Recertification tab
Use the search bar and dropdown filters located above the application list to quickly find specific applications.
-
For details on adding additional application filters, see Add additional filters.
-
For more advanced search options, see Perform an advanced search for applications.
The static search and dropdown fields are as follows:
| Field | Description |
|---|---|
| Search |
Enter partial or full names to search for application names.
|
| Expiration Status | Select one or more expiration statuses. |
| Tags |
Select one or more tags. Tip: Use the Search tags search field in the Tags dropdown to locate tags matching partial or full tag names. |
To remove search or filter conditions from a field, click the X next to it.
To remove all the search and filter conditions, click Clear All.
You can add additional filters to filter applications based on data from other columns.
Do the following:
-
Click +, located to the right of the current filters.
A new dropdown field with placeholder text Select Filter appears.
-
Click Select Filter in the new dropdown and select the filter you want to add.
Note: The Last Recertified By filter has a search field which you can use to locate users matching partial or full names.
You can now use this dropdown to filter results by the selected option.
Note: Additional filters disappear if you refresh the page, or click Clear All or Reset Filters. Individual filters cannot be removed.
 List of applications
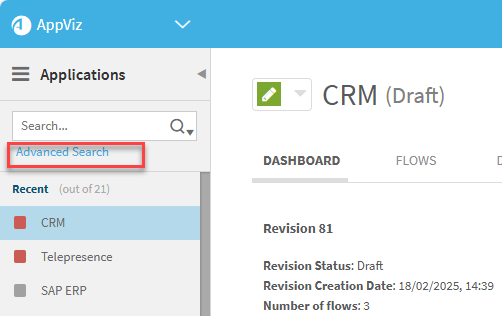
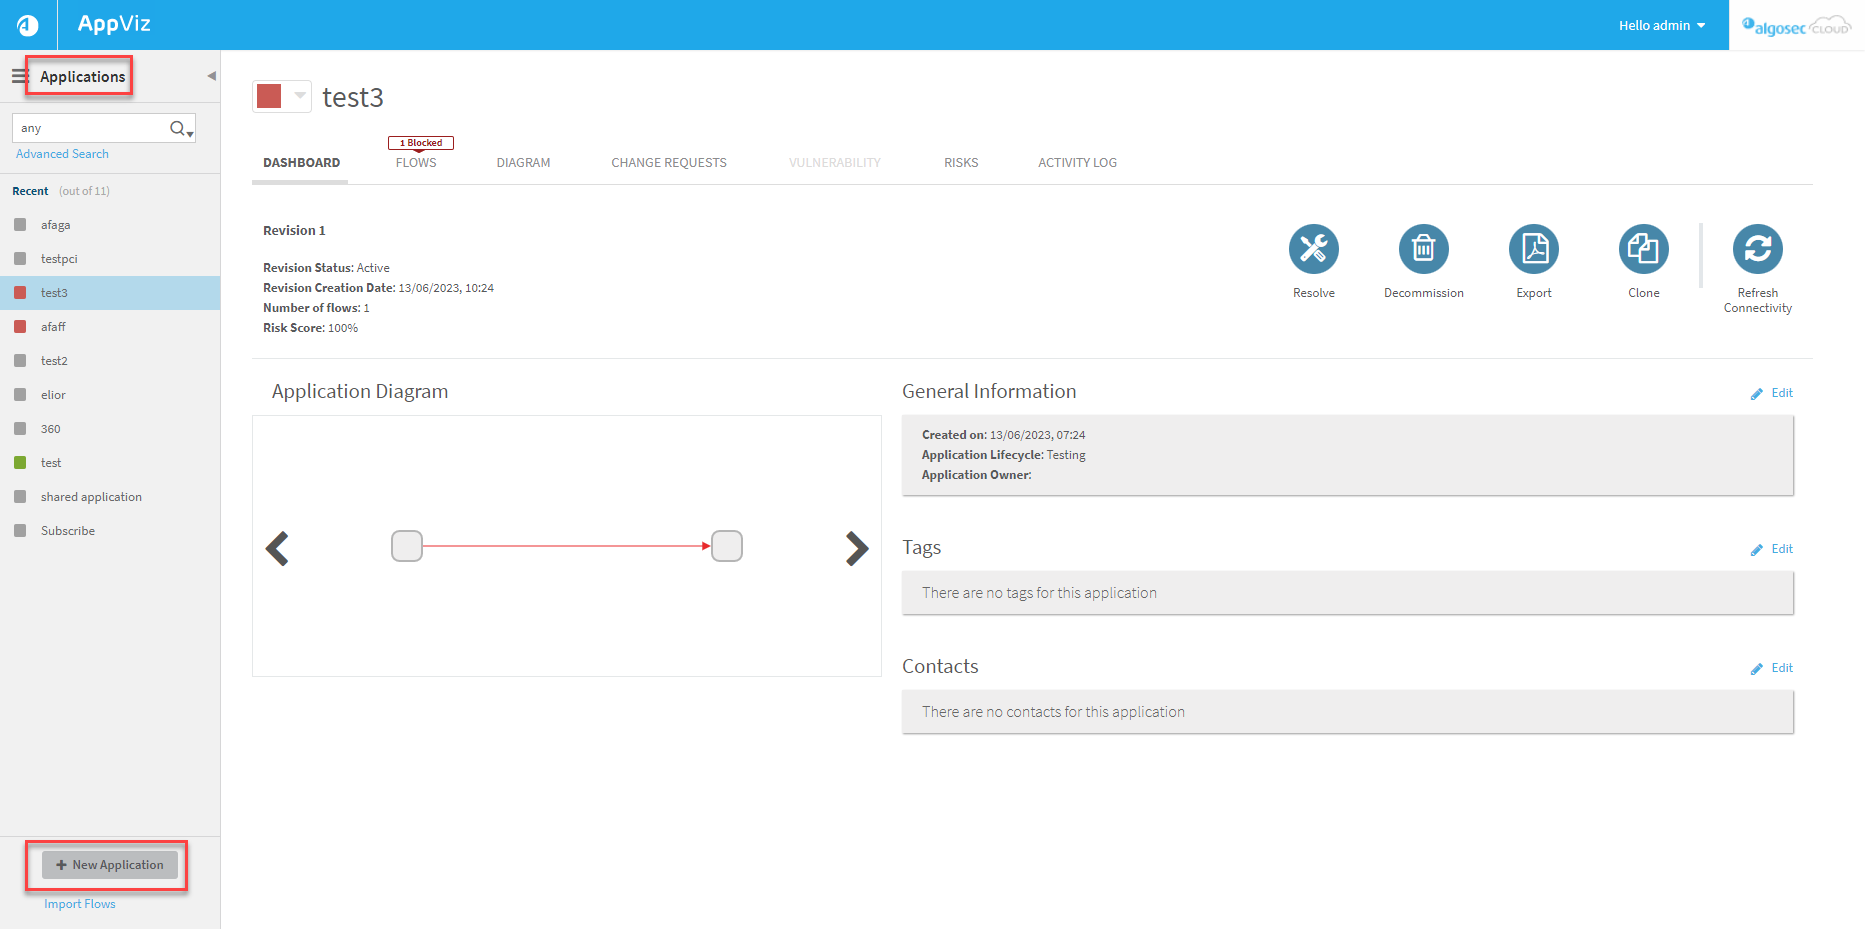
After clicking APPLICATIONS in the AppViz main menu, the list of applications appears on the left. Click an application name to view its details in the workspace and manage application workflow.
![]()
Revision Status and Connectivity Status
Application names are preceded by icons for applications listed at left side of Application page and preceding application titles, indicating status as follows:
-
Image icons indicate an application's revision status. Click the icon to select the revision you want to view.


 Draft revision

 Pending Implementation
 -
Colored boxes represent the current connectivity status of the application's flows:
Note: If there is no connectivity information and both the Refresh Connectivity and Run Connectivity buttons are disabled, set the user property connectivity.scan.enable to true and check the value of the user property afa.tsq.custom_group.
 Traffic Allowed. The network security policy is configured to allow all of the application's connectivity requirements. Every flow in the application is allowed.
 Traffic Blocked, Traffic Partially Blocked. One or more of the application's flows are blocked or partially blocked.
 No connectivity information, Decommissioned or Pending Decommission.
Search and filter applications
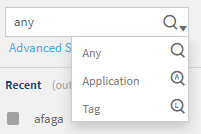
At the top left of the AppViz Applications area, enter text in the search bar at the top left to search for application names or tags.
Note: This search only returns current versions of your applications, and cannot access historical data.
Tip: To limit the search to either application names or tags, you can click ![]() and select the relevant option from the dropdown menu:
and select the relevant option from the dropdown menu:
Perform an advanced search for applications
Create advanced search queries using a wide range of search fields and interactive wizards.
Note: Basic search and filter fields are also available directly on the Applications page for the most common searches:
Do the following:
-
Click Advanced Search to perform an advanced search for applications:
The Advanced Search page appears.
The Advanced Search dialog appears.
-
Enter text in any of the fields to find matching applications.
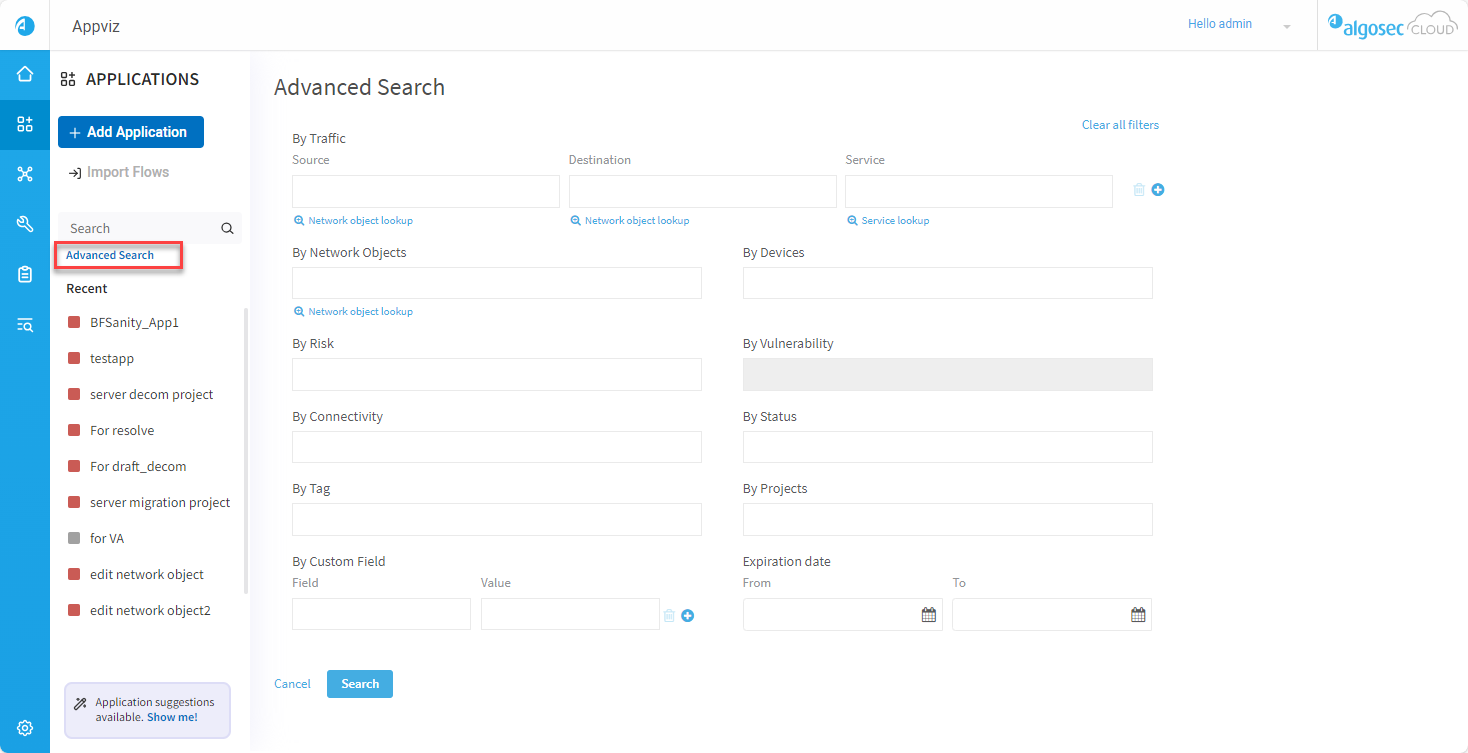
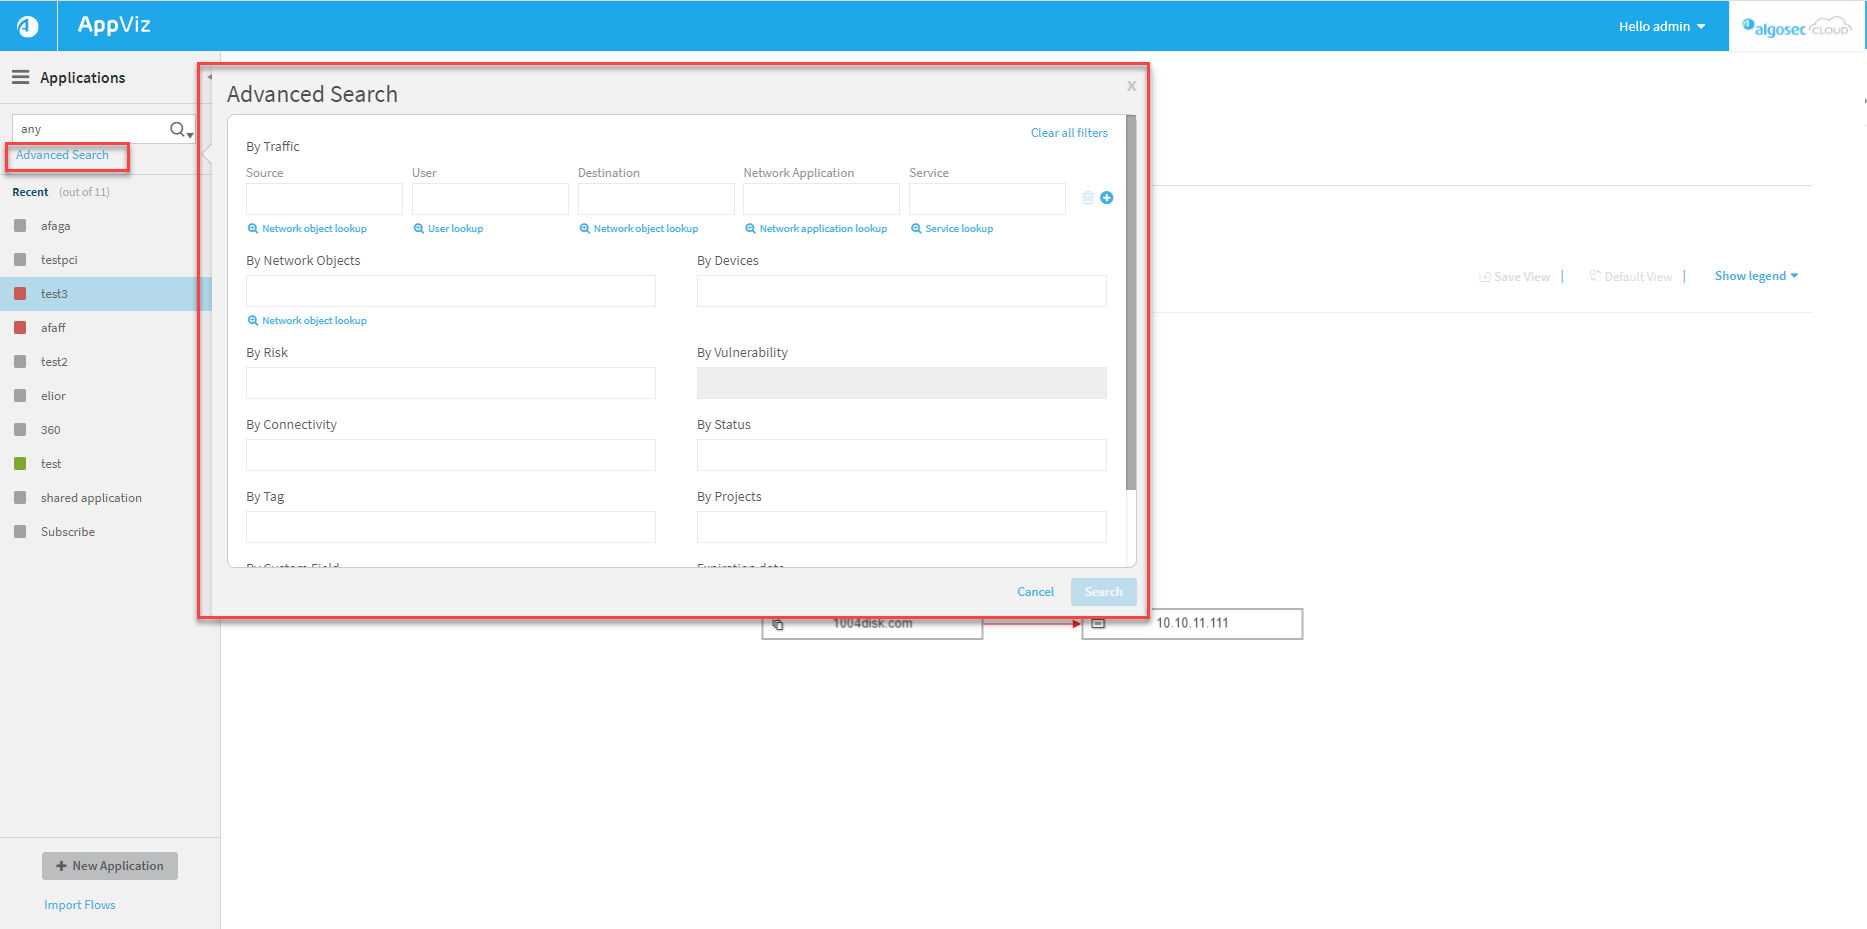
Advanced search fields include:
Field Description By Traffic Enter details in any of the following fields:
-
Source. A server name or IP address for the traffic source you want to search for.
-
User. The username for the user of the traffic you want to search for.
-
Destination. A server name or IP address for the traffic destination you want to search for.
-
Network Application. A network application name for the traffic source you want to search for.
-
Service. A service name or definition of the service of the traffic you want to search for.
- Click
 to add another traffic line to your search criteria.
 - Click
 to delete a traffic line.
Note: The User and Network Application fields appear only when user or application awareness is configured.
By Network Objects Enter the name of a network object. By Devices Enter the name of a device. By Risk Enter a risk code or title. By Vulnerability Enter a CVE identifier or vulnerability description. By Connectivity Select one or more connectivity statuses for the application's flows.
Note: This search parameter is related to flow connectivity, not application connectivity.The results will include all applications with at least one flow with the specified connectivity.
By Status Select one or more revision statuses.
By tag Enter a tag name. By Projects Enter a project name.
By Custom Field Enter a custom field name and value.
- Click to add another custom field line.
- Click to delete a custom field line.
By Expiration Date Enter a range of application expiration dates. Tip:
-
Start typing to select from a list of auto-complete options.
-
Click in any text box for hint of what should be entered in it:
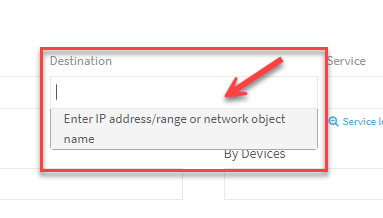
-
Click the blue lookup links to use wizards to help you find your data.
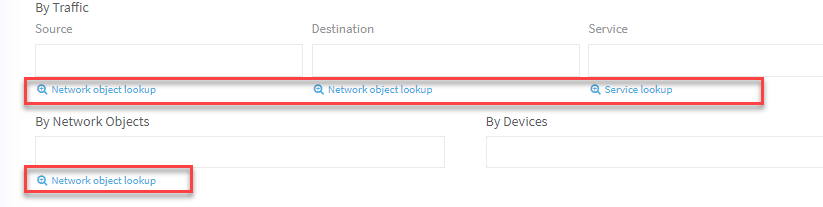
 Network object lookup wizard details
-
Click Network object lookup below the desired field.
The Network Object Lookup wizard appears.
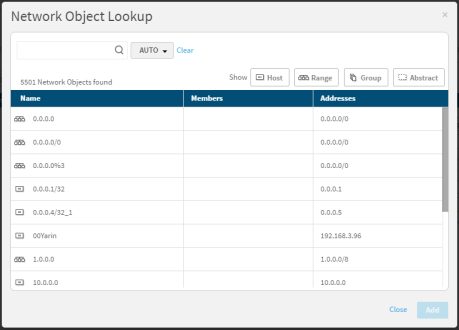
Note: If device objects with the same name (but different content) appear, the device on which the object is defined is indicated.
-
To search for network objects, use the Auto-Search. For details, see Advanced search wizard auto search details.
- To filter the results by object type, click one or more of the Show buttons.
- The first Show button you click causes all other buttons to become disabled (and consequently not appear in the results).
- Clicking additional buttons causes the object type you click to toggle: if it was enabled it will become disabled and vice versa.
- By default, all Show buttons are enabled (all objects appear in the results).
-
Select one or more network objects from the list.
The number of network objects selected appears above the list.
-
Click Add.
The selections are added to the field.
Users lookup wizard details
Note: If user field validation is not enabled, the only users that appear in this lookup are users that were previously created in AppViz. Administrators can enable user field validation as needed. For details, see Enable validation for the user field .
To select a user using the Users Lookup wizard:
-
Click User lookup below the Users field.
The Users Lookup wizard appears.
-
To search for users, type the search criteria into the search box, and click
 .
. -
Select one or more users from the list.
-
Click Add.
The selections are added to the field.
Service lookup wizard details
To select a service using the Service Lookup wizard:
-
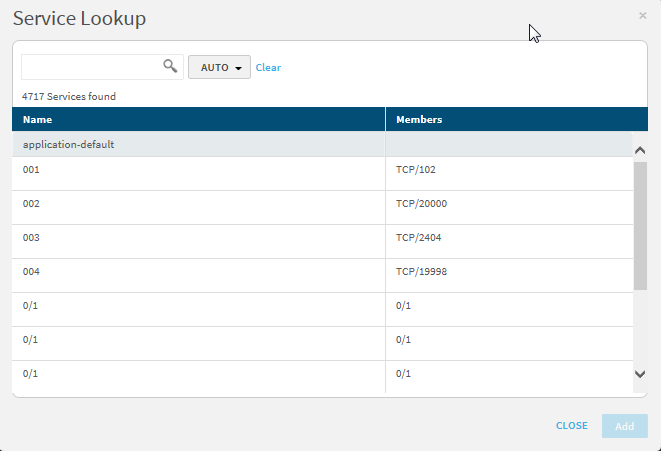
Click the link below the desired field.
The Service Lookup wizard appears.
-
To search for services, use the Auto-Search. For details, see Advanced search wizard auto search details.
-
Select one or more services from the list.
The number of services selected appears above the list.
-
Click Add.
The selections are added to the field.
Network application lookup wizard details
To select an application using the Network Application Lookup wizard:
-
Click + Network Application Lookup.
The Network Application Lookup wizard appears.
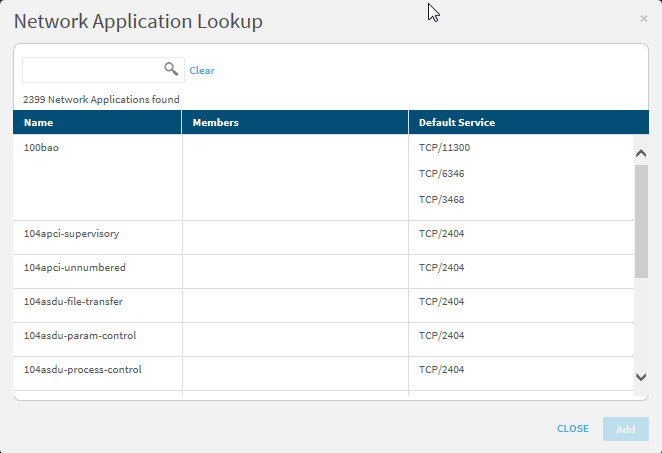
-
To search for network applications, type all or part of an application name in the search box, and press enter.
-
Select one or more applications from the list.
The number of network applications selected appears above the list.
To clear all your selections, click Clear.
-
Click Add.
The selections are added to the field.
Advanced search wizard auto search details
To use the Auto Search:
-
In the
 drop-down menu, select one of the following options:
Search parameter A search will return... Containing the range
All objects that contain the searched content.
Contained within the range
All objects that are entirely contained in the searched content.
Exact address/service match
All objects that are an exact match of the searched content.
Intersection
All objects that have any overlap with the searched content.
Match as object name
All objects whose name contains the searched phrase.
Auto
All objects whose names contain the searched phrase.
If an IP address/range or service definition is entered, then all servers/services which intersect with the given content.
- Type the search criteria into the search box, and click .
- Select one or more objects from the list below the search box.
Note: You may select multiple objects, but if you perform a search after making a selection, the original selection will not stay selected.
-
-
At the top-right, click Clear all filters to clear your search criteria.
-
-
Click Search to perform your search.
-
To return to the Applications page, click Applications in the breadcrumbs trail.
Add applications
This section describes how to add a new application to AppViz manually.
Do the following:
-
Click + Add Application located under the Search bar.Click + New Application located at the bottom-left in the AppViz Applications area.
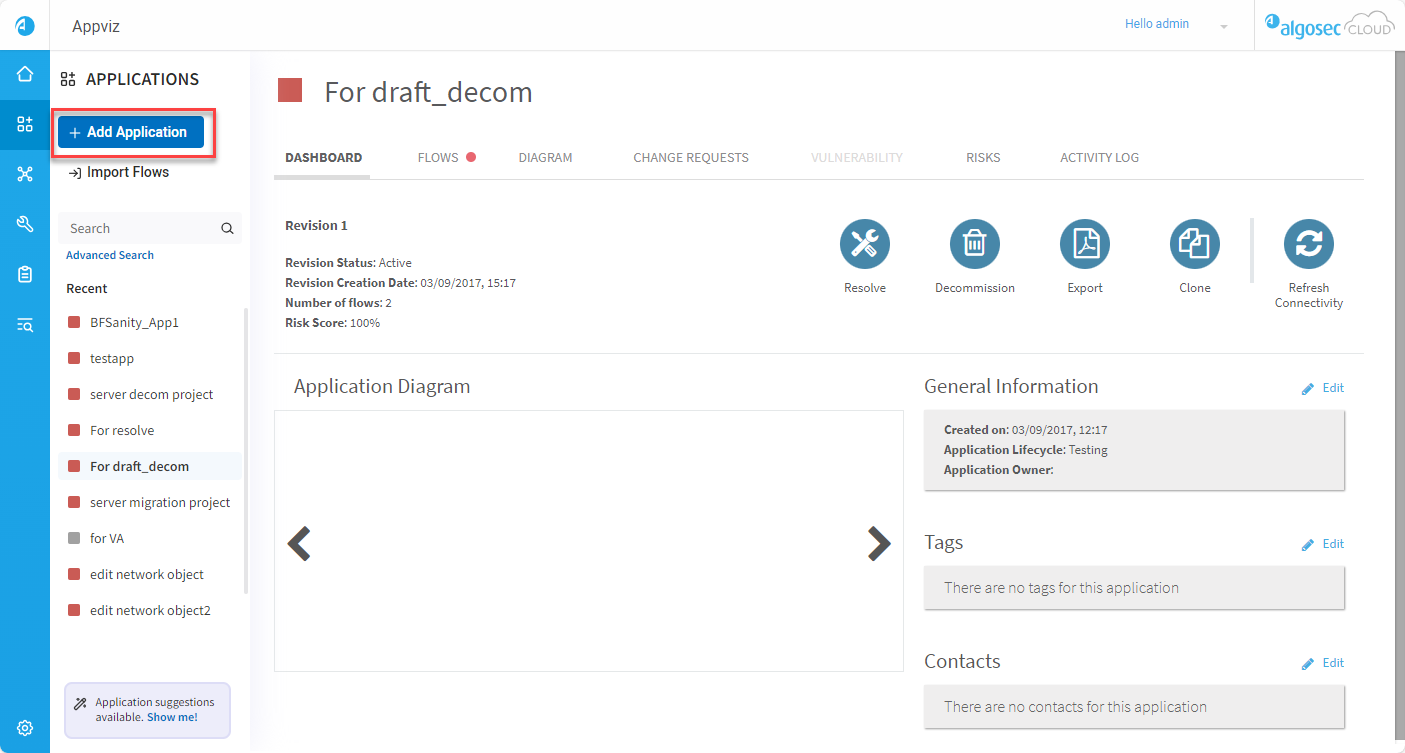
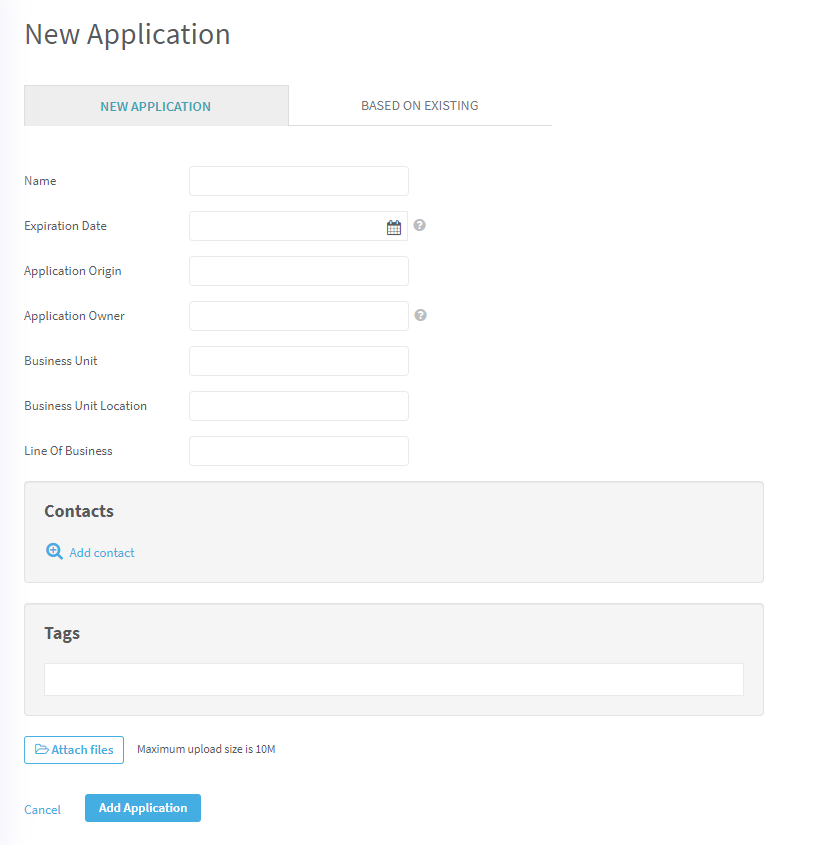
The New Application page appears in the workspace.
The New Application form appears in the workspace.
Note: To return to the Applications page, click Applications in the breadcrumbs trail.

-
[Optional] Create a new application from the New Application tab by filling out the relevant fields (see Business applications) and then skip Step #4 (Clone an existing application),
- [Optional] Clone an existing application:
- Click the Based on existing tab.
- In the Base Application box, type the name of the application to clone. Or, click Application lookup to search for the base application or select from the Application Name list.
Complete or modify the fields as needed:
In this field...
Do this...
Name
Type the name of the application.
Expiration Date
Click the calendar icon to select an expiration date.
Note: Expiration date may be modified in edit mode.
Business Unit
Type the name of the business unit.
Business Unit Location
Type the name of the business unit location.
Line Of Business
Type the line of business.
Business Criticality
Type the criticality of the business.
Business Partner ID
Type the ID of the business partner.
- [Optional] Associate Contacts:
To associate contacts with the application, do the following in the Contacts area:Click Add contact.
The Add contact wizard is displayed.
Do one of the following:
- Select a contact from the Contacts list below the search box.
- Search for a contact, by doing the following:
- Type any part of the contact name in the search box.
- Click .
- Select the contact's role from the Roles list.
- Click Save Changes.
The contact is added to the application.
-
[Optional] Add a tag to the application:
Note: You can only add user-defined tags, not system tags or tags that indicate than an application comes from AI discovery. By definition, non-user-defined tags are automatically added to applications.
-
If you are working from the application's Dashboard tab, click
 . Otherwise, continue to the next step.
The tags field appears in an editable format.
-
Start typing the tag name in the field.
A drop-down list appears with auto-completed options.
If the user has permission to create new tags, the list additionally includes an option to create a new tag with the name you specified and add it to the application.
-
Select the desired tag in the drop-down list.
The tag appears in the field.
-
To de-select a tag, click x.
Note: You can only de-select user-defined tags, not system tags.
-
If desired, repeat the procedure to add additional tags.
-
If you are working from the application's Dashboard tab, click Save Changes. Otherwise, continue with the relevant procedure.
-
- To add an attachment to the application, click Attach files and follow the instructions.
-
Click Add Application.
The application is added.
Import flows
This section describes how to import flows from a CSV file to AppViz without flow optimization.
To import flows with flow optimization, see Import application flows to AppViz from a File.
Note: During the import process:
-
Flows are imported exactly as they appear in the CSV file.
-
During import, if an entity in the CSV file is not found, AppViz skips the row with the unknown entity and provides the user with details why the import of that entity failed.
Do the following:
-
Click Import Flows.

The Import Flows page appears.

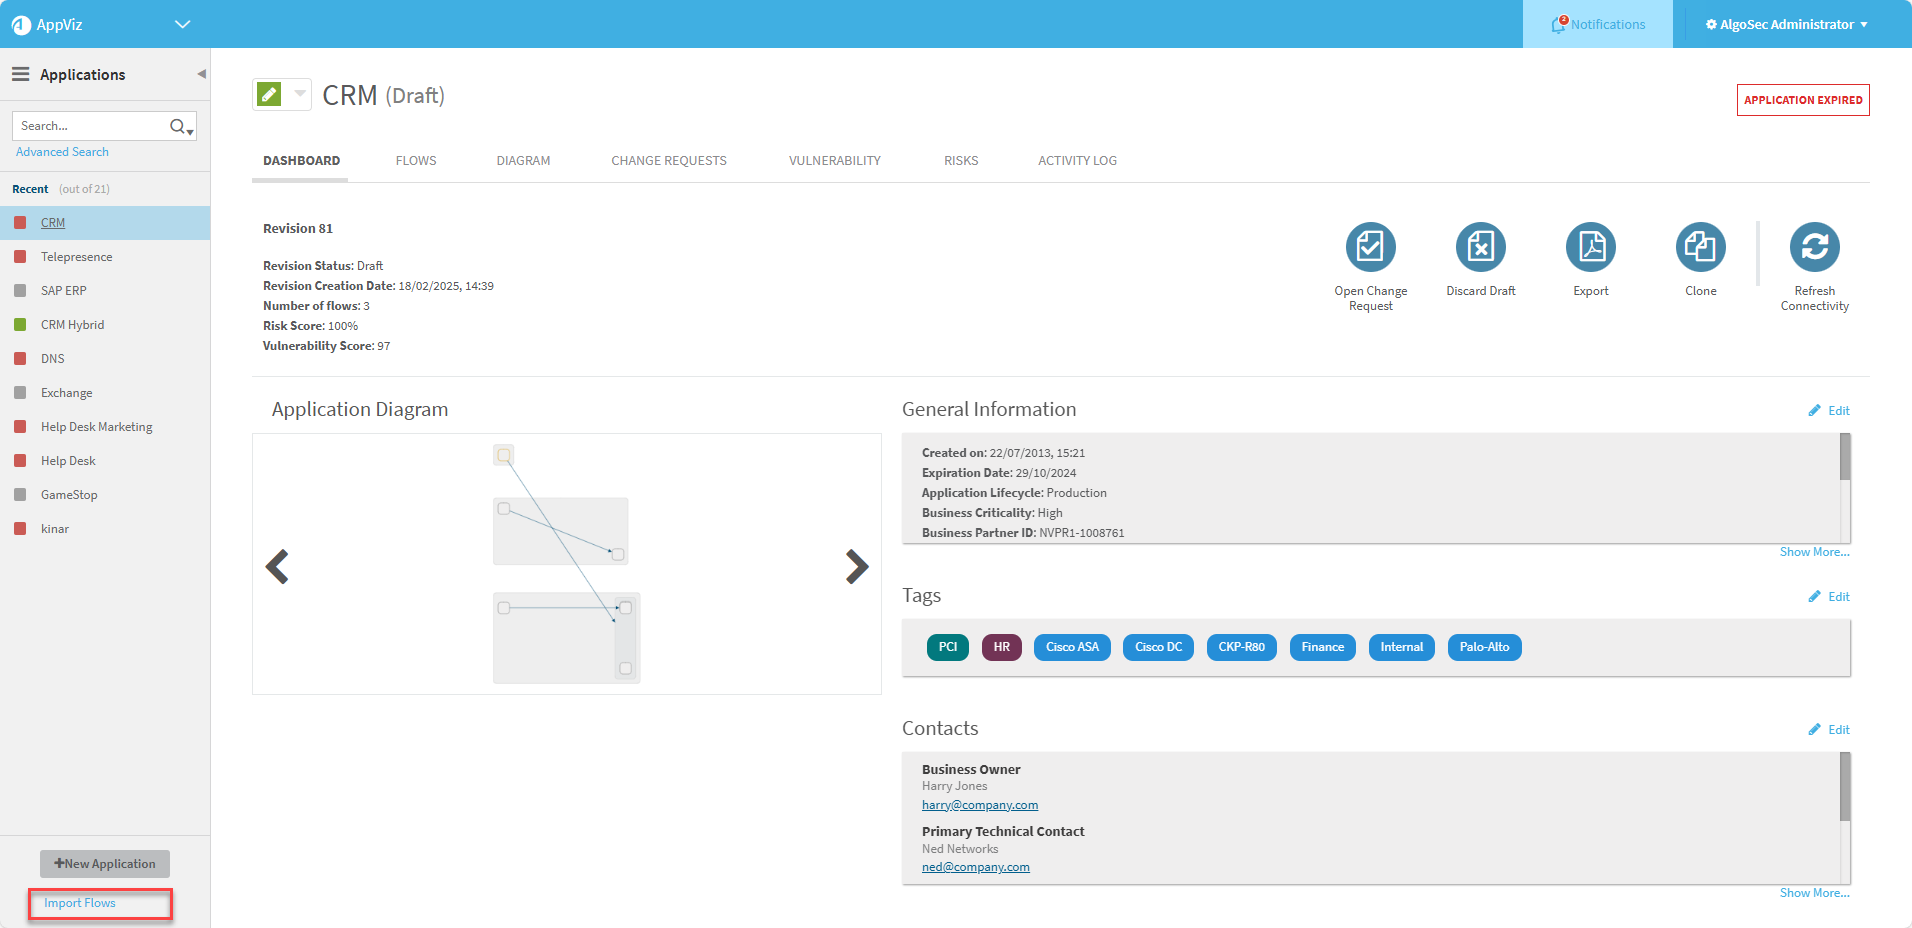
The Import Flows dialog appears.
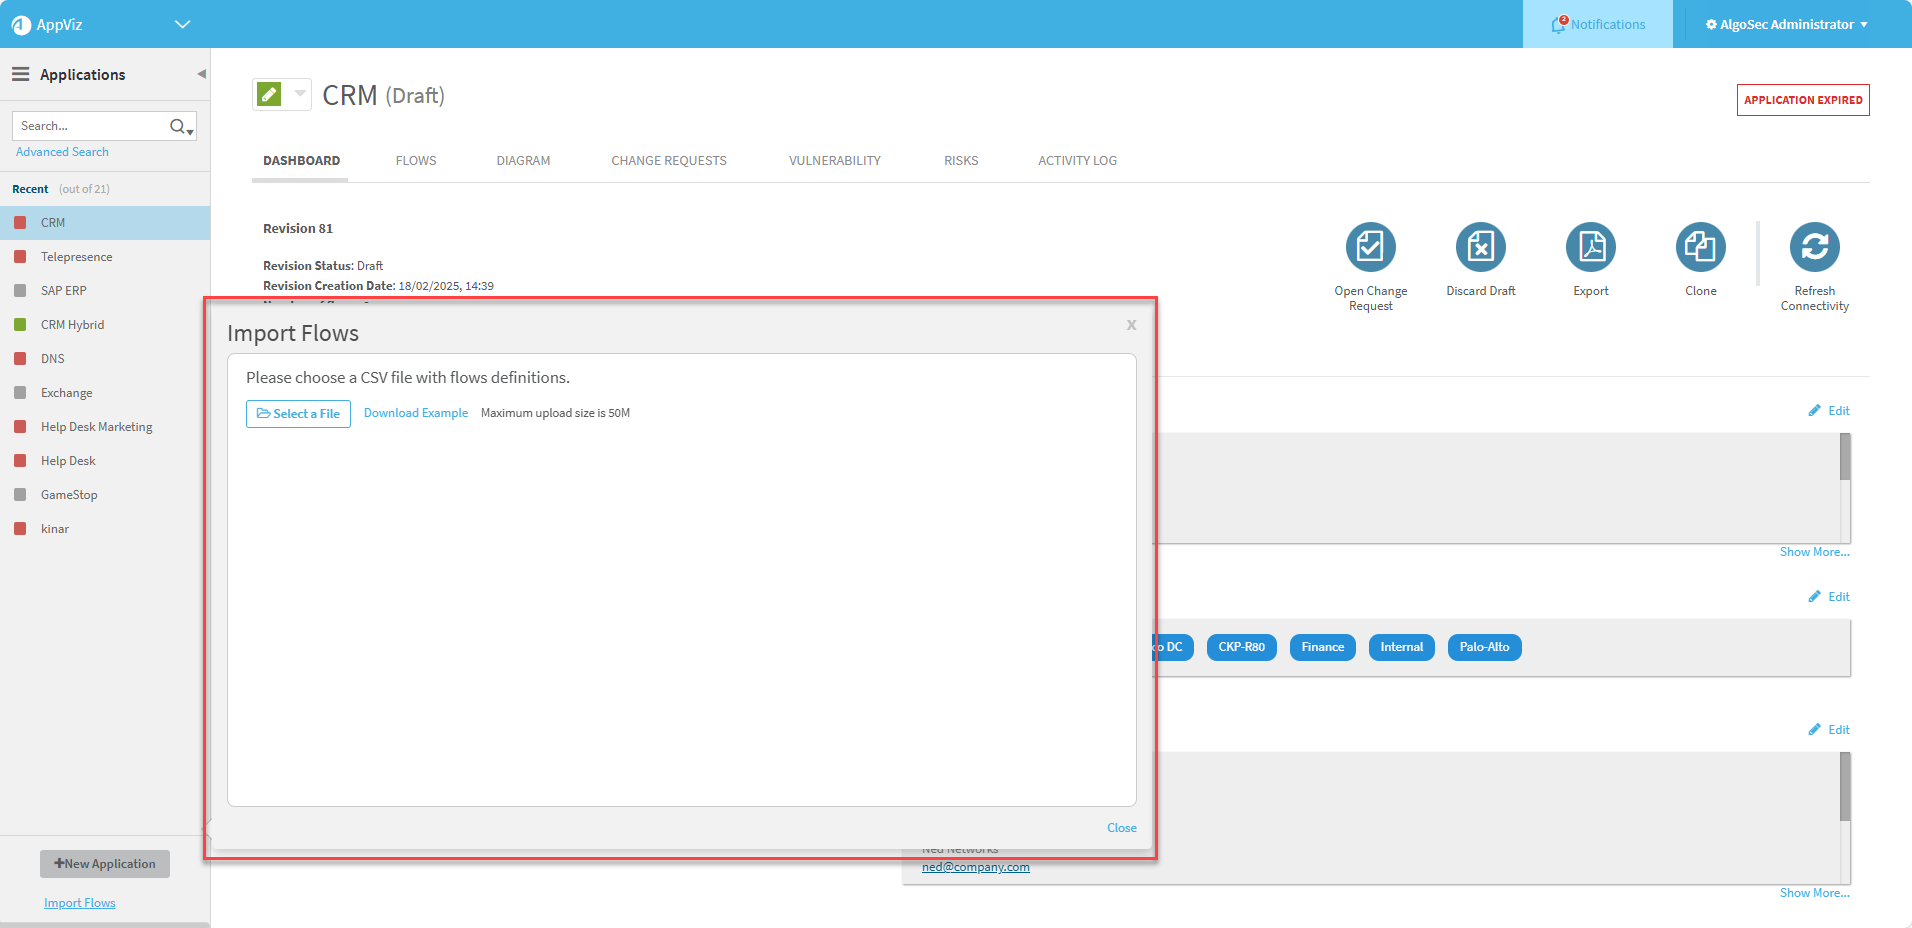
-
(Optional) Download an example CSV file, if needed. Edit it as required. For more details, see Update data via CSV files
Note: If you are working in AFA, export flows directly from the AFAPolicy tab. For details, see Business applications.
-
Click Select File to browse and select the file to import.
-
AppViz displays a summary of the applications and flows found. If AppViz failed to import many lines, you may have a small
 at the end of the line. Click the small to expand the list fully.
To continue with your import, click Next.
-
To return to the Applications page, click Applications in the breadcrumbs trail.
â Next steps:
