Add Check Point devices
Relevant for: AFA Administrators
This topic describes how to add Check Point MDSM, SmartCenter / Gateway, or CMA devices, as well as fields and options shared by all of these device types.
Note: You must also perform procedures on your devices, depending on how you connect to the device from AFA. For details, see Enable data collection for Check Point devices.
Tip: Watch a training video on how AFA can collect data from a few Check Point devices. See Defining security devices in Firewall Analyzer on the AlgoSec portal.
Check Point network connections
The following diagrams shows an ASMS Central Manager or Remote Agent connecting to a Check Point MDSM, CMA, or Smart Center device, and a Check Point Gateway. Check Point versions R80 or higher have an additional connection via HTTP-REST.
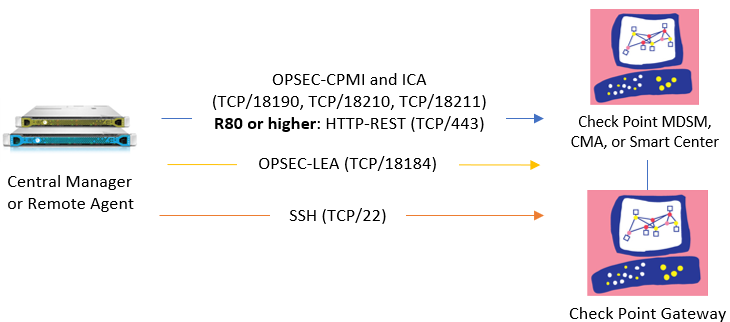
Note: If your CLM/MLM log servers reside on separate hosts, you'll need to connect to these separately from ASMS.
Check Point device permissions
AFA can collect data or logs via SSH or OPSEC. For Check Point versions R80 and higher, you must also define data collection via REST.
ASMS requires the following permissions for each type of connection to your Check Point devices:
ASMS requires minimal read-only CPMI and LEA OPSEC object permissions to connect to Check Point devices, and automatically initiates log collection via the defined LEA connection.
In the Check Point interface, define your permissions as follows:
| CPMI |
Select the following CPMI permissions:
|
| LEA | On the LEA Permissions tab, under Permissions to Read Logs, select Show all log fields. |
Note: Create a separate OPSEC Object and permissions profile for ASMS use only. Do not use Administrator credentials.
For more details, see Create a Check Point OPSEC Certificate for Check Point Devices (R77 and Lower).
ASMS must have SSH access to the relevant management and log devices, such as PV-1, CMA, SmartCenter, external log server, or CLM.
- For SecurePlatform (SPLAT), ASMS must be allowed to switch to expert mode
- For Solaris/RHEL/IPSO, ASMS must connect as the root user
Note: Ensure the same credentials (username and password) are used for both SSH access to the SmartCenter and the SmartConsole GUI login.
Public key authentication is also supported. In such cases, the following permissions are required:
| Read |
AFA requires read permissions on the domain folders, such as $FWDIR/conf or $FWDIR/log. |
| Write |
AFA writes a package containing the required configuration in the /tmp or /var/tmp directory, based on the device platform, such as SP or Solaris. AFA also requires write permissions in the $FWDIR/conf directory for temporary log files. |
| Execute | AFA runs several commands on the management device, including fwm logexport for logs and cpstat for routing. |
For more details, see How to Configure the AlgoSec Firewall Analyzer SSH Client to Use Public Key Authentication in AlgoPedia and Enable data collection for Check Point devices.
When using a Check Point device version R80 or higher, AFA also collects data via REST, in addition to OPSEC or SSH.
Note: For R80 devices version R80.30 and lower, you must manually enable SFTP on the device. To enable SFTP, see Check Point SecureKnowledge article sk82281.
In addition to OSPEC or SSH permissions, ASMS must have permissions to execute REST calls to the Check Point Security Management Server.
- Minimum permissions required is Read Only All.
- When ActiveChange is enabled, the minimum permissions are Read Write All.
For more details, see Enable data collection via REST
Add a Check Point Multi-Domain Security Management device
Check Point Multi-Domain Security Management (MDSM) integrates multiple 'firewalled' networks within a single administrative framework. These devices consolidate multiple SmartCenter Servers, referred to as Customer Management Add-ons (CMAs), on a single host.
AFA analyzes the Filter Module security policy via a secure connection to the MDSM server.
Note: Multi-Domain Security Management, or MDSM, refers to both MDSM and Provider-1 devices.
Do the following:
-
Access the DEVICES SETUP page. For details, see Access the DEVICES SETUP page.
-
In the vendor and device selection page, select Check Point > Multi Domain Security Management (Provider-1).
Configure the fields and options on the page as needed. For details, see Access Information and Geographic Distribution.
-
Click Next.
The fields on the Check Point - Multi-Domain Security Management (Provider-1) - Step 2/3 page differ, depending on whether you selected to connect to the device via SSH or OPSEC.
-
Click Next.
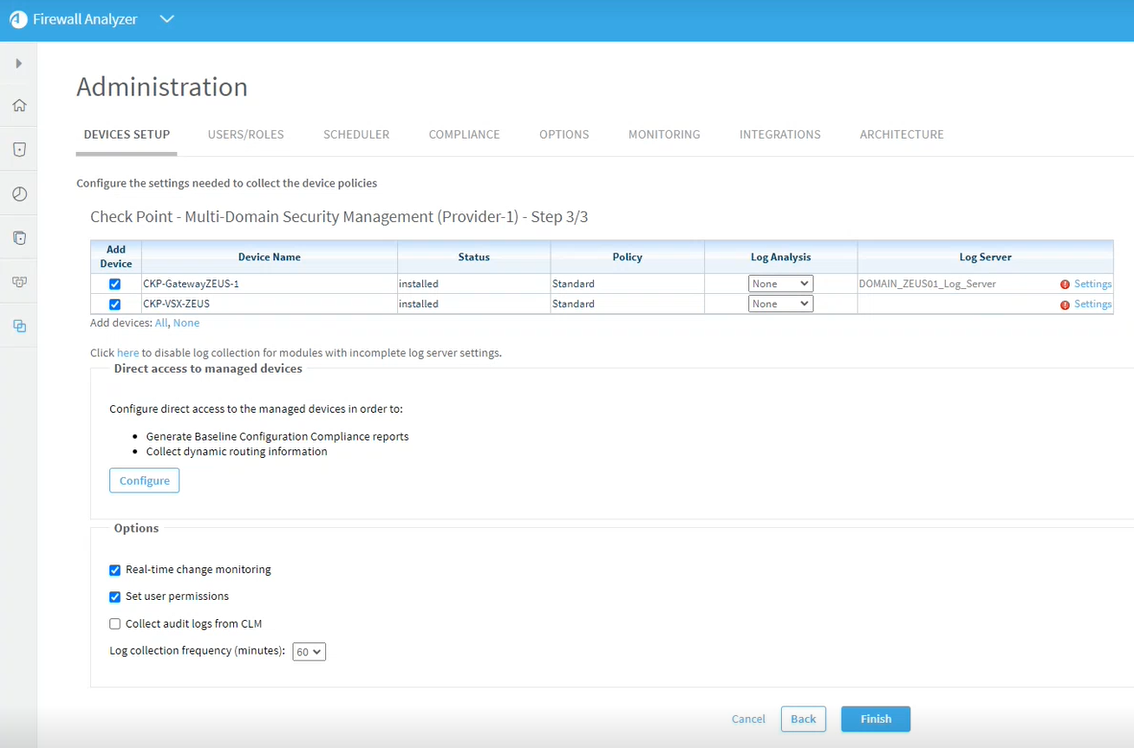
The Check Point - Multi-Domain Security Management (Provider-1) - Step 3/3 page appears.
This page displays a table listing all the devices that are managed by the Check Point MDSM, including standalone devices and virtual systems.
-
 Optional: Configure AFA to use logs created by a managed device or virtual system.
Tip: This enables AFA to detect certain policy optimization information, such as unused rules.
Note: When onboarding virtual systems, Check Point does not automatically add the log server. You need to configure it manually.
Do the following:
-
If the device is not selected, in the Add Device column select the check box next to the device's name.
-
In the Log Analysiscolumn, select one of the following:
-
None. Disables logging
-
Standard. Enables logging
-
Extensive. Enables logging and the Intelligent Policy Tuner.
-
-
In the Log Server column to the right of the log server name, click Settings.
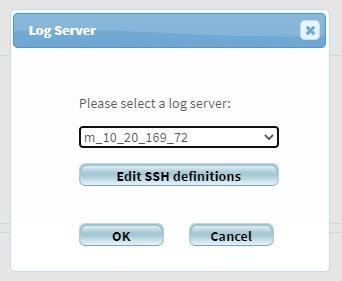
The Log Server dialog appears based on the server type selected in the Connect via field in the Access Information area (configured above).
For SSH log servers
-
Use the dropdown to select the server to use or choose Other and enter the log server's name manually.
-
To edit SSH definitions, click Edit SSH definitions.
The Check Point Log Server SSH Setup dialog appears.

In the Check Point Log Server SSH Setup dialog, do the following:
-
Specify whether this log server is part of a Multi-domain log module (MLM/CLM) or a Stand-alone log server
-
Populate the fields as needed. For details, see Log Server fields.
-
(Optional) Click Test Connectivity to check the connection is working correctly.
-
Click OK.
-
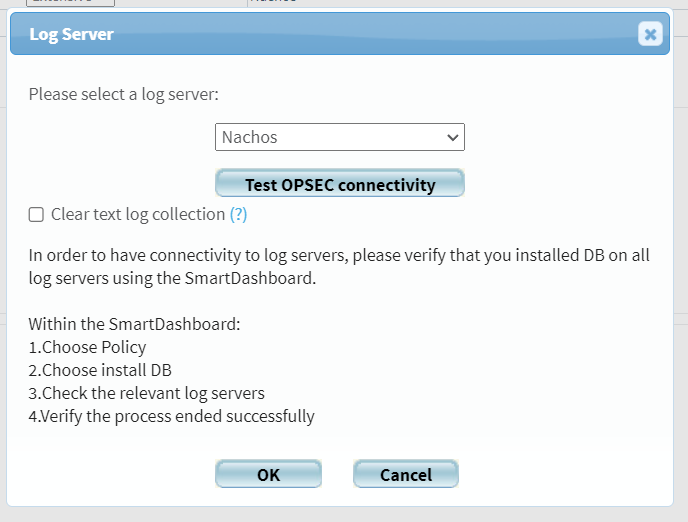
For OPSEC log servers
-
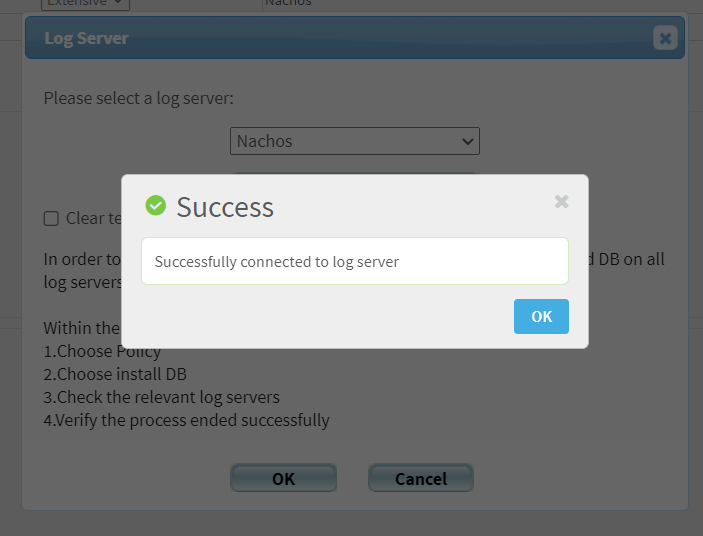
To test OPSEC connectivity to the defined log server, click Test OPSEC connectivity.
A message informs you whether AFA connected to the log server successfully.
-
Click OK.
-
-
Click OK.
-
-
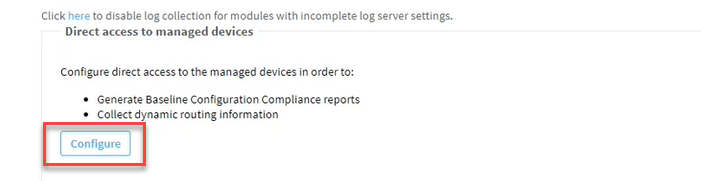
Optional: Configure direct access to managed devices
This section describes how to enable collection of dynamic routing information and generate baseline configuration compliance reports.
Note: Enabling direct access creates a direct SSH connection to the device even when using OPSEC to connect to the device.
Do the following:
-
In the Direct access to managed devices area, click Configure.
-
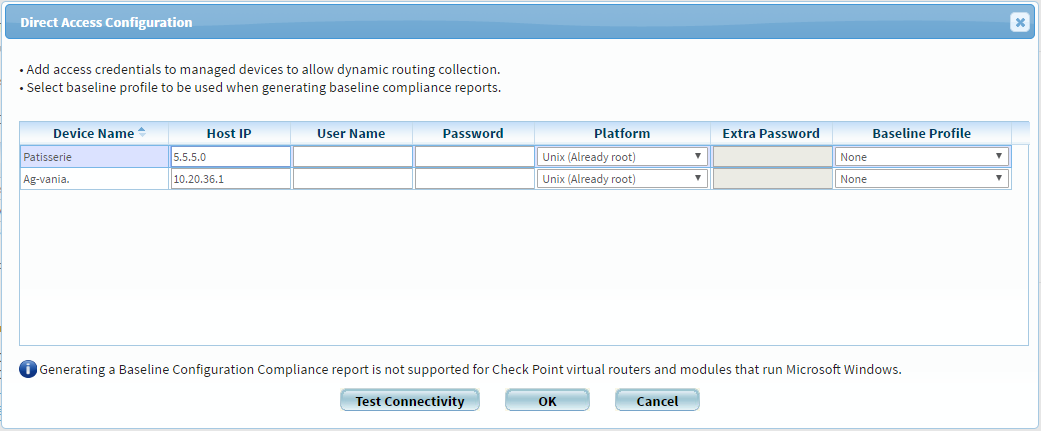
The Direct Access Configuration dialog is displayed.
-
Complete the fields as needed. For details, see Direct Access Configuration fields.
- (Optional) Click Test Connectivity to check the connection is working correctly.
- Click OK.
-
-
In the Options area, complete the remaining fields as needed. For details, see Additional Check Point options.
-
Click Finish.
-
If you selected Set user permissions in the Options area, the Edit users dialog box appears.
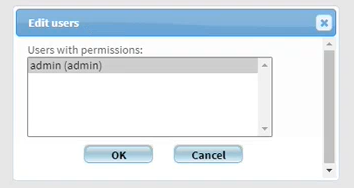
In the list of users displayed, select one or more users who will have access to this new device and its reports. To select multiple users, press the CTRL button while selecting.
Click OK to close the dialog.
A success message appears to confirm that the device is added.
Add a Check Point SmartCenter/Gateway
Check Point products are based on a distributed architecture, where a typical Check Point deployment is composed of a Filter Module or device and the SmartCenter Server.
- A standalone deployment is the simplest deployment where the SmartCenter Server and the Filter Module are installed on the same machine.
- A distributed deployment is a more complex deployment where the Filter Module and the SmartCenter Server are deployed on different machines.
Do the following:
-
Access the DEVICES SETUP page. For details, see Access the DEVICES SETUP page.
-
In the vendor and device selection page, select Check Point > Security Management (SmartCenter).
Configure the fields and options on the page as needed. For details, see Access Information and Geographic Distribution.
-
Click Next.
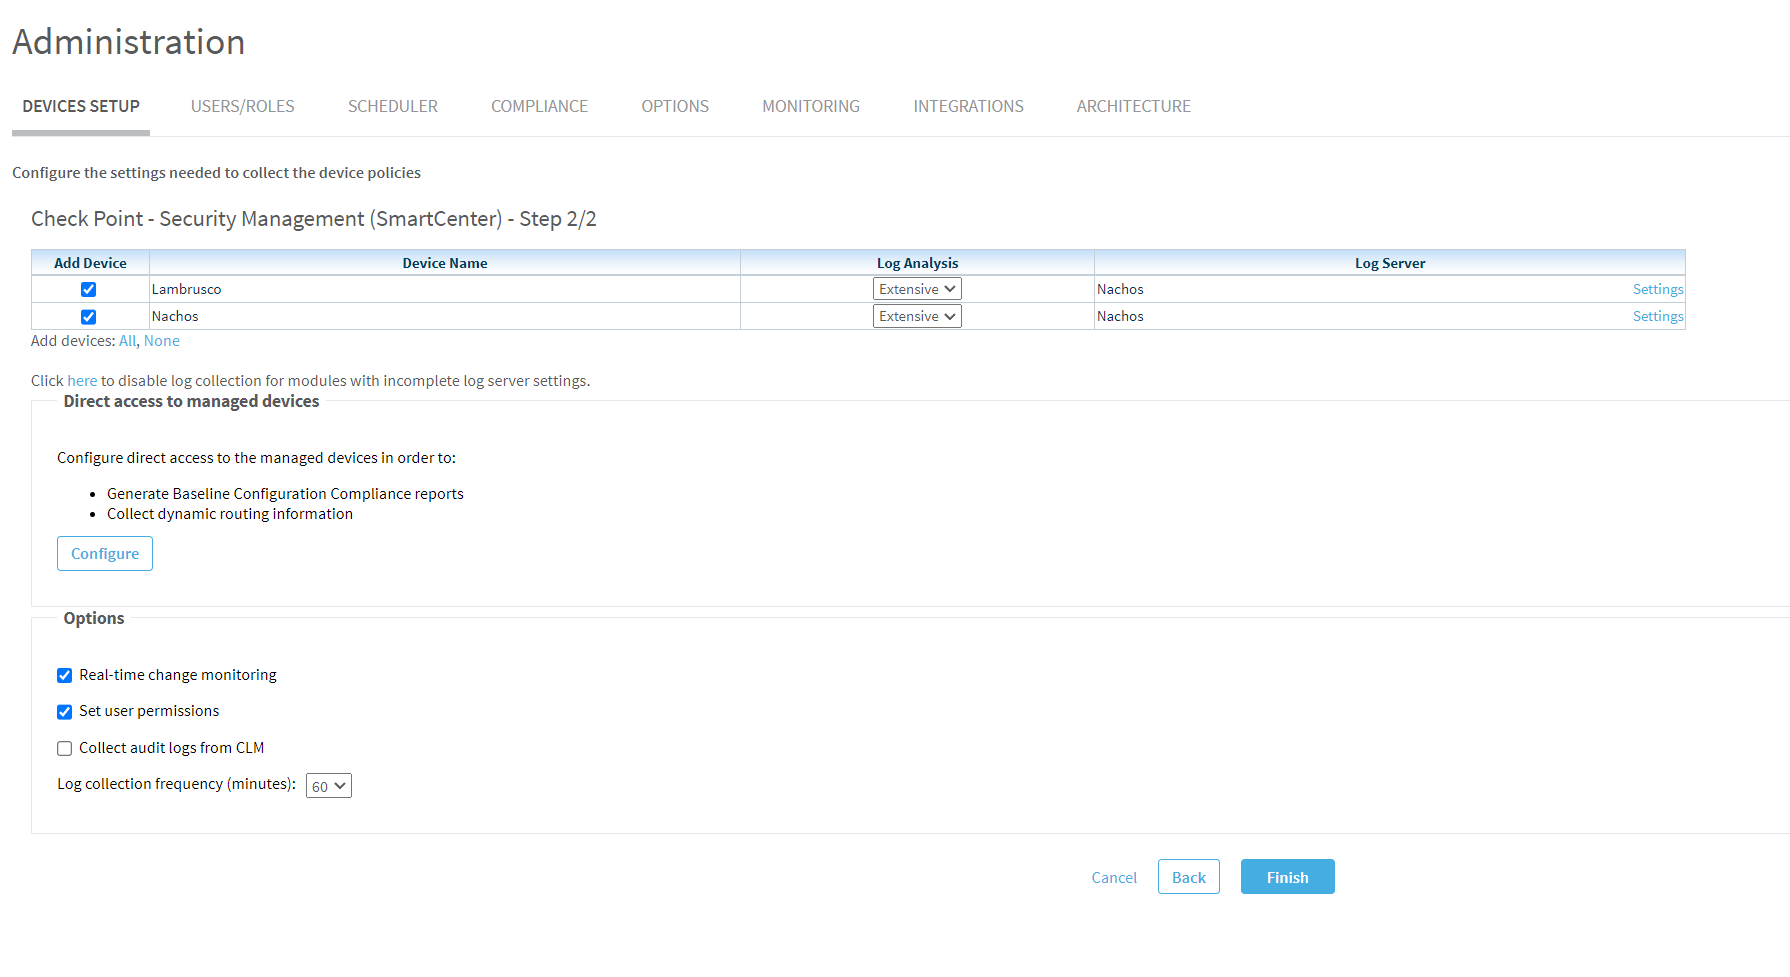
The Check Point - Security Management (SmartCenter) - Step 2/2 page appears, displaying a table that lists all the devices that are managed by the Check Point SmartCenter/Gateway, including standalone devices and virtual systems.
-
Optional: Configure AFA to use logs created by a managed device or virtual system.
Tip: This enables AFA to detect certain policy optimization information, such as unused rules.
Note: When onboarding virtual systems, Check Point does not automatically add the log server. You need to configure it manually.
Do the following:
-
If the device is not selected, in the Add Device column select the check box next to the device's name.
-
In the Log Analysiscolumn, select one of the following:
-
None. Disables logging
-
Standard. Enables logging
-
Extensive. Enables logging and the Intelligent Policy Tuner.
-
-
In the Log Server column to the right of the log server name, click Settings.
The Log Server dialog appears based on the server type selected in the Connect via field in the Access Information area (configured above).
For SSH log servers
-
Use the dropdown to select the server to use or choose Other and enter the log server's name manually.
-
To edit SSH definitions, click Edit SSH definitions.
The Check Point Log Server SSH Setup dialog appears.
In the Check Point Log Server SSH Setup dialog, do the following:
-
Specify whether this log server is part of a Multi-domain log module (MLM/CLM) or a Stand-alone log server
-
Populate the fields as needed. For details, see Log Server fields.
-
(Optional) Click Test Connectivity to check the connection is working correctly.
-
Click OK.
-
For OPSEC log servers
-
To test OPSEC connectivity to the defined log server, click Test OPSEC connectivity.
A message informs you whether AFA connected to the log server successfully.
-
Click OK.
-
-
Click OK.
-
-
Optional: Configure direct access to managed devices
This section describes how to enable collection of dynamic routing information and generate baseline configuration compliance reports.
Note: Enabling direct access creates a direct SSH connection to the device even when using OPSEC to connect to the device.
Do the following:
-
In the Direct access to managed devices area, click Configure.
-
The Direct Access Configuration dialog is displayed.
-
Complete the fields as needed. For details, see Direct Access Configuration fields.
- (Optional) Click Test Connectivity to check the connection is working correctly.
- Click OK.
-
-
In the Options area, complete the remaining fields as needed. For details, see Additional Check Point options.
-
Click Finish.
-
If you selected Set user permissions in the Options area, the Edit users dialog box appears.
In the list of users displayed, select one or more users who will have access to this new device and its reports. To select multiple users, press the CTRL button while selecting.
Click OK to close the dialog.
A success message appears to confirm that the device is added.
Add a Check Point CMA
You can add single Customer Management Add-ons (CMAs) using the following procedure.
Tip:
- Add multiple CMAs at once by adding a Check Point MDSM. For details, see Add Check Point devices.
Do the following:
-
Access the DEVICES SETUP page. For details, see Access the DEVICES SETUP page.
-
In the vendor and device selection page, select Check Point > Single CMA.
Configure the fields and options on the page as needed. For details, see Access Information and Geographic Distribution.
-
Click Next.
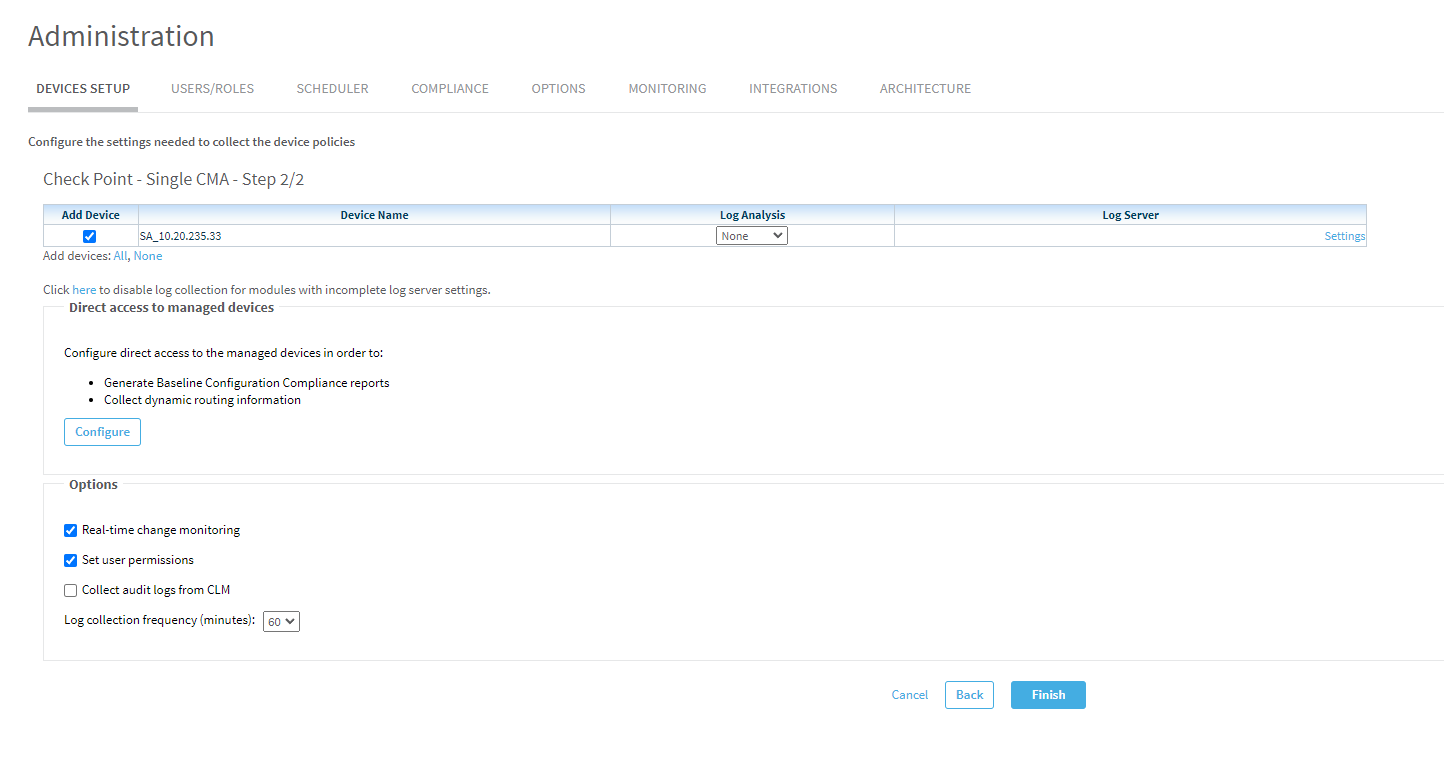
The Check Point - Single CMA - Step 2/2 page appears, displaying a table that lists all the devices that are managed by the Check Point CMA, including standalone devices and virtual systems.
-
Optional: Configure AFA to use logs created by a managed device or virtual system.
Tip: This enables AFA to detect certain policy optimization information, such as unused rules.
Note: When onboarding virtual systems, Check Point does not automatically add the log server. You need to configure it manually.
Do the following:
-
If the device is not selected, in the Add Device column select the check box next to the device's name.
-
In the Log Analysiscolumn, select one of the following:
-
None. Disables logging
-
Standard. Enables logging
-
Extensive. Enables logging and the Intelligent Policy Tuner.
-
-
In the Log Server column to the right of the log server name, click Settings.
The Log Server dialog appears based on the server type selected in the Connect via field in the Access Information area (configured above).
For SSH log servers
-
Use the dropdown to select the server to use or choose Other and enter the log server's name manually.
-
To edit SSH definitions, click Edit SSH definitions.
The Check Point Log Server SSH Setup dialog appears.
In the Check Point Log Server SSH Setup dialog, do the following:
-
Specify whether this log server is part of a Multi-domain log module (MLM/CLM) or a Stand-alone log server
-
Populate the fields as needed. For details, see Log Server fields.
-
(Optional) Click Test Connectivity to check the connection is working correctly.
-
Click OK.
-
For OPSEC log servers
-
To test OPSEC connectivity to the defined log server, click Test OPSEC connectivity.
A message informs you whether AFA connected to the log server successfully.
-
Click OK.
-
-
Click OK.
-
-
Optional: Configure direct access to managed devices
This section describes how to enable collection of dynamic routing information and generate baseline configuration compliance reports.
Note: Enabling direct access creates a direct SSH connection to the device even when using OPSEC to connect to the device.
Do the following:
-
In the Direct access to managed devices area, click Configure.
-
The Direct Access Configuration dialog is displayed.
-
Complete the fields as needed. For details, see Direct Access Configuration fields.
- (Optional) Click Test Connectivity to check the connection is working correctly.
- Click OK.
-
-
In the Options area, complete the remaining fields as needed. For details, see Additional Check Point options.
- Click Finish.
-
If you selected Set user permissions in the Options area, the Edit users dialog box appears.
In the list of users displayed, select one or more users who will have access to this new device and its reports. To select multiple users, press the CTRL button while selecting.
Click OK to close the dialog.
A success message appears to confirm that the device is added.
Check Point fields and options
Check Point devices include the following types of fields and options:
|
Host |
Enter the host name or IP address of the device. |
|
R80 or higher |
Select this option for device versions R80 or higher. For R80 devices, you must configure the Management API Settings of the device to accept API calls from the IP address of the AlgoSec server. For more information, see Enable data collection via REST. |
|
Connect via |
Specify how AFA should connect to the device based on the device version by selecting one of the following:
Note: For Windows environments, only OPSEC is supported. Tip: Configure AFA to connect to the device using SSH with Public-Key authentication. To do so, select the Use public key authentication in data collection check box in the General sub-tab of the Options tab in the Administration area. For details, see Define AFA preferences. |
|
User Name / Password |
Type the username and password to access the device. These fields only appear if you selected R80 or higher or you selected SSH in the Connect via area. For more details, see Required device permissions. |
|
SecurePlatform |
Choose this option to specify that the device is installed on a Check Point SecurePlatform operating system. You must complete the Expert Password field. This field only appears if you selected SSH in the Connect via area. |
|
Expert Password |
Type the expert password, which allows access to all the functions on the SmartCenter server required for this process. This field only appears if you selected SSH in the Connect via area. |
|
Solaris / RedHat Linux |
Choose this option to specify that the device is installed on a Solaris or RedHat Linux operating system. This field only appears if you selected SSH in the Connect via area. |
|
User credentials above are for root user |
Select this option to specify that the username and password entered in the User Name and Password fields are the credentials for the Solaris root user. If you clear this option, you must complete the Root Password field. This field only appears if you selected SSH in the Connect via area. |
|
Root Password |
Type the root password for Solaris. This field only appears if you selected SSH in the Connect via area. |
|
High Availability |
Select this option to configure High Availability for CMAs. Important: AFA connects to the HA cluster using the active IP address, not the virtual IP address. You must configure access rules for each device in the cluster to allow this traffic. This field only appears if you selected OPSEC in the Connect via area. It is not relevant for Check Point MDSM. |
|
Secondary Security Management (SmartCenter) |
Type the secondary CMA. This field only appears if you selected OPSEC in the Connect via area. It is not relevant for Check Point MDSM. |
In the Device managed by field, select the remote agent that should perform data collection for the device.
To specify that the device is managed locally, select Central Manager.
For more details, see Configure a distributed architecture.
Select the log collection method to use.
If you choose SSH, you must enable AFA to analyze application control traffic logs. For more details, see Enable data collection for Check Point devices. If you do not perform this step, then information related to application control traffic will not appear in the device report's Policy Optimization page.
This area enables you to specify which certificate to use for OPSEC access to the device.
For more information, see Enable data collection via OPSEC.
This area only appears if you selected OPSEC in the Connect via area.
Select to Enable ActiveChange to enable ActiveChange for the device.
The ActiveChange License Agreement appears. Select the I agree checkbox, and then click OK.
For more details, see Implement changes with ActiveChange.
Check Point log server fields include the following:
|
Host (MLM) |
Type the host name or IP address of the log server. |
|
Username |
Type the username to use for SSH access to the log server. |
|
Password |
Type the password to use for SSH access to the log server. |
|
Secure Platform |
Choose this option to specify that the log server is installed on a Check Point SecurePlatform operating system. You must complete the Expert Password field. |
|
Expert Password |
Type the expert password, which allows access to all the functions on the log server required for this process. |
|
Solaris |
Choose this option to specify that the log server is installed on a Solaris operating system. |
|
User credentials above are for root user |
Select this option to specify that the username and password entered in the Username and Password fields are the credentials for the Solaris root user. If you clear this option, you must complete the Root Password field. |
|
Root Password |
If you use a user other than "root" for accessing the Solaris OS, type the root password for Solaris. |
|
Test Connectivity |
Click this button to test connectivity to the defined log server. A message informs you whether AFA connected to the log server successfully. |
Check Point direct access configuration fields include the following:
|
Host IP |
Type the IP address of the device. |
|
User Name |
Type the username to access the device. |
|
Password |
Type the password to access the device. |
|
Platform |
Select the device's platform. This field only appears for Check Point devices. |
|
Extra Password |
Type the password to use for running OS commands on the device. This field only appears for Check Point devices. |
|
Baseline Profile |
Select the baseline compliance profile to use. The drop-down list includes all baseline compliance profiles in the system. For more information on baseline compliance profiles and instructions for adding new baseline compliance profiles, see Customize baseline configuration profiles. To disable Baseline Compliance Report generation for this device, select None. |
|
Test Connectivity |
Click this button to test connectivity to the defined device. A message informs you whether AFA connected to the device successfully. |
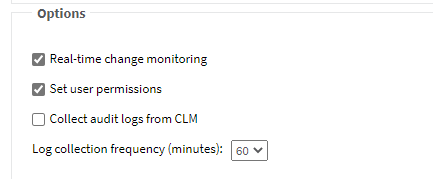
Check Point devices have the following additional options:
| Real-time change monitoring |
Select to enable real-time alerting upon configuration changes. For more details, see Configure real-time monitoring. |
| Set user permissions | Select to set user permissions for this device |
| Collect audit logs from CLM |
Select to collect audit logs from a CLM. Note: When this option is enabled, all modules must be configured to collect logs from the same CLM. |
| Log collection frequency | Enter the interval of time in minutes, at which AFA should collect logs for the Check Point device. |
Configure one-armed mode manually
AFA automatically identifies Check Point CloudGuard devices in one-armed mode, when the device has a single interface. If your device has multiple interfaces and one-armed mode is not identified automatically, configure this for your device manually.
Do the following:
-
On the AFA machine, access your device configuration meta file as follows:
/home/afa/.fa/firewalls/<device_name>/fwa.meta
where <device_name> is the name of the device listed. If you device is listed multiple times, enter the longer name.
-
On a new line, enter:
is_steering_device=yes
- Run an analysis on the device to update the device data in AFA.
â See also:
