Regenerating the Onboarding API Access Key
If the API Access Key used for cloud onboarding is compromised, you can regenerate it at any time. After regenerating the key, you must update your cloud configuration so AlgoSec can continue communicating with your cloud accounts.
This topic explains when key regeneration is required, what must be updated, and the steps needed for AWS, Azure, and Google Cloud.
When to Regenerate the API Access Key
You may need to regenerate the onboarding API Access Key when:
- The key credentials (Client ID and Secret) are suspected or confirmed to be compromised.
- Internal security rotation policies require issuing a new key.
- You want to invalidate old or unused onboarding credentials.
Regenerating the Key
Do the following:
- Open ACE.
- Navigate to Settings > Access Management > API Access Keys.
- Select the key used for onboarding (typically named onboarding). Click on the vertical ellipsis
 to the right of the access key.
 - Click Regenerate. A new Client ID and Client Secret is generated.
-
Go to Updating AWS After Regenerating the Key or Updating Azure and Google Cloud for next steps.
Updating AWS After Regenerating the Key
When the onboarding key is regenerated, AWS deployments must be updated with the new Client ID and Client Secret.
Tip: After the onboarding key is regenerated, you can always get the new Client ID and Client Secret by clicking 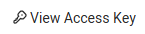 on the Onboarding page.
Using the CloudFormation Wizard (recommended)
Do the following:
-
After regenerating the onboarding API Access Key, re-run the AWS Onboarding Wizard:
-
In the ACE
 Settings area, click ONBOARDING.
 -
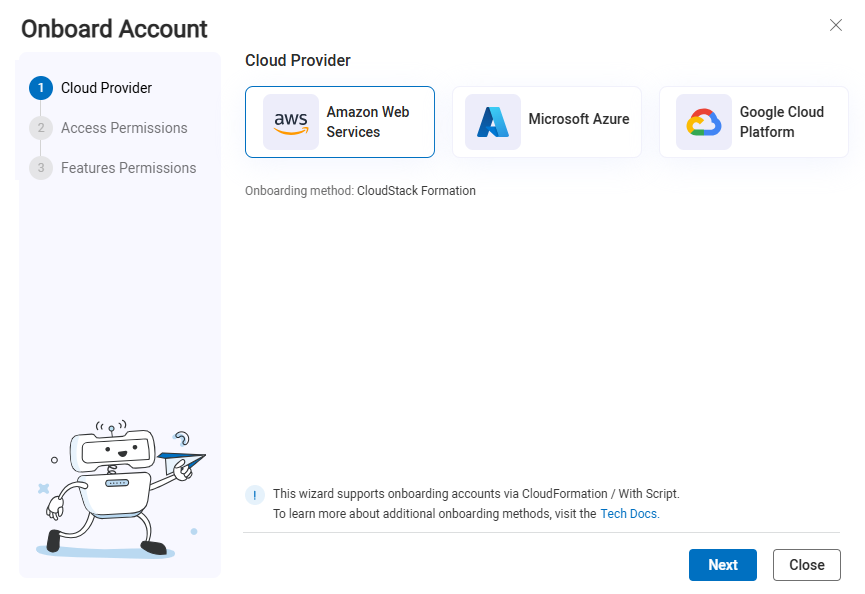
On the Onboarding Management page that opens, click +Onboard Accounts. The Onboard Account Wizard opens.
-
Click the
 Amazon Web Services button and click Next. The AWS Onboarding Wizard Access Permissions step opens.
 -
Click Next. The Features Permissions step of the wizard opens.
-
-
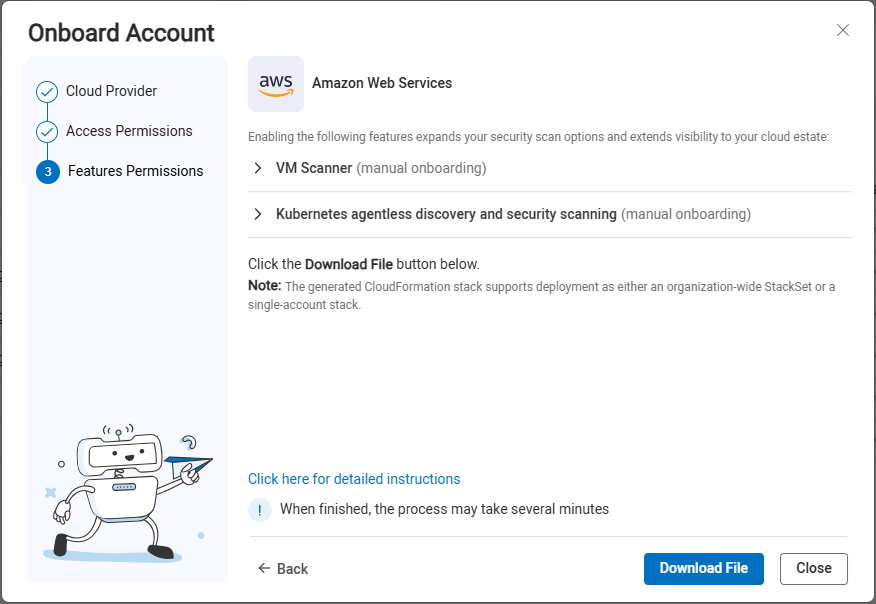
Click Next. The Stack Deployment step of the wizard opens.
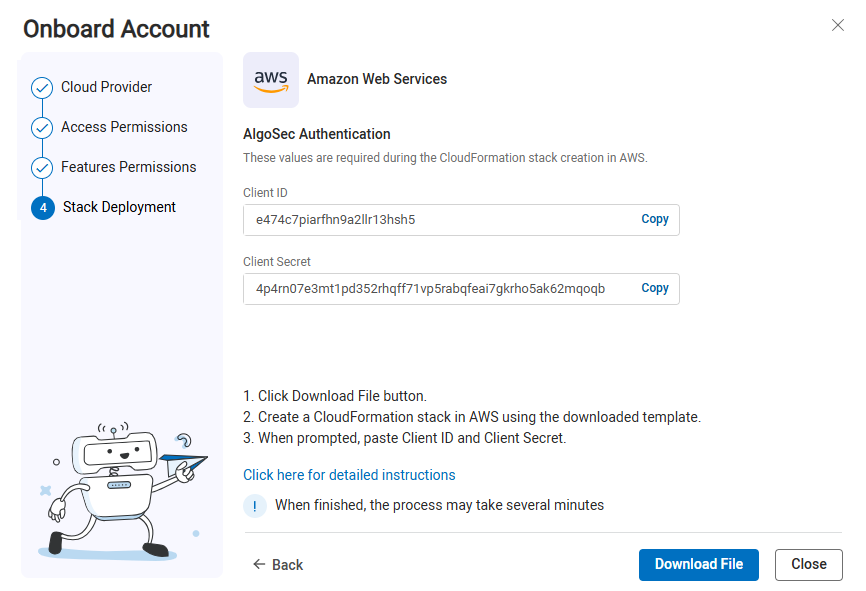
- Click Download File. The CloudFormation template file is downloaded to your machine. You will use it later in these steps.
-
-
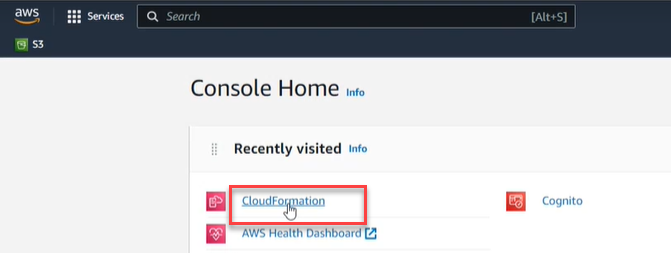
Log in to the AWS Console Home.
-
In the AWS Console Home, click CloudFormation.
-
 To
To -
Click Stacks.

-
-
Select Replace Existing Template.
-
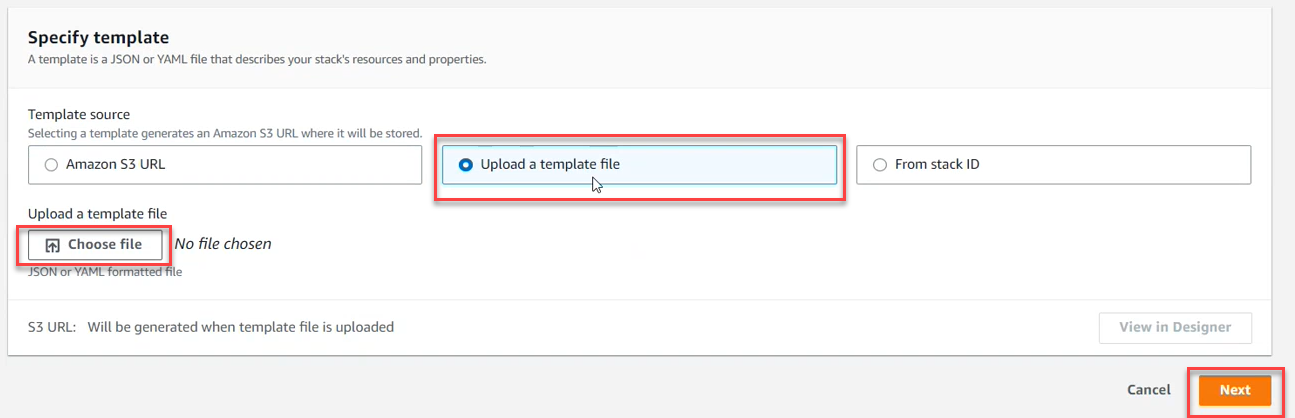
In the Specify Template section, click Upload a Template File. Click Choose file. Browse and select the CloudFormation Template that you downloaded previously. Then click Next.
-
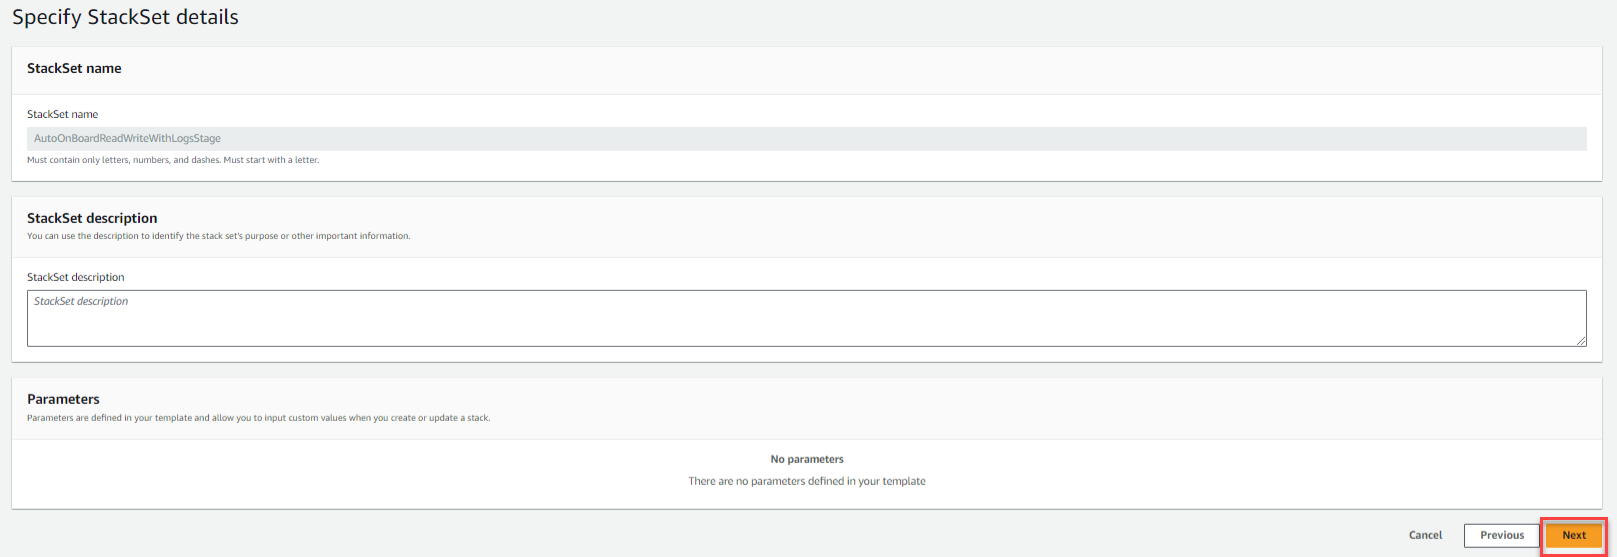
In the Specify Stack details section,

-
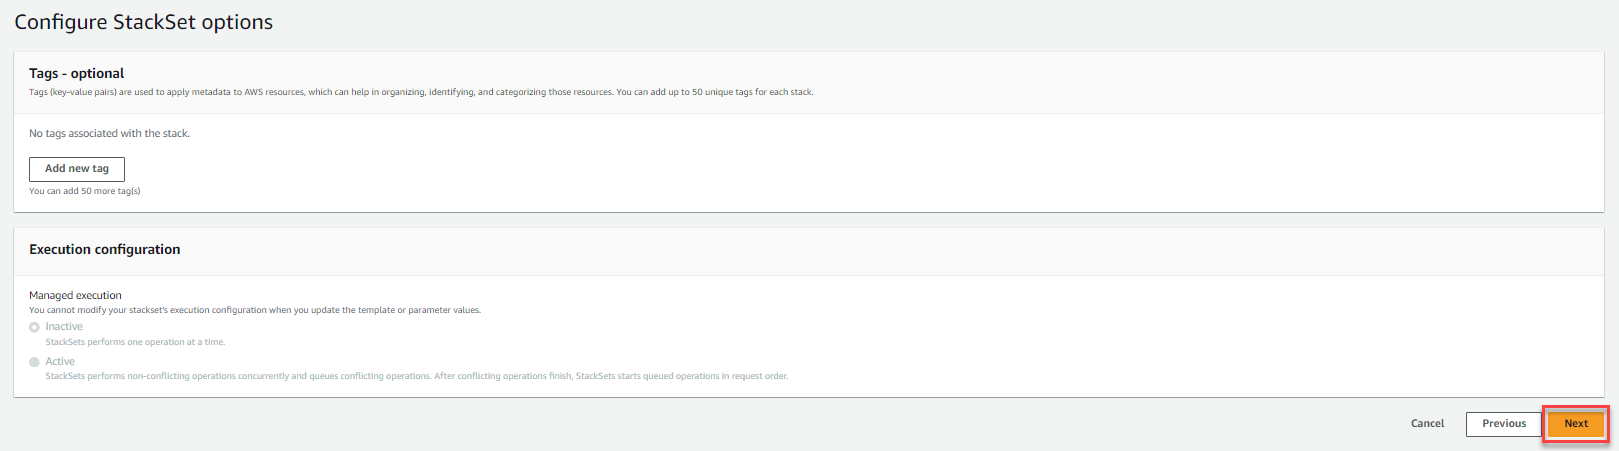
On the Configure Stack options screen, click Next.

-
Review the Stack. Select I acknowledge that AWS CloudFormation might create IAM resources.

-
Click Submit. It may take several minutes for the Stack to be
To -
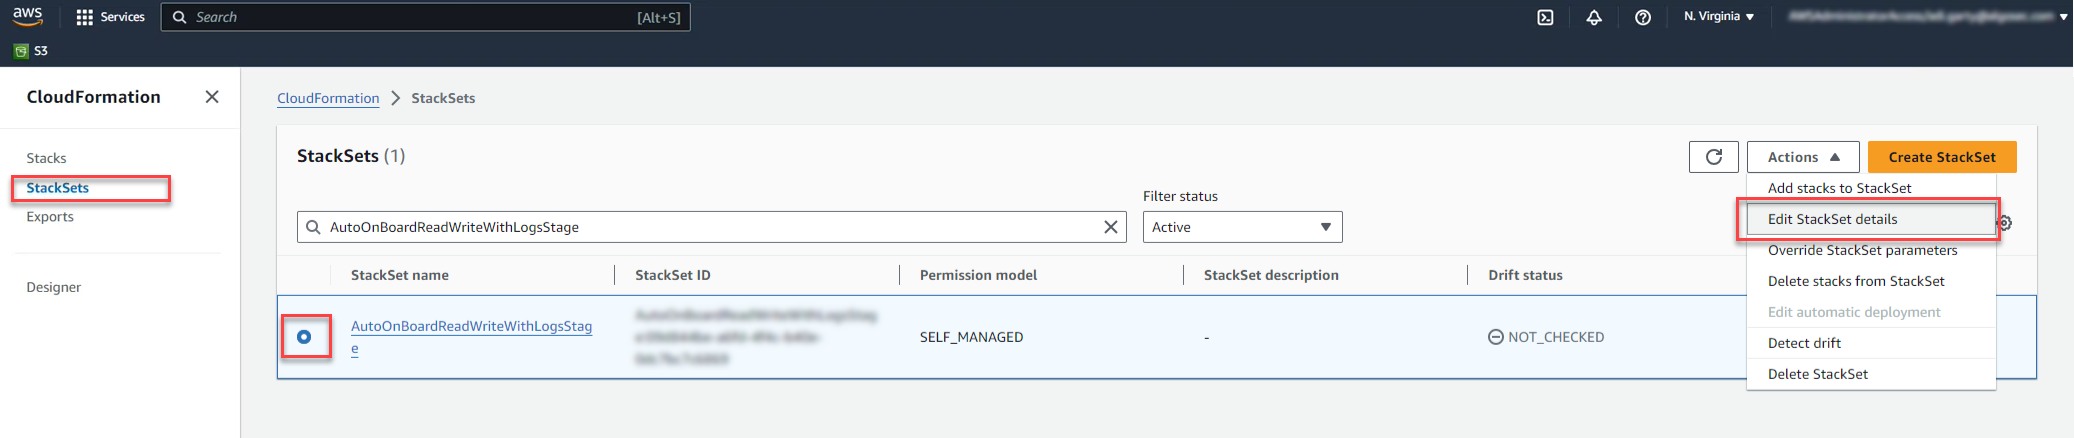
Click Stack Sets.
-
-
In the Prerequisite - Prepare template section, click Replace current template. Select Upload a Template File. Click Choose File. Select the file from the list and click Next.

-
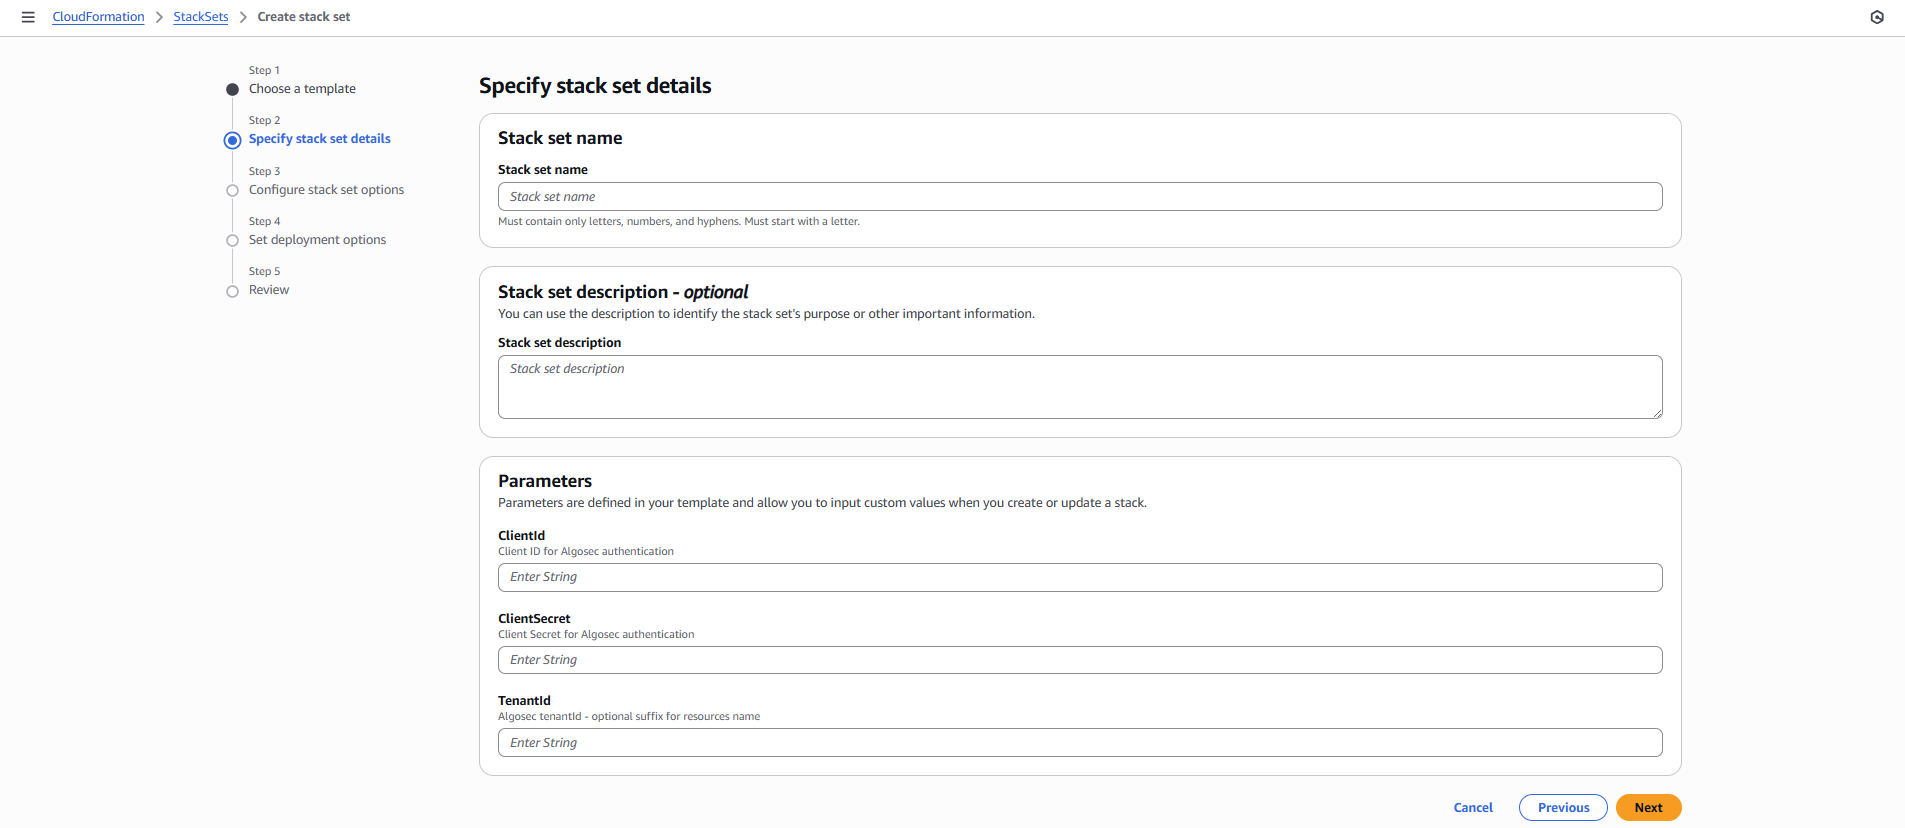
In the Specify Stack Set details section, paste the
The Configure Stack Set options screen appears.
-
On the Configure Stack Set options screen, click Next.
The Set Deployment Options section appears.
-
In Set Deployment Options, click either: Deploy to organizational Units (OUs) or Deploy to accounts. Update fields as required.
-
In the Specify Regions section, select the region(s) where the stacks

-
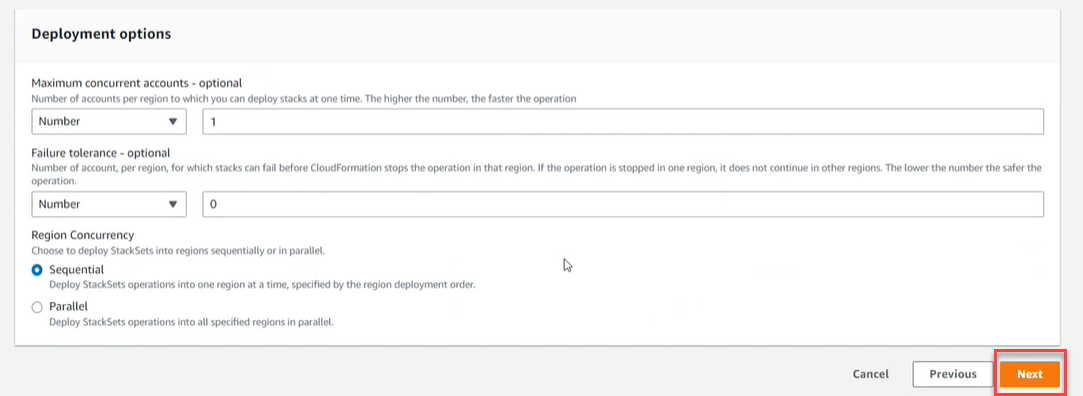
Set Deployment Options based on the needs and requirements of your system. Then click Next.
-
Review the StackSet. Select I acknowledge that AWS CloudFormation might create IAM resources.
-
Click Submit. It may take several minutes for the StackSets to be
-
-
Update or recreate the CloudFormation stack using the new template.
Updating the stack ensures that the new credentials are applied to all AWS components managed by AlgoSec.
Using Terraform or the API Onboarding Methods
For Terraform-based or API-based deployments, only If CD Mitigation is enabled:
Do the following:
- Log in to the AWS Console Home.
- Go to the Parameter Store, My Parameters tab.
-
Update the parameter values with the new Client ID and Client Secret;
-
/algosec/<algosec_tenant_id>/clientId
-
/algosec/<algosec_tenant_id>/clientSecret
-
Updating Azure and Google Cloud
Updating the onboarding API Access Key is only required when you use the Cloud Discovery Mitigation (CD Mitigation) feature in ACE Cloud App Analyzer.
-
If CD Mitigation is not enabled for the account, no further action is required.
-
If CD Mitigation is enabled, continue with one of the following as required:
Using the Wizard
Do the following:
- Re-onboard the subscription or project using the wizard. See To onboard Azure resources | With script or To onboard Google Cloud resources | With script.
This automatically updates CD Mitigation credentials.
For Manual Update (No Script), Terraform and API Onboarding Methods
If your deployment did not use automation:
Do the following:
- Open the CD Mitigation settings
- For an Azure subscription:
- Go to the Azure Portal, and click the required subscription.
- Click Resource Groups on the left hand menu.
- Select the Resource Group from the list that appears.
- Select the Key Vault and go to Secrets.
- Update the new Client ID and Client Secret in the Prevasio Additionals secret.
- For a Google Cloud project:
- Go to the Google Cloud Console and click the required project.
- In the Search bar, search for Secret Manager and open it.
- Click the *-additionals item in the list.
- Delete the existing additional and create a new one with the new Client ID and Client Secret.
