Manage User Roles
This topic explains how to define and assign user roles and permissions to ensure appropriate access.
Access the Roles tab
Do the following:
From ACE
-
Hover over the Settings
 icon at the lower left of your screen. Settings options are displayed.
 -
Click on Access Management.

The Access Management page is displayed.
-
Select the Roles tab.
Out-of-the-box System Roles
Role-based access management lets you assign one of three out-of-the-box system roles to users. Each role is defined by a scope and privilege type (read-only, read/write).
The table below describes permitted User Roles functionality:
Note: Viewing user information, adding and editing users is only available to users assigned the Admin role.
|
ACE Cloud Network Security |
Admin | Security manager | Auditor |
|---|---|---|---|
| User Management | ü | ||
| ASMS Integration | ü | ||
| View Accounts | ü | ü | ü |
| Add and delete Accounts and Credentials | ü | ü | |
| View Inventory | ü | ü | ü |
| View Network Policies | ü | ü | ü |
|
Manage Network Policies |
ü | ü | |
| View and Export Risks | ü | ü | ü |
| Suppress/Activate Risks and Risk Triggers | ü | ü |
|
Cloud App Analyzer |
Admin |
Security Manager |
Auditor |
|---|---|---|---|
|
(Manage: Full access and permissions) |
Read-only |
||
|
User Management |
ü |
|
|
|
Onboarding |
ü | ü | |
|
View Onboarded Accounts |
ü | ü |
View only |
|
Sync accounts (trigger application discovery) |
ü | ü |
|
| Configure Jira connectivity | ü | ü | |
| View Detected Risks & Compliance | ü | ü |
View only |
|
Export alerts to Jira ticket |
ü | ü |
|
| Suppress alerts | ü | ü | |
|
CI Container Security |
ü | ü |
View only |
|
Cloud CD Security |
ü | ü |
View only |
|
Threat Management |
ü | ü |
View only |
|
View scan results |
ü | ü |
View only |
|
Kubernetes Security |
ü | ü |
View only |
|
View Discovered Applications |
ü | ü |
View only |
|
View Asset & Security Issues |
ü | ü |
View only |
| System Settings | ü |
View only |
View only |
Edit Out-of-the-box System Roles
You can map SSO groups to System Roles.
Do the following:
-
Under Settings, click Access Management.
The Access Management page is displayed.
-
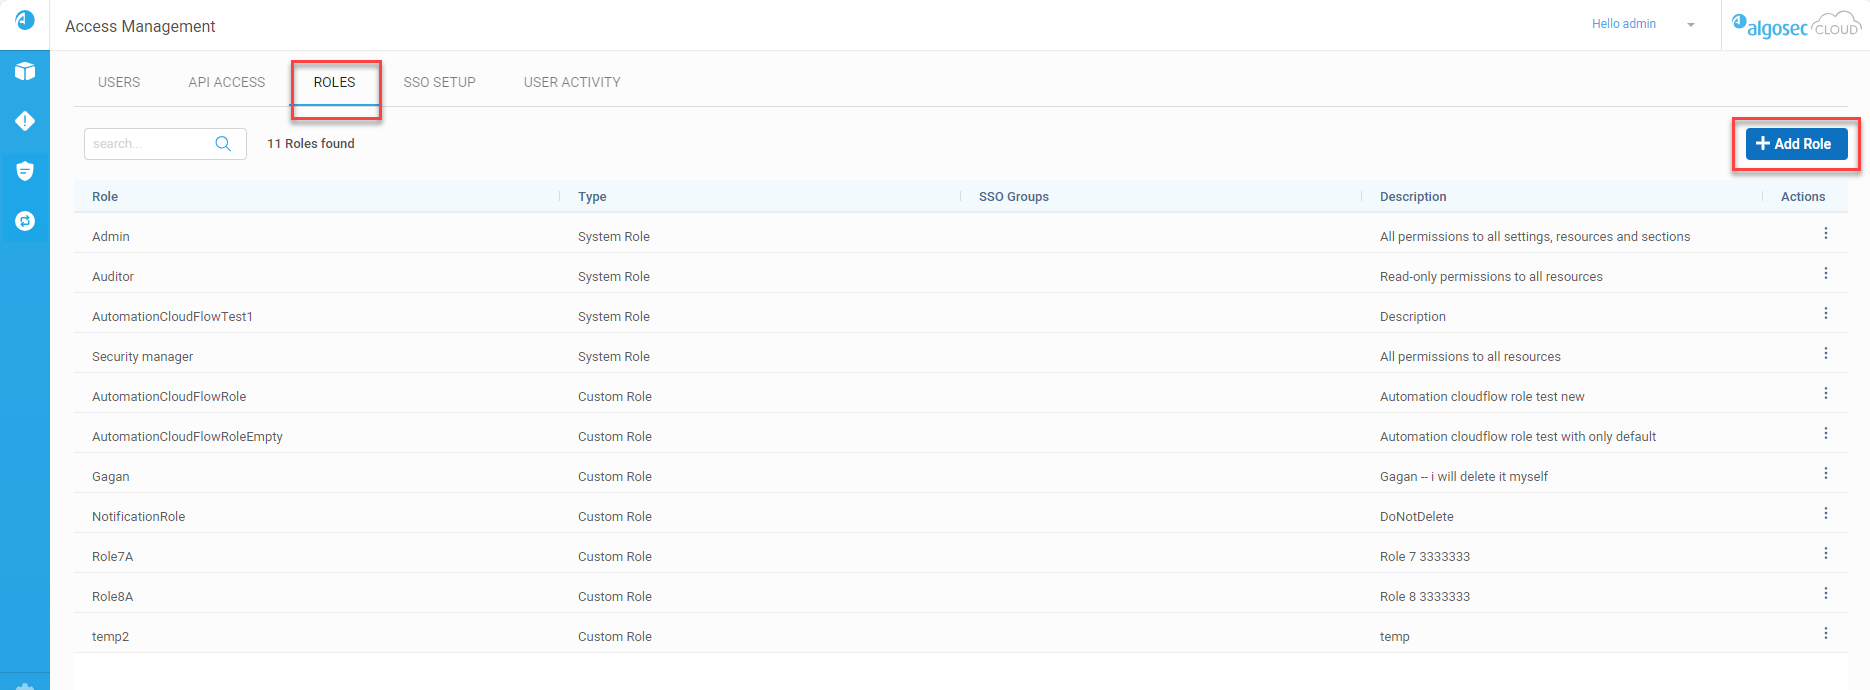
Click Roles.
The Roles tab is displayed.
-
Click on the ellipsis
 button to the right of the row with type System Role.
 -
Click Map SSO groups.

The Edit Role pop-up appears.
-
Add or remove SSO Groups as required.
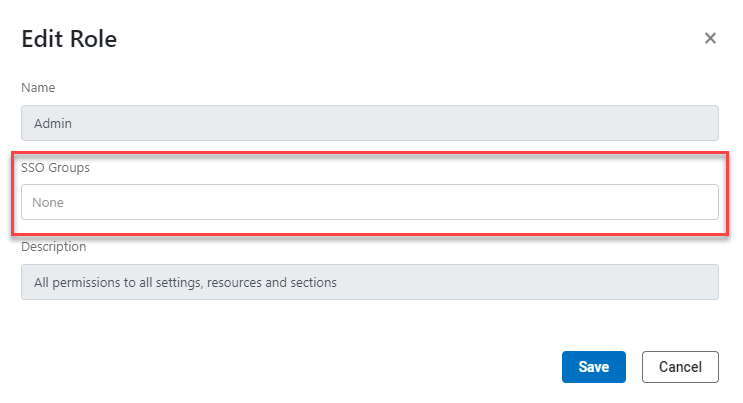
-
Click Save.
Out-of-the-box role assignments for users in ACE and ObjectFlow
When a user is created and assigned a built-in role in one SaaS application, the user is created in the other application and assigned a role, as follows.
-
Admin role user created in ObjectFlow is Admin in ACE and vice versa.
-
Security manager role user created in ObjectFlow is Auditor in ACE and vice versa (Security manager role user created in ACE has Auditor role in ObjectFlow ).
-
Auditor role user created in ObjectFlow is Auditor of ACE and vice versa.
When an existing user's role changes in ACE:
-
From Admin to either Security Manager or Auditor, the corresponding role in ObjectFlow becomes Auditor.
-
From Security Manager to Auditor, there is no effect on the user's role in ObjectFlow.
-
From Auditor to Security Manager, there is no effect on the user's role in ObjectFlow.
When a user's role changes in ObjectFlow:
-
From Admin to either Security Manager or Auditor, the corresponding role in ACE becomes Auditor.
-
From Security Manager to Auditor, there is no effect on the user's role in ACE.
-
From Auditor to Security Manager, there is no effect on the user's role in ACE.
Custom Roles
While system roles apply to all accounts and vendors, custom roles define permissions limited to specified individual accounts or vendors. The same custom role can be applied to multiple users and multiple custom roles can be assigned to a single user. However, users cannot have a mixture of custom roles and system roles.
When defining a custom role, Manage permissions or Read-only permissions can be assigned to any account or vendor. Since Manage permissions always include Read-only permissions, selecting the Manage checkbox for an account or vendor automatically displays the Read-only checkbox as selected.
Only users with the system role Admin have permission to define custom roles and assign them to users.
To add a custom role
Do the following:
-
Under Settings, click Access Management.
The User Tab of the Access Management page is displayed.
-
Click Roles.
The Roles tab is displayed.
-
Click + Add Role at the upper right of the Role tab.
-
In the Add role dialog that is displayed, provide a Name, assign SSO Group(s), and a Description for the new custom role.
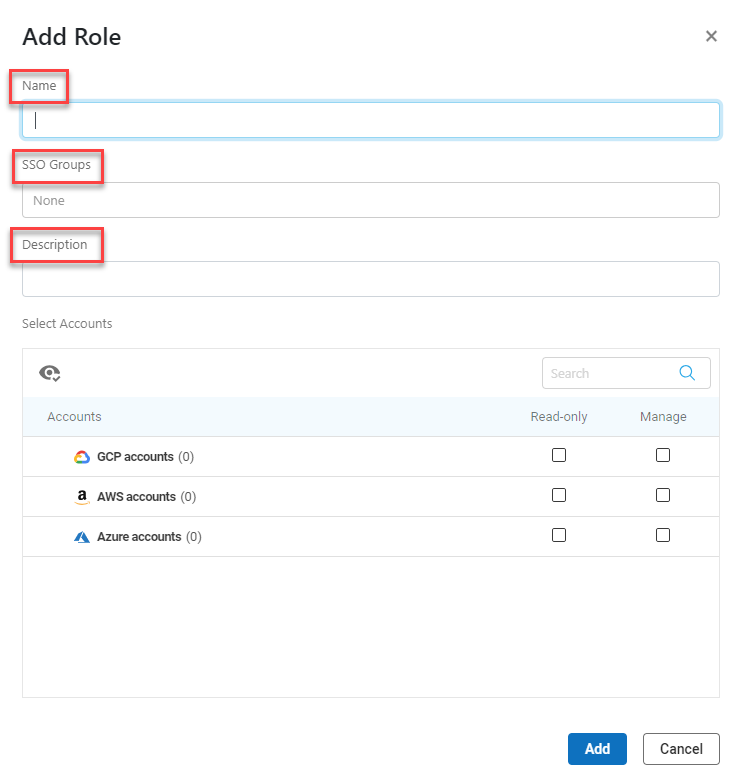
-
In the Select Accounts section, select permission type (Read-only or Manage) on the vendor levels and account levels as needed for the role.
Tip: To view only vendors and accounts for which permission types are selected, click the Show Selected
 button.
-
To apply permission types per individual accounts, select the required permission check box for each account.
-
To apply a permission type for all the accounts of the same vendor, select the required permission check box at the vendor level.
-
Do not select any checkbox to the right of accounts that should not be viewed by users on the basis of this custom role.
See Permissions Table.
 Permissions Table
ACECloud Network Security
View Accounts Add and delete Accounts and Credentials View Inventory View Network Policies Manage Network Policies
View and Export Risks Suppress/Activate Risks and Risk Triggers ACE Cloud App Analyzer
View Onboarded Accounts
Configure Jira connectivity View Detected Risks & Compliance Export alerts to Jira ticket
Suppress alerts CI Container Security
Cloud CD Security
Threat Management
View scan results
Kubernetes Security
View Discovered Applications
View Asset & Security Issues
System Settings
-
-
Click Save. at the bottom of the dialog.
Now you can apply the this custom role to users.
To edit a custom role
Do the following:
-
Under Settings, click Access Management.
The User Tab of the Access Management page is displayed.
-
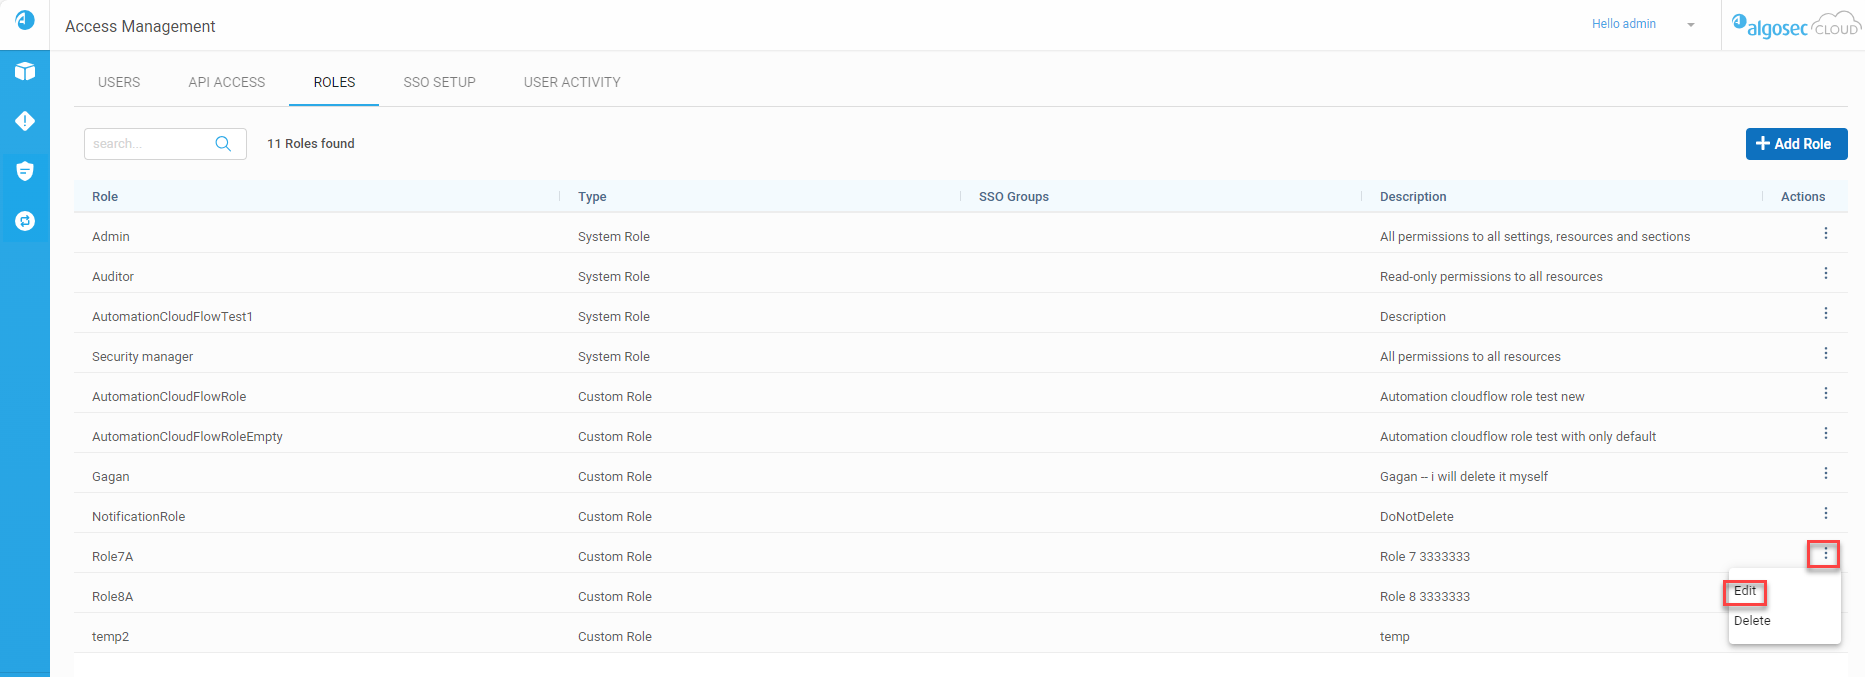
Click Roles.
The Roles tab is displayed.
-
Click more and then click edit to the right of the custom role you wish to edit.
-
Edit the form as required.
Note: You cannot edit the name of the role.
Tip: To view only vendors and accounts for which permission types are selected, click the
Show Selected button. -
Edit the Select Accounts section as required:
-
To apply permission types per individual accounts, select the required permission check box for each account.
-
To apply a permission type for all the accounts of the same vendor, select the required permission check box at the vendor level.
-
Do not select any checkbox to the right of accounts that should not be viewed by users on the basis of this custom role.
See Permissions Table.
Permissions Table
ACECloud Network Security
Manage Read-only View Accounts ü ü Add and delete Accounts and Credentials ü View Inventory ü ü View Network Policies ü ü Manage Network Policies
ü View and Export Risks ü ü Suppress/Activate Risks and Risk Triggers ü ACE Cloud App Analyzer
Manage Read-only View Onboarded Accounts
ü View only
Configure Jira connectivity ü View Detected Risks & Compliance ü View only
Export alerts to Jira ticket
ü ü Suppress alerts ü View only
CI Container Security
ü ü Cloud CD Security
ü ü Threat Management
ü ü View scan results
ü View only
Kubernetes Security
ü ü View Discovered Applications
ü View only
View Asset & Security Issues
ü View only
System Settings View only
View only
-
- Click Save. at the bottom of the dialog.
The updated custom role is updated for the users to which it has been applied and can be applied to new users.
See Add a new user and Edit a user.
