Onboard Google Cloud Projects to Cloud Network Security
This topic describes how to add Google Cloud projects to ACE Cloud Network Security.
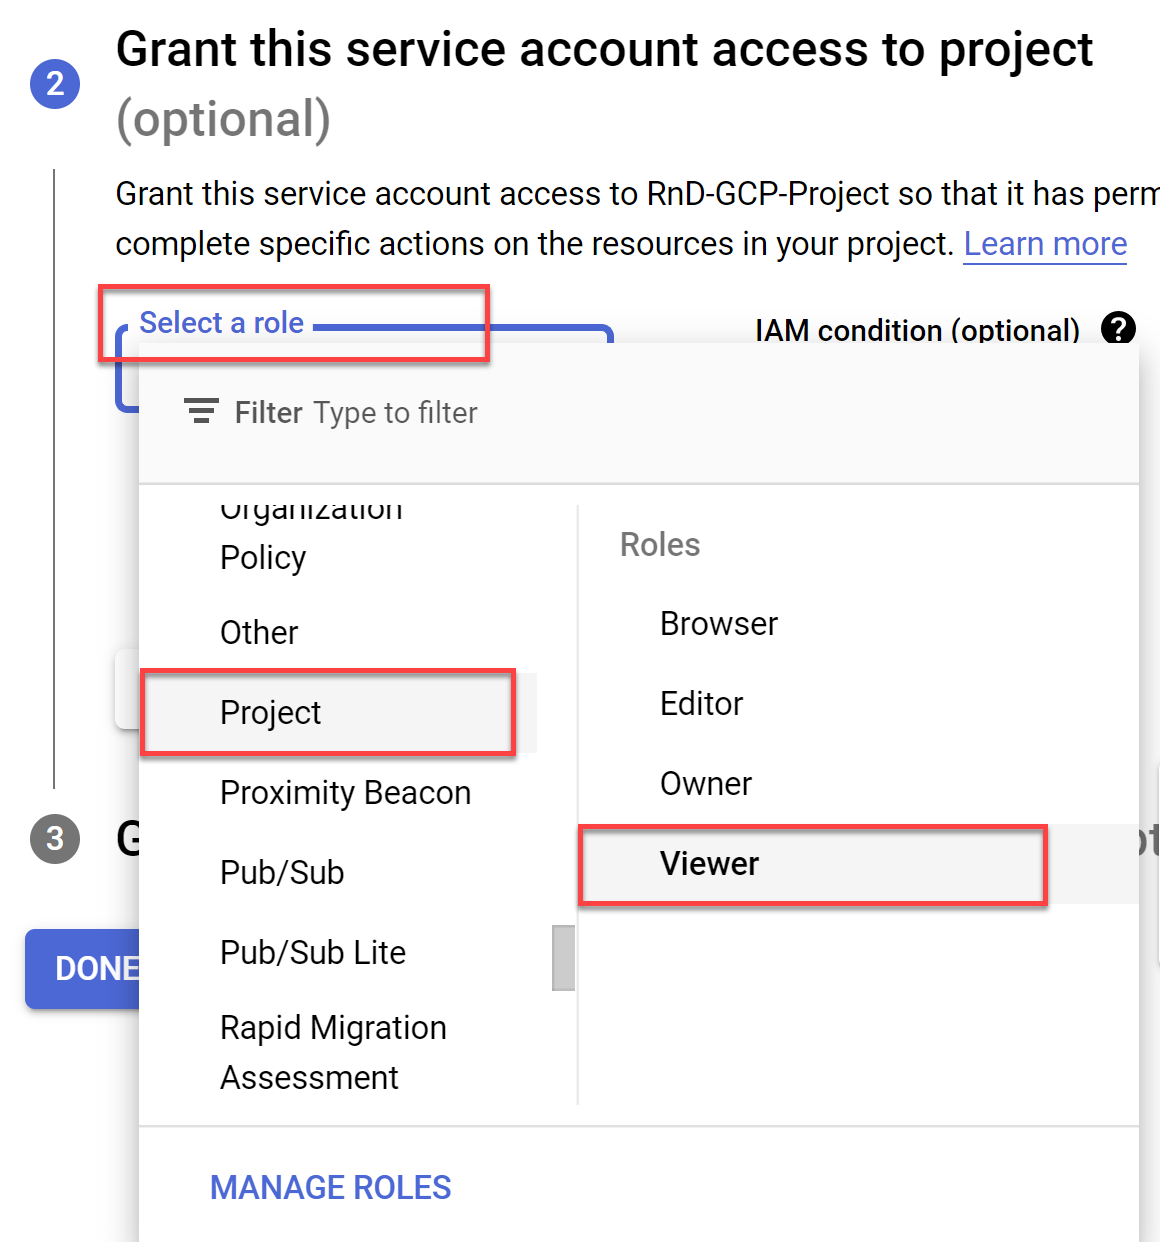
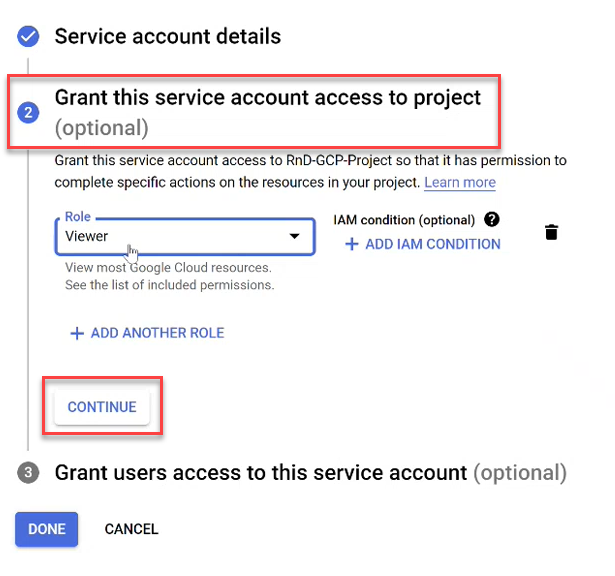
Note: AlgoSec only needs READ permissions to provide support for your GCP security policy management. This requirement ensures you can receive complete security analysis and recommendations while granting the minimal level of access.
For details about required permissions, see Permissions required for Google Cloud
You can choose from the following four onboarding methods to add new Google Cloud Projects:
-
With script - Uses scripts to onboard Google Cloud resources. Changes to projects in Google Cloud after onboarding are automatically synced to ACE Cloud Network Security.
-
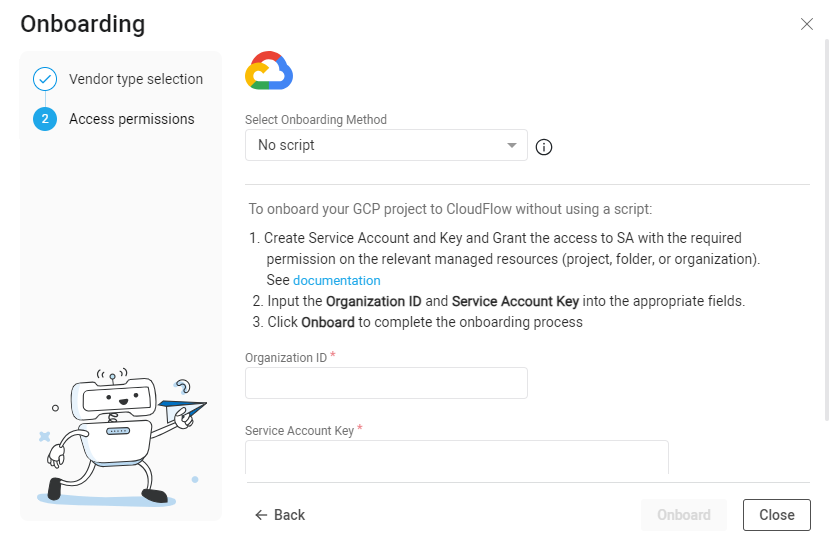
No script - Onboard Google Cloud resources without using scripts. Changes to projects in Google Cloud after onboarding are automatically synced to ACE Cloud Network Security.
-
API (single account) - Onboard a single project. Changes to the projects after onboarding are not synced.
-
Terraform - Leverage Terraform, the infrastructure-as-code solution, for onboarding your Google Cloud projects into ACE Cloud Network Security. Changes to projects in Google Cloud after onboarding are automatically synced to ACE Cloud Network Security.
Notes:
-
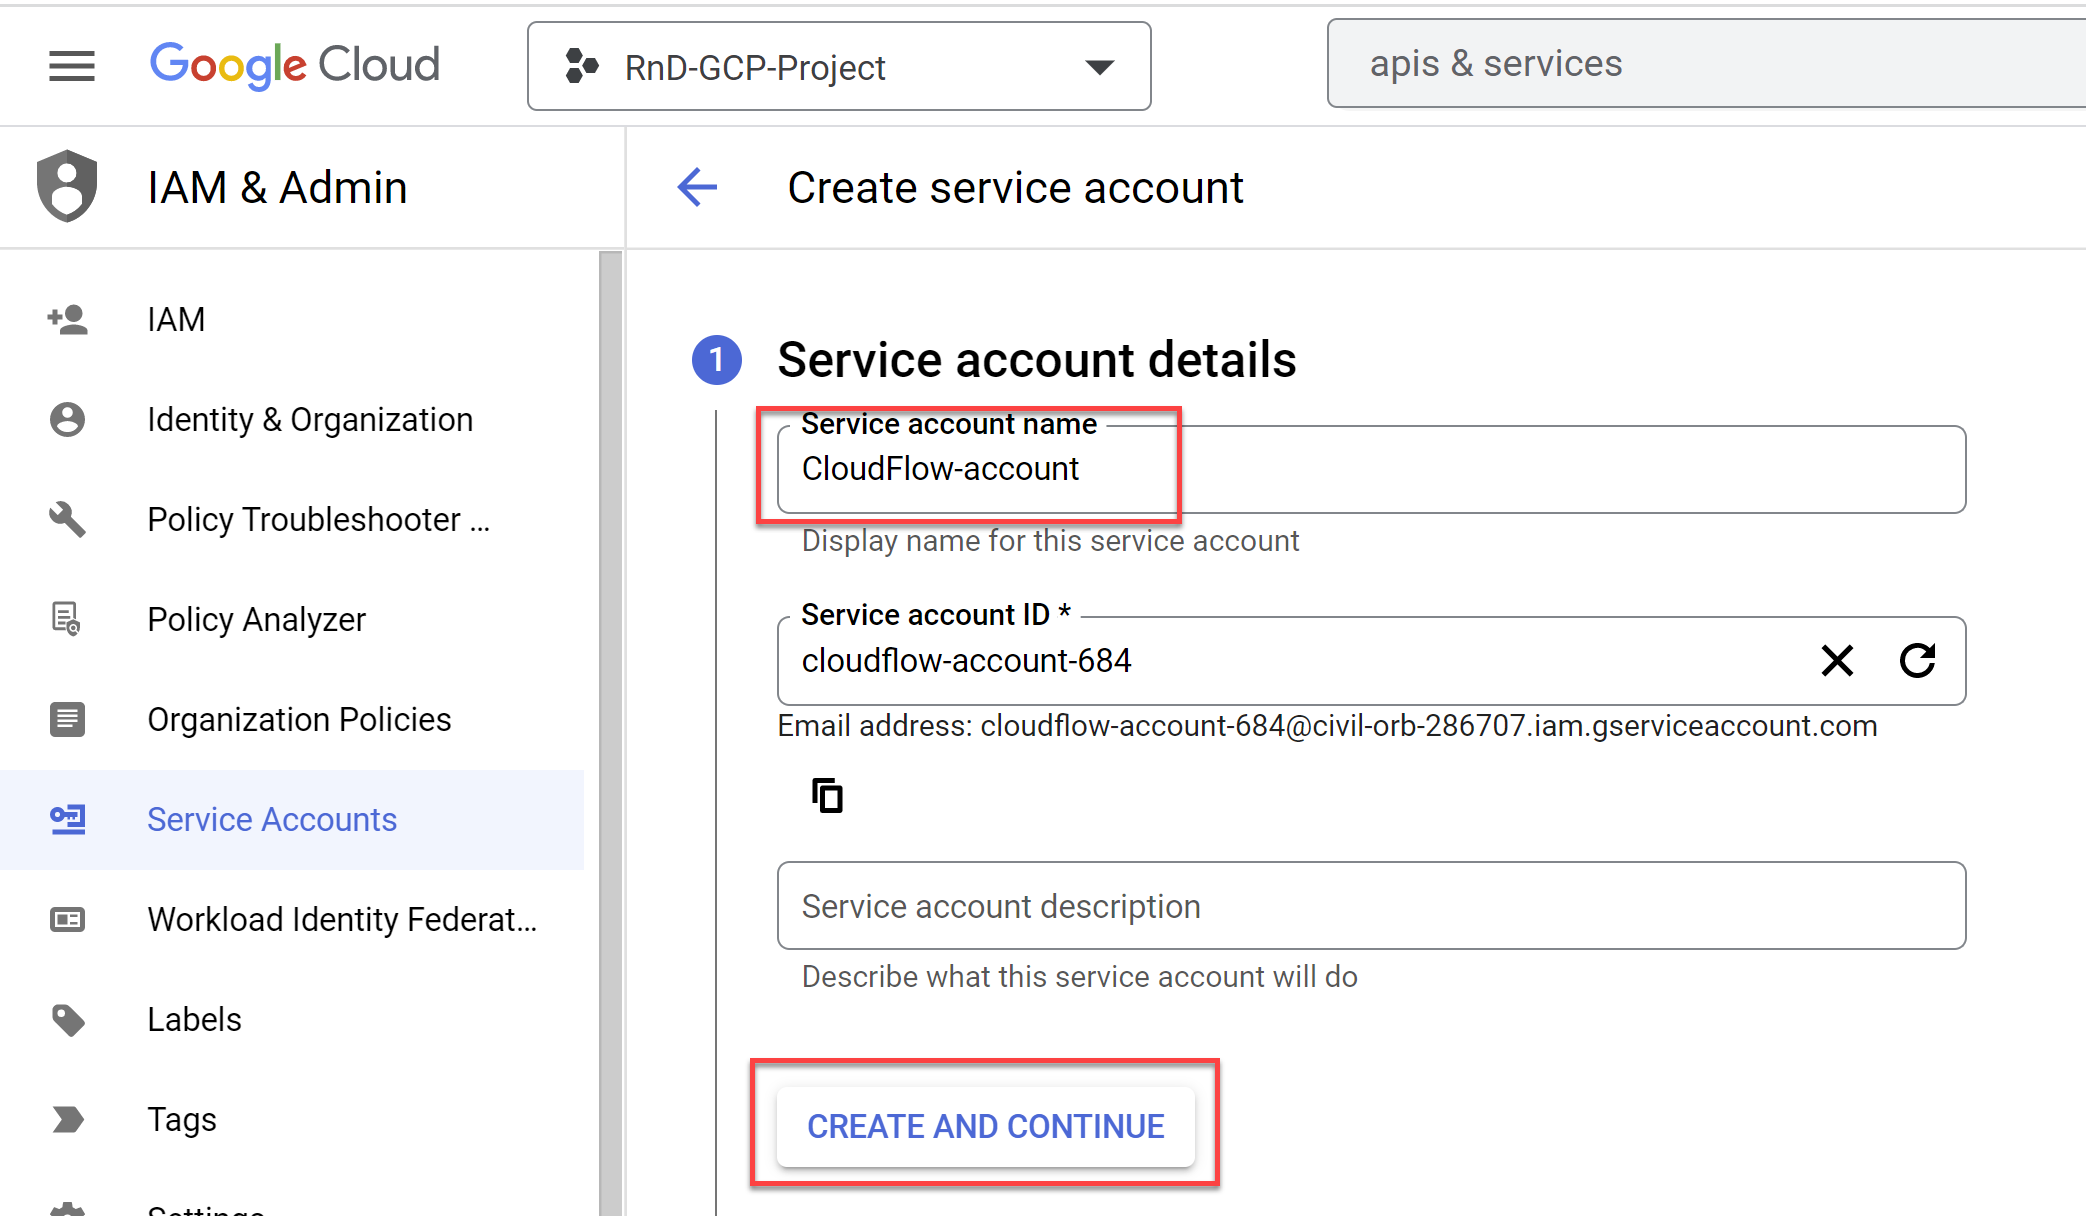
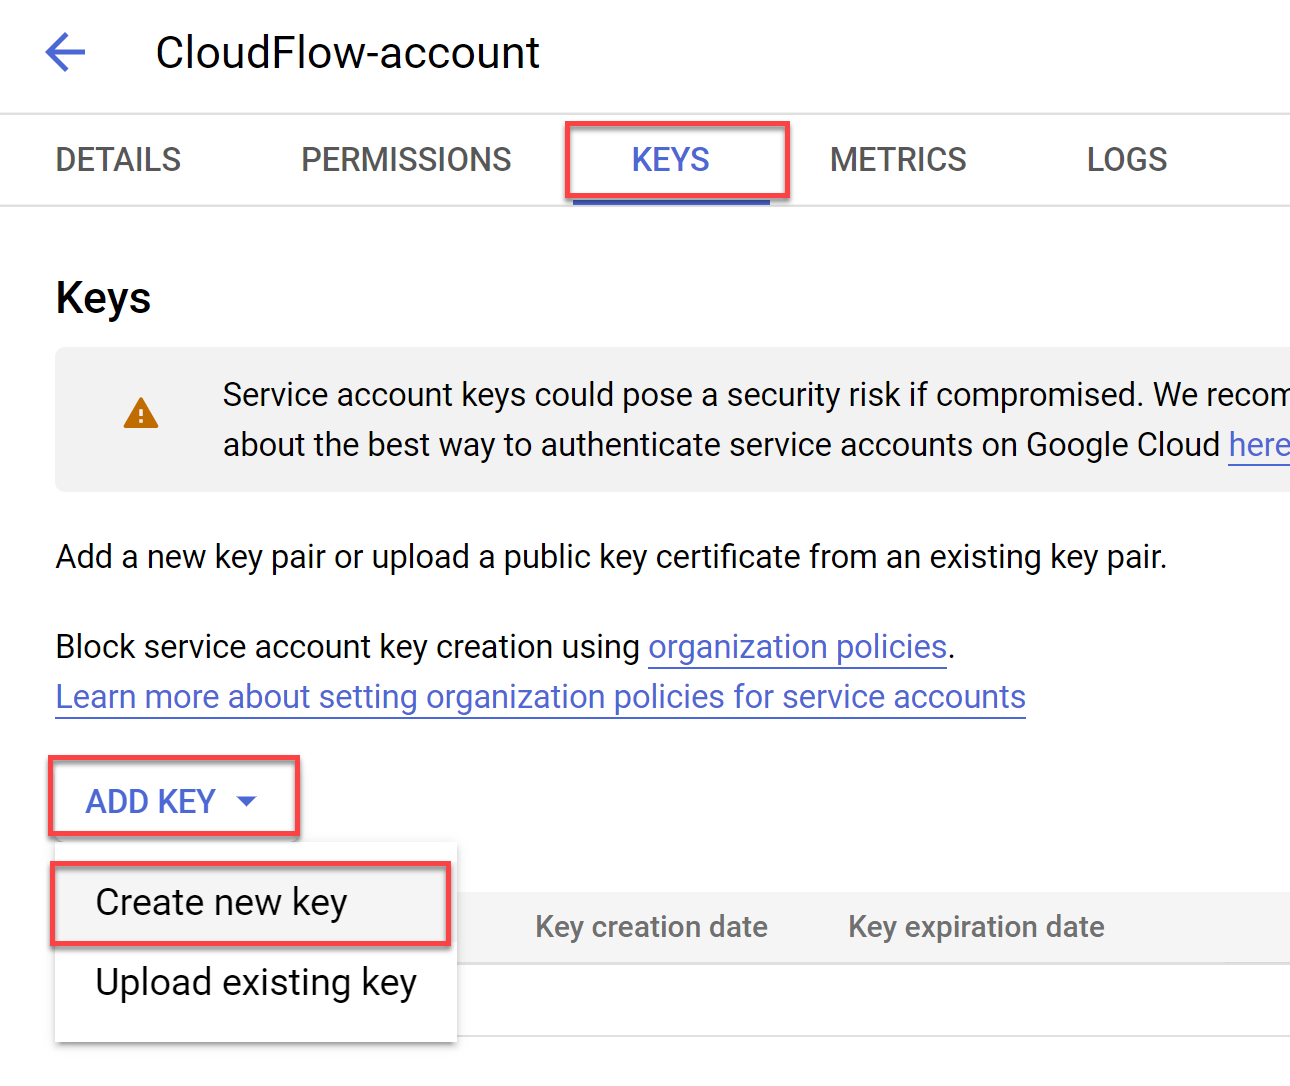
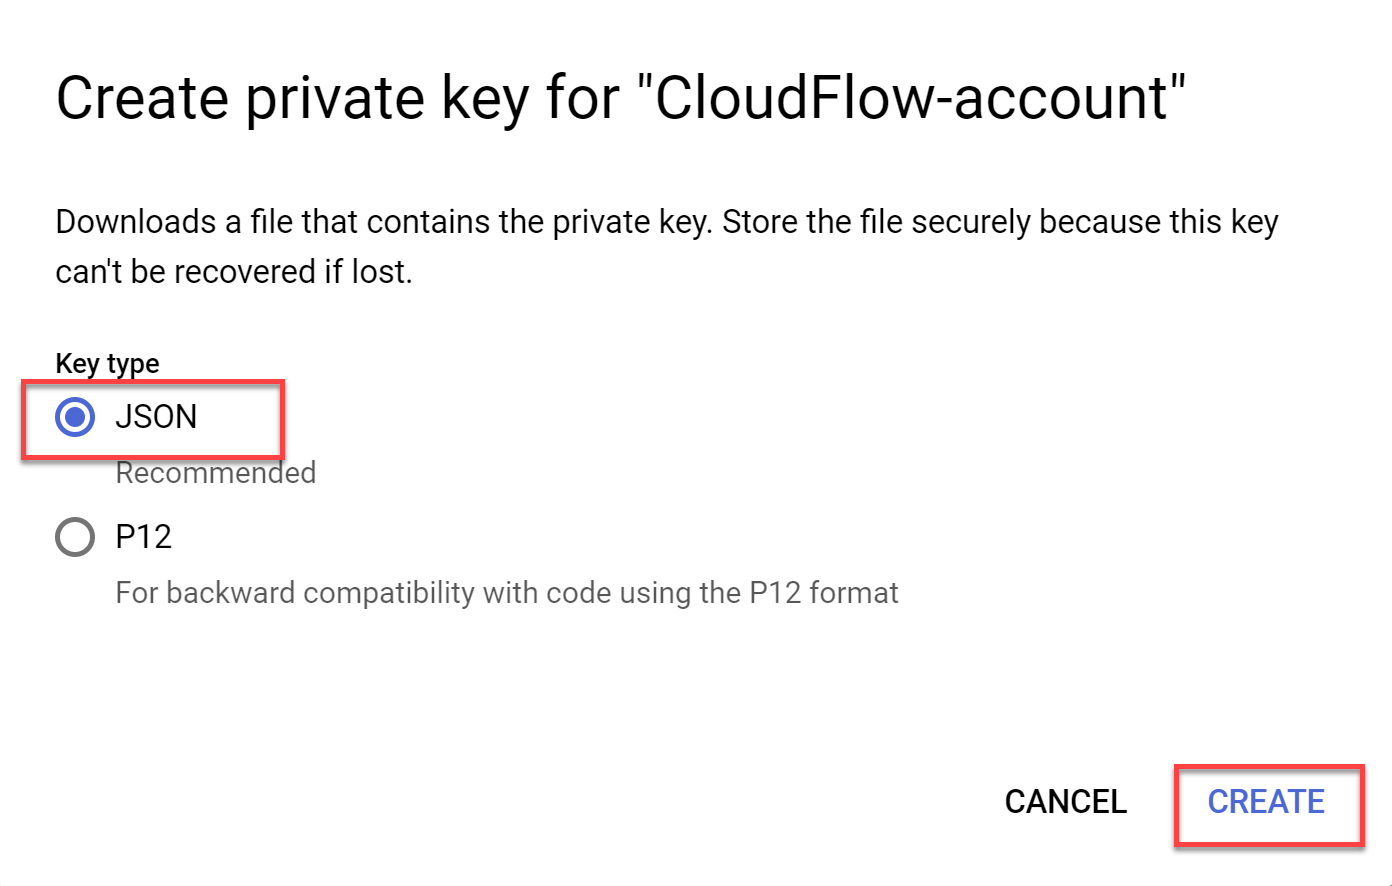
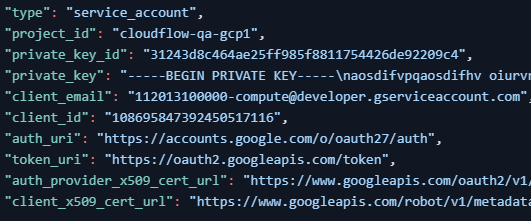
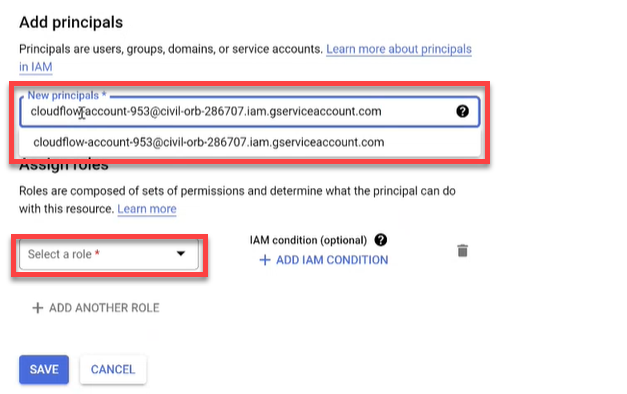
To add projects to ACE Cloud Network Security, you need Google Cloud service account credentials.
-
Onboarding means giving access to ACE to collect data from your Google Cloud projects. To stop data collection (delete your project), you must withdraw access to ACE by revoking the ACE permissions within your cloud vendor environment.
-
Project IDs must be unique across all organizations for the onboarding process to complete successfully.
-
Any changes to projects in an onboarded Google Cloud folder or organization will automatically sync with ACE Cloud Network Security once every hour.
Note: For more information about the GCP onboarding script, see Cloud Network Security Google Onboarding Script.
Before you start
To connect a Google Cloud project that is managed by an organization, make sure you are logged on to Google Cloud console.
Access the Onboarding wizard
Do the following:
-
In the ACE
 Settings area, click
  ONBOARDING.
On the Onboarding Managment page that opens, click +Onboard.
-
If you are onboarding your first account, click the New Cloud Account button on the welcome page.
-
Otherwise, click the
 Google Cloud button and click Next.
The Google Cloud Onboarding wizard appears.
-
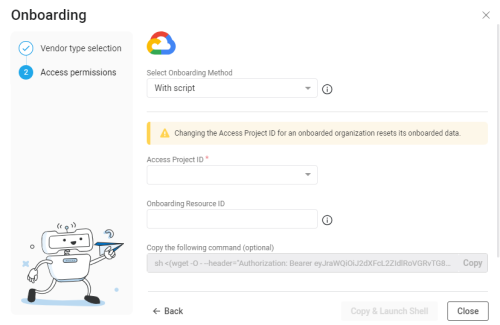
Select your preferred method to onboard using the Select Onboarding Method dropdown.
*Automatically syncs changes to projects from Google Cloud to ACE after onboarding. Onboarding Method Description Automatic sync* With script Uses scripts to onboard Google Cloud resources Yes No script Onboard Google Cloud resources without using scripts Yes API (single account) Onboard a single Google Cloud via API No Terraform Onboard Google Cloud resources using Terraform Yes


Permissions required for Google Cloud
Notes:
-
When using the "With script" onboarding method: APIs are automatically enabled. If you want to remove the write permission serviceusage.serviceUsageAdmin, you can do so, but you will need to manually enable the following APIs for each Project.
-
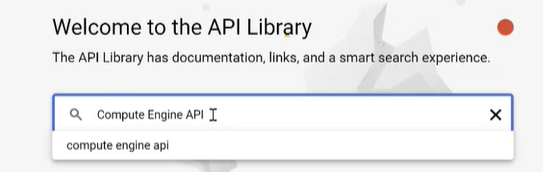
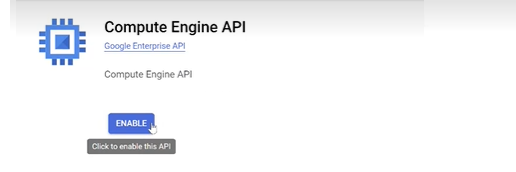
When using the "No script" onboarding method, the following APIs must be enabled for each Project before adding the Google Cloud permissions listed in the table below. For details, see Step 2 in To Onboard Google Cloud resources | No script.
Important: Missing permissions can cause ACE to malfunction and lead to data inconsistencies. AlgoSec is not responsible for any issues arising from missing permissions.
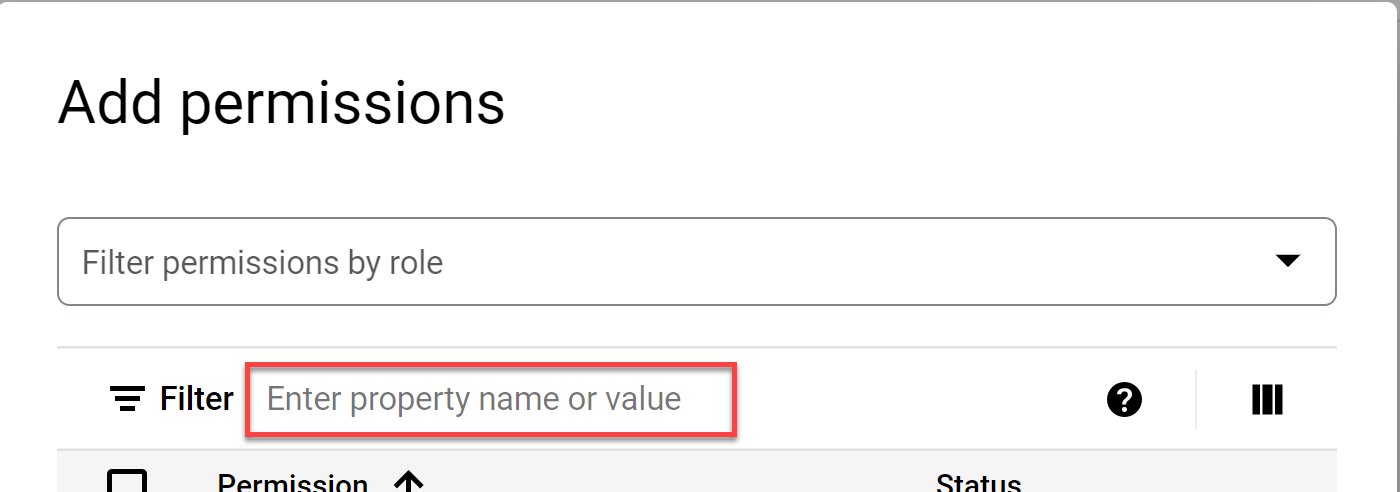
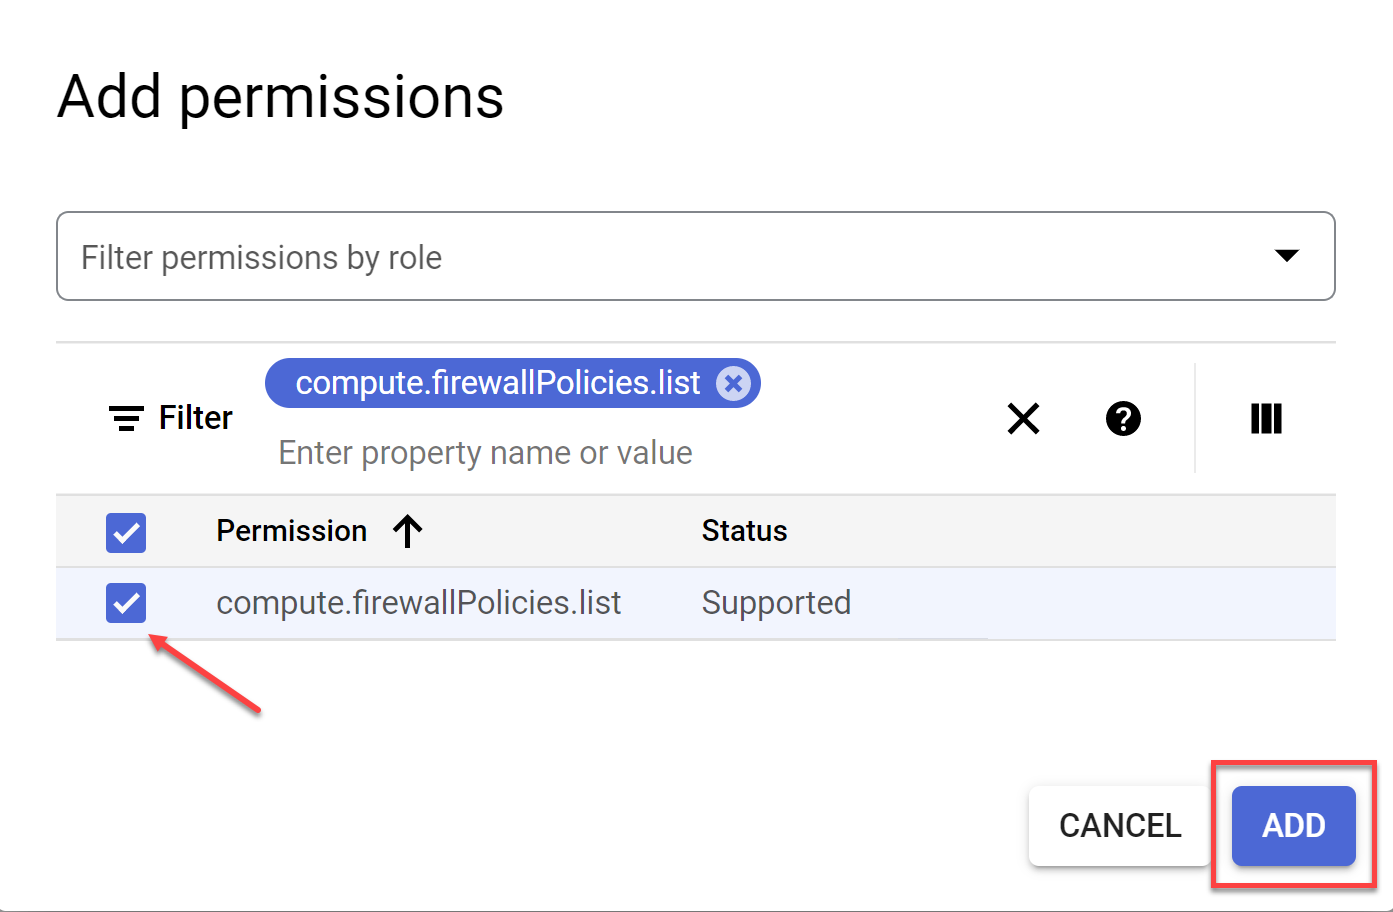
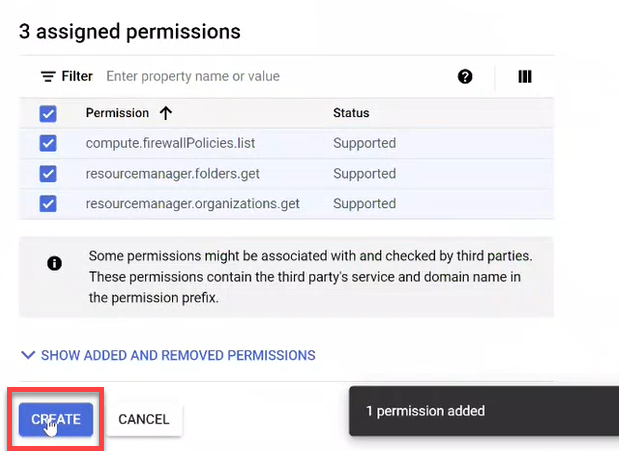
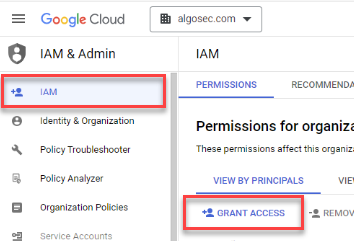
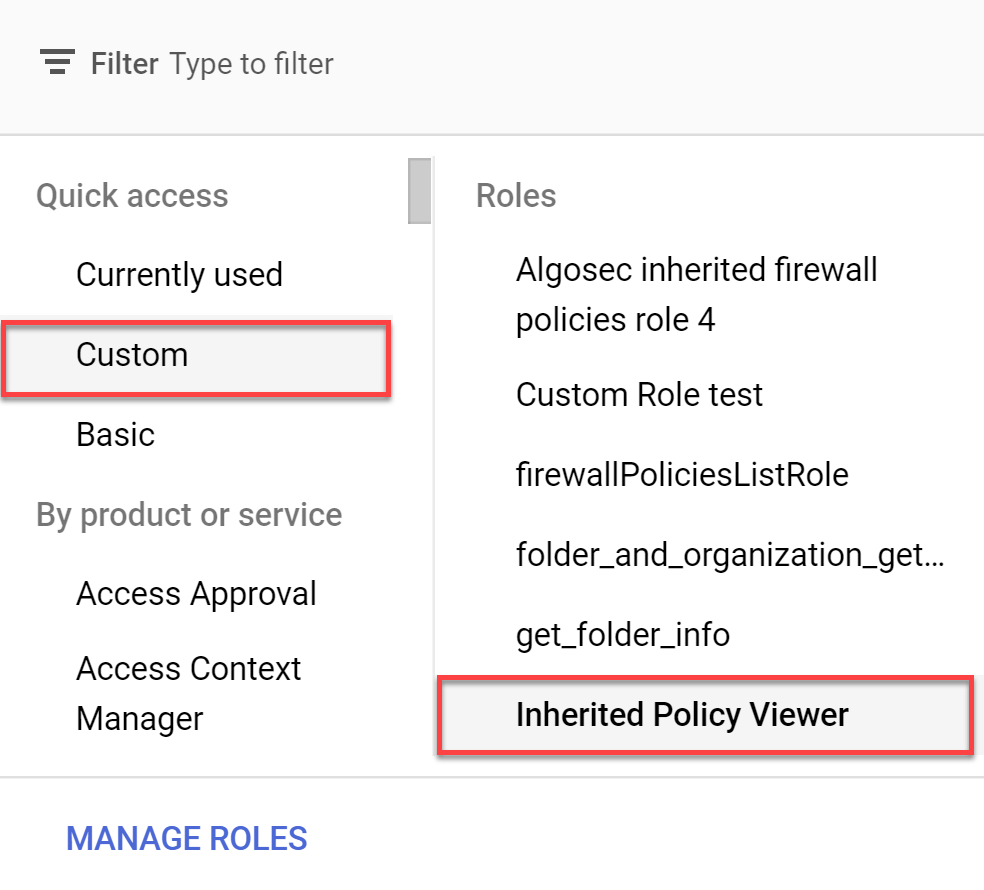
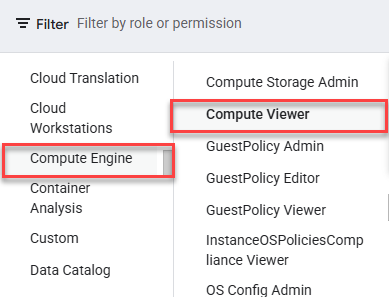
See Permissions Required for Google Cloud Projects.
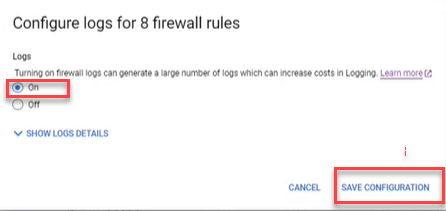
Enable Google Cloud logs
By enabling Google Cloud logs, ACE can retrieve and analyze logs. This provides data, shown on the Risks page and Network Policy page, such as the date each rule was last used.
Do the following:
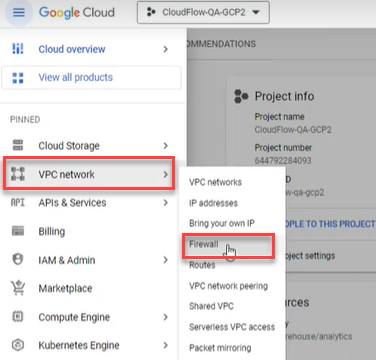
-
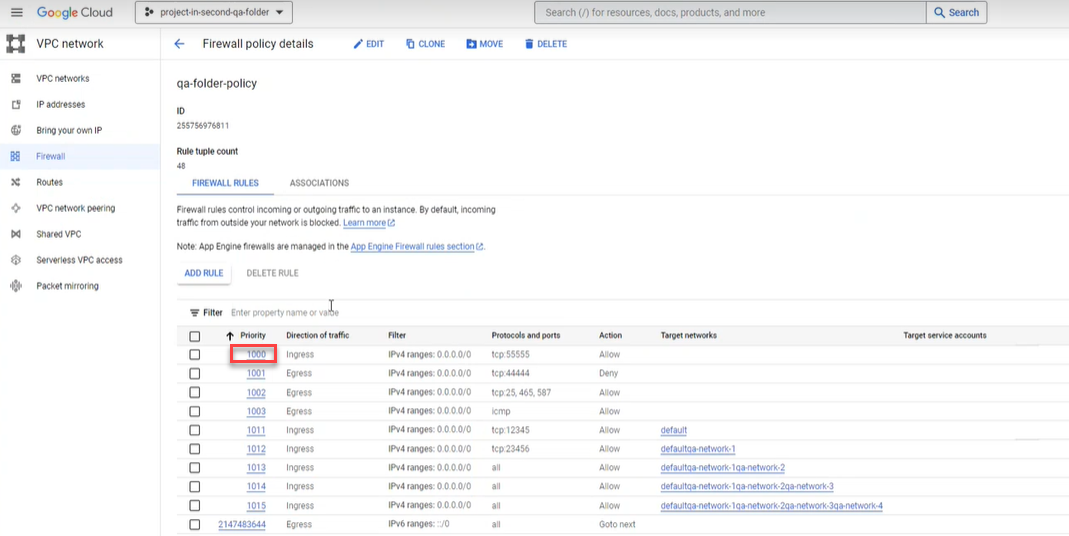
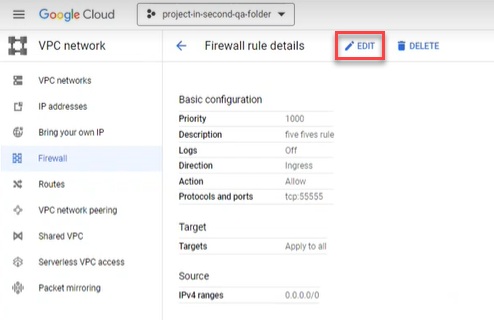
In the Google Cloud console, select VPC network > Firewall.
-
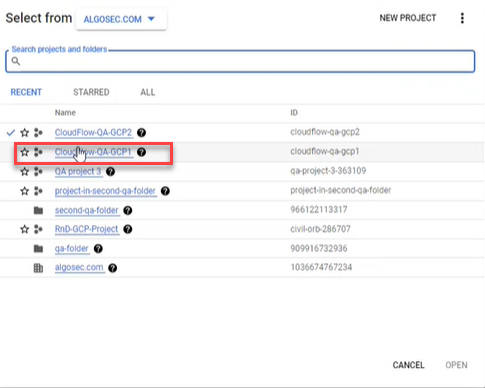
Click the firewall selector at the top of the page.

The Select From dialog appears.

-
Select the firewall whose rules you want to log.
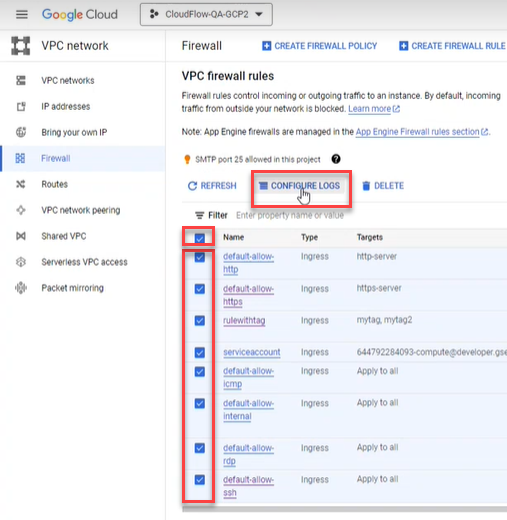
-
Select the rules.


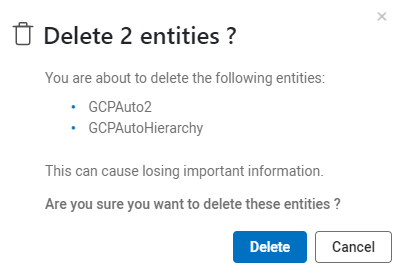
Offboard Google Cloud projects from ACE
You can offboard Google Cloud projects from ACE with the following methods: