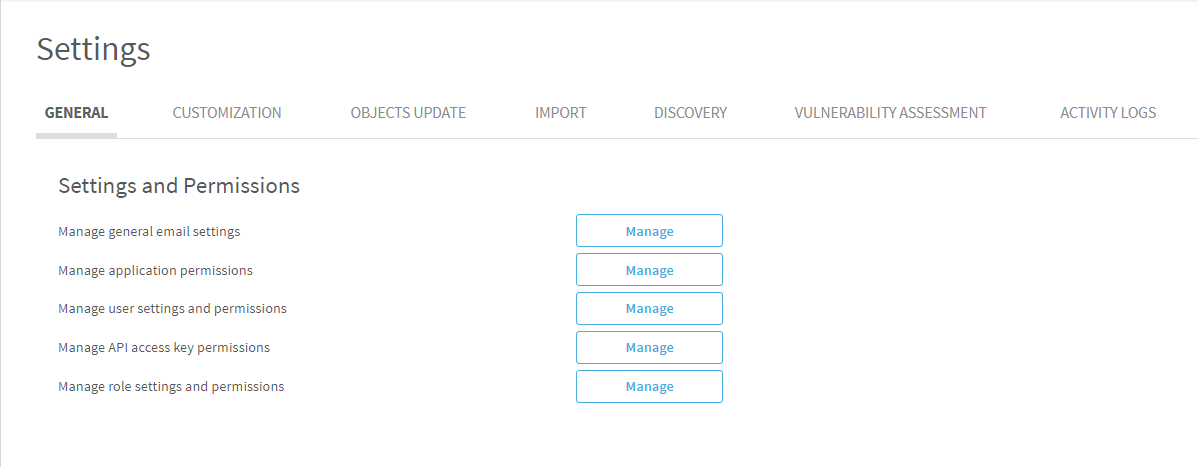
Manage permissions and roles
Relevant AppViz administrators
This section describes how to manage AppViz roles, and permissions.
Note:
By default, users have access to all Network Objects/Service Objects in application flows. You can use object tags to manage object visibility per user. See Managing Object Permissions Using Tags.
As well, you can use API Access Keys to control user access to view and edit application via API.
Roles and permissions
AppViz access management supports two out-of-the-box System Roles:
|
System Role |
Permissions |
|---|---|
| User |
User permissions are defined in the Settings area of AppViz. |
|
Administrator |
All permissions |
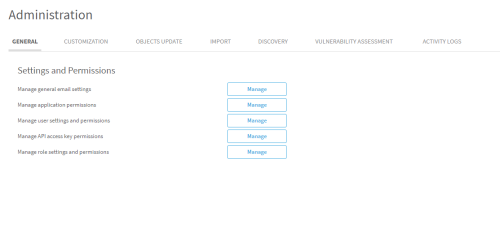
When a user with the "User" System Role is created, in the AppViz Settings > General tab, you can:
-
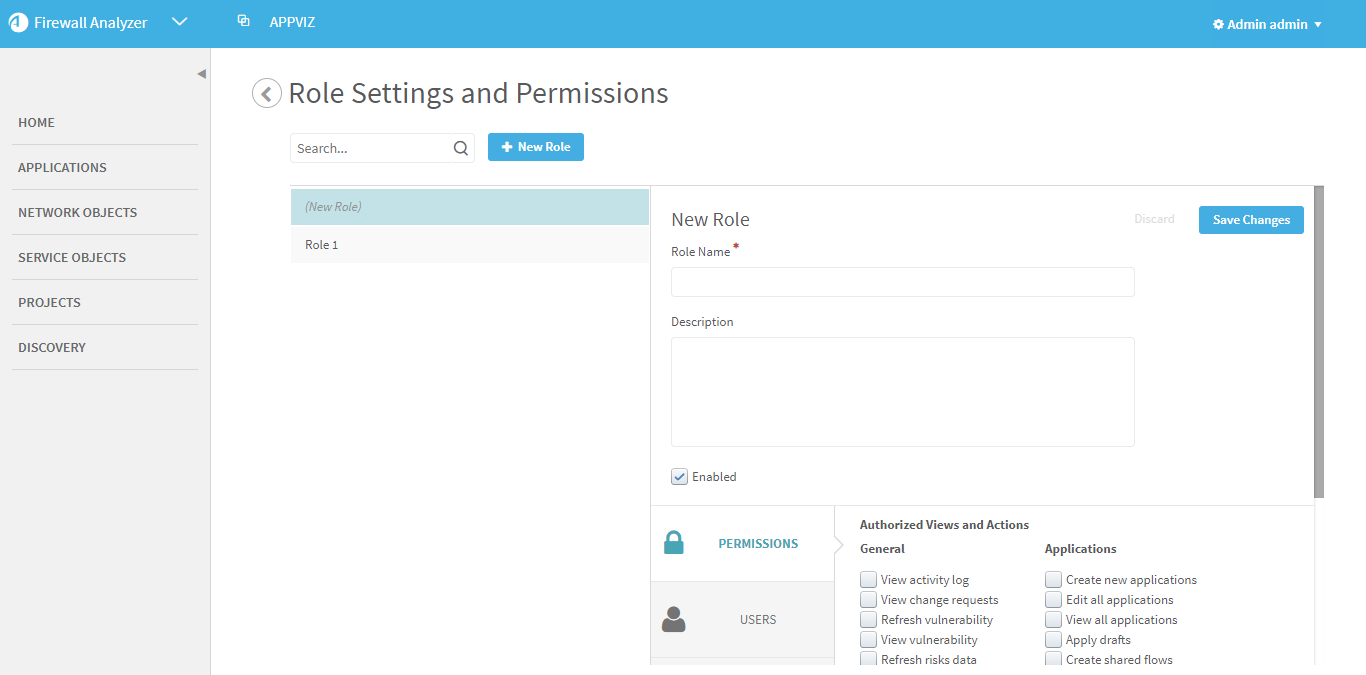
Create a new role and assign it the user. See Manage role settings and permissions.
-
Assign individual permissions to the user. See Manage user settings and permissions.
-
Assign permissions for an application. See Manage application permissions.
-
Assign permissions to API access to roles. See Manage API Access Key permissions.
Note: Users automatically have permissions for any applications they create.
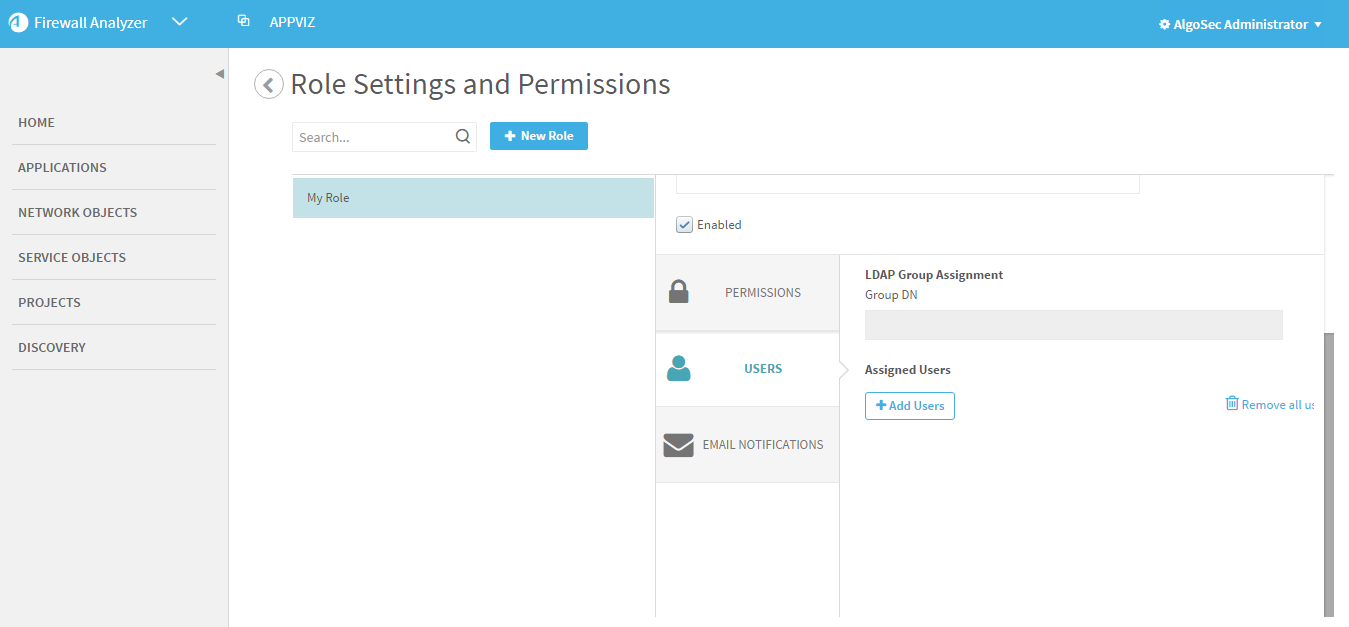
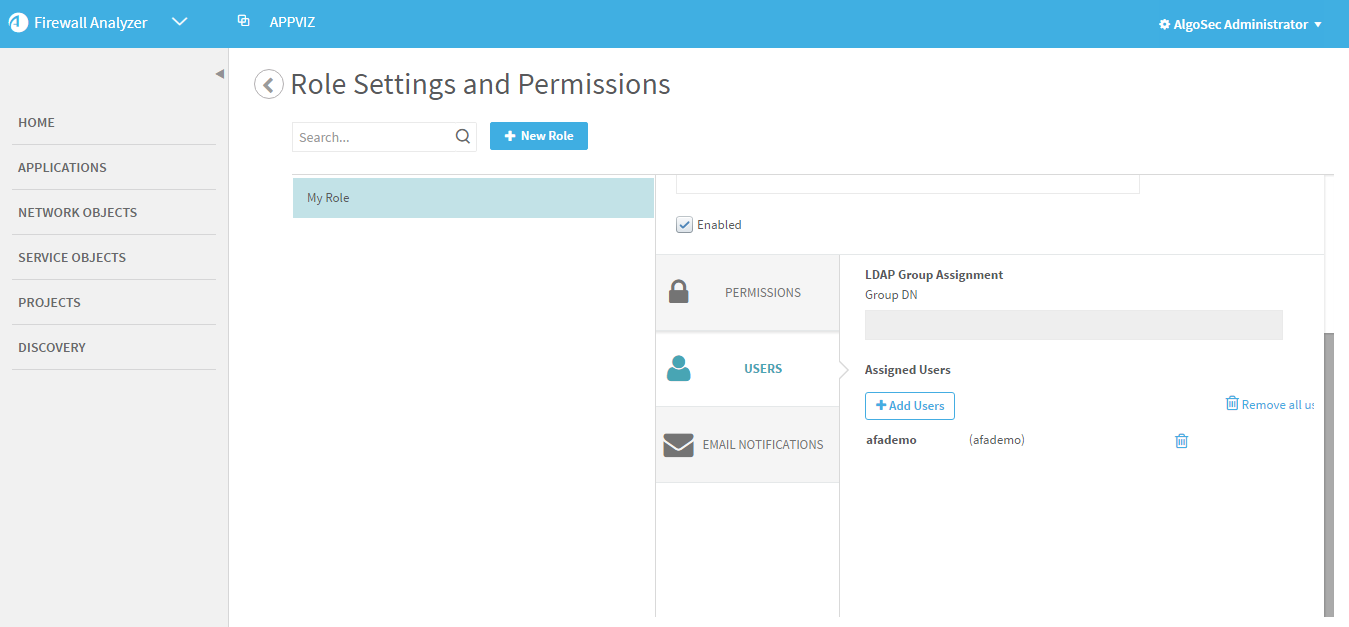
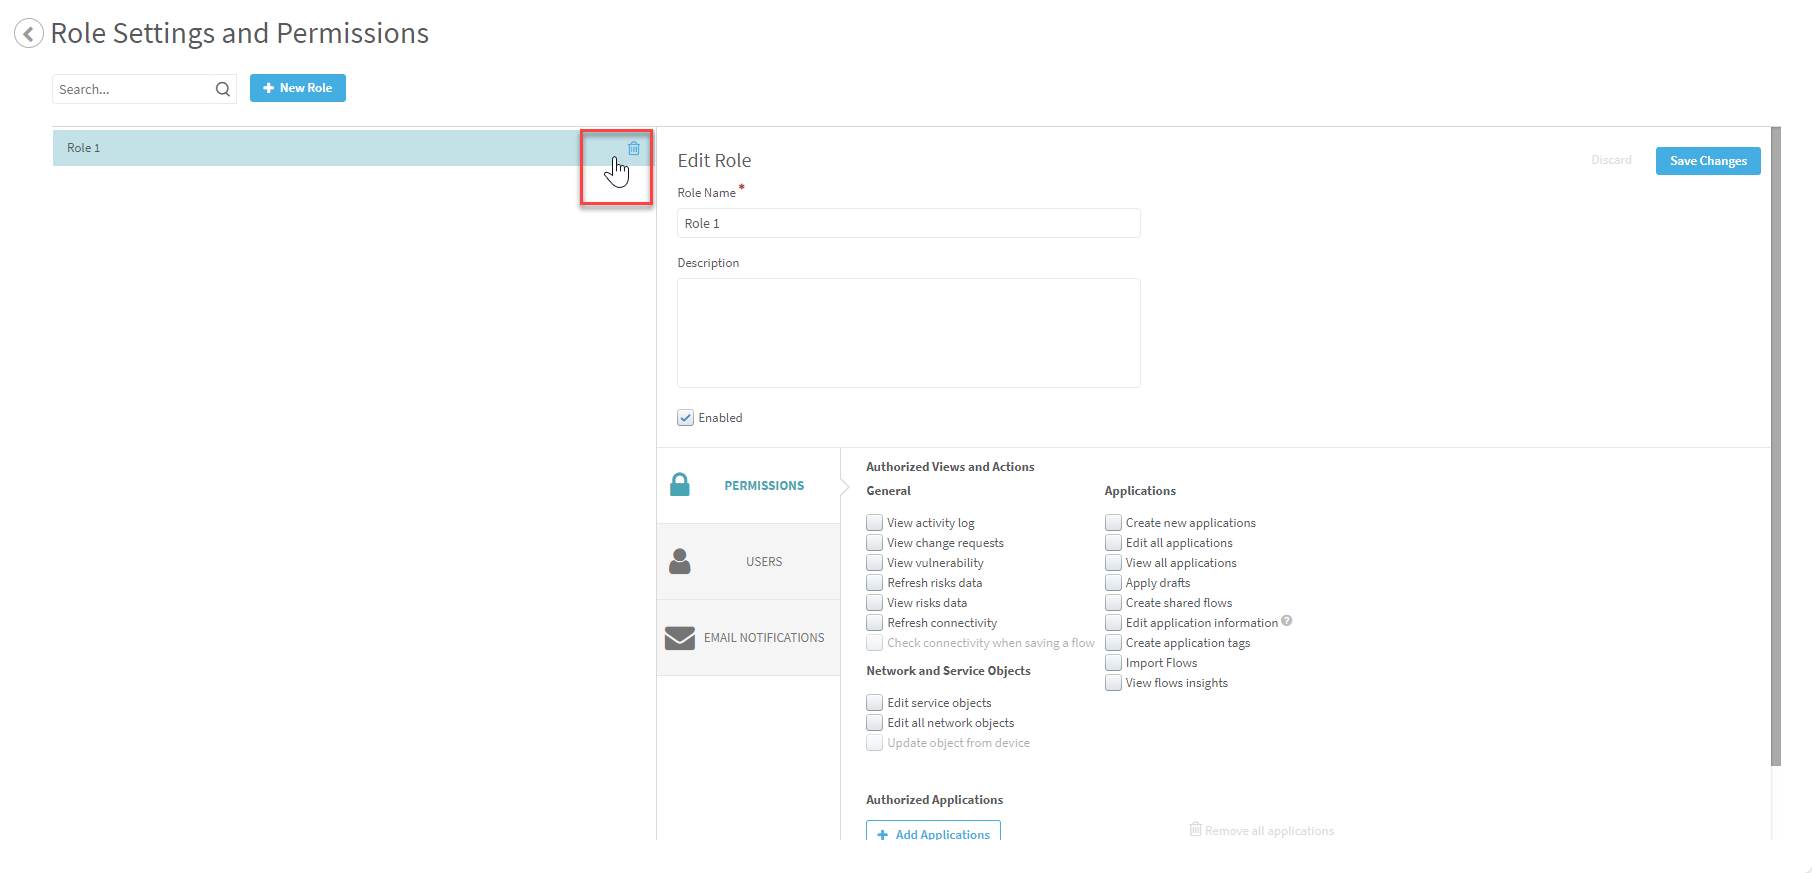
Manage role settings and permissions
This section explains how to manage roles in the AppViz Settings area (excluding System Roles).
Do any of the following:


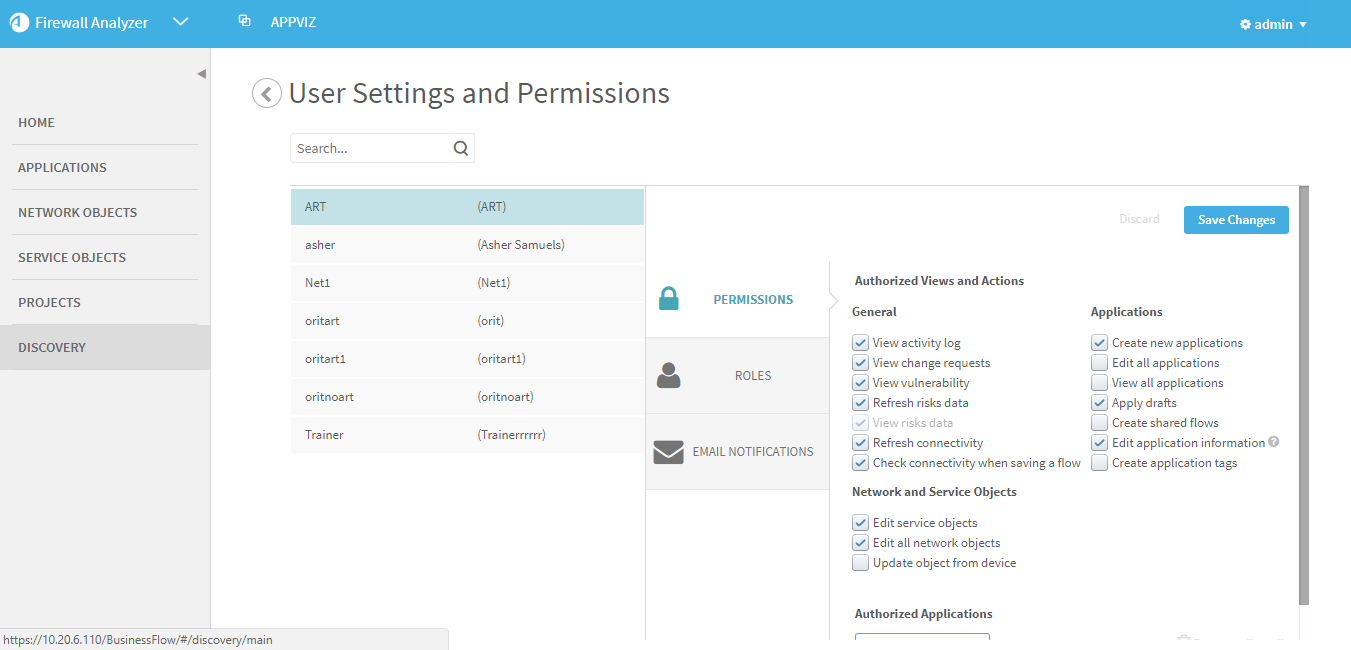
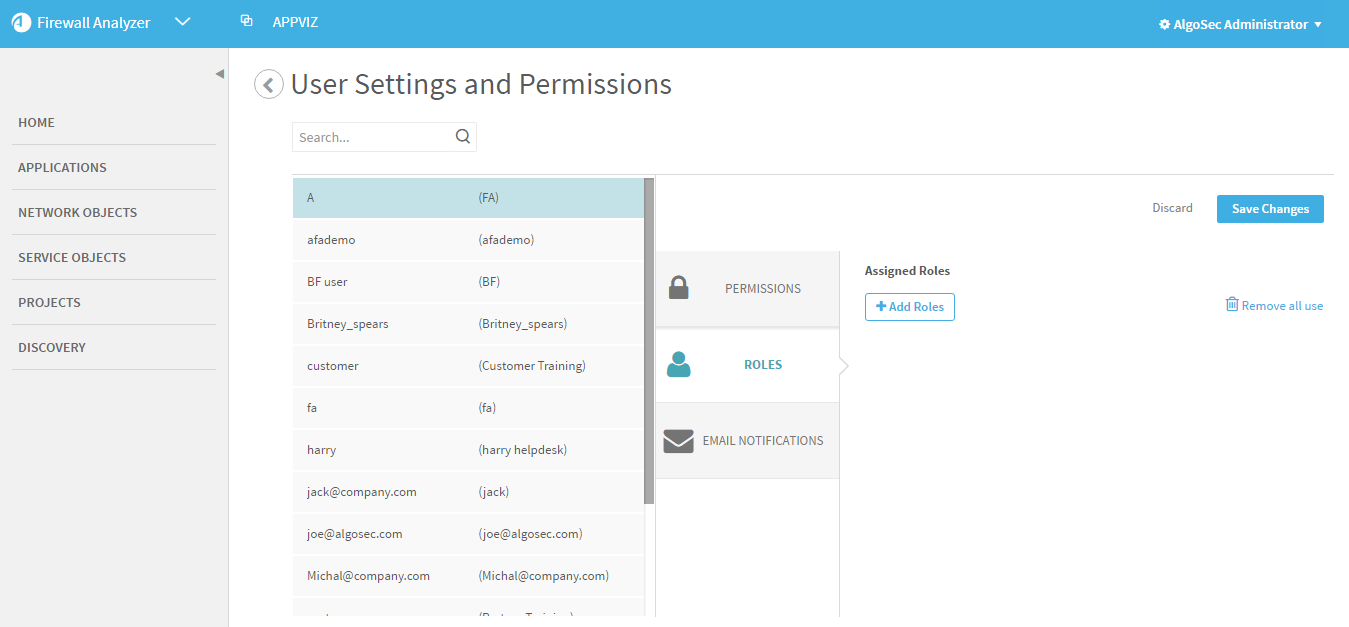
Manage user settings and permissions
You can manage permissions for users in two ways:
- You can grant permissions to individual users. This gives users permission to view or edit an application that they do not have permission for by default.
- You can assign users a role; consequently, the users with the role receive all the permissions of the role. See Manage role settings and permissions.
Note: If a user is assigned both individual permissions and a role, and there are conflicting permissions between the two, the higher permission level will take precedence.
Tip: All users receive default permissions. You can modify these default permissions by configuring the advanced AppViz property permissions.initial. See Configure advanced AppViz properties.
Manage application permissions
You can give single users, or all users
To manage permissions for an application:
-
Navigate to the Administration area.
-
Hover over the
 SETTINGS icon at the bottom left of the screen. After the panel expands, click
  ADMINISTRATION.
The Administration area appears in the workspace.
-
-
In the Settings and Permissions area, next to Manage application permissions, click Manage.
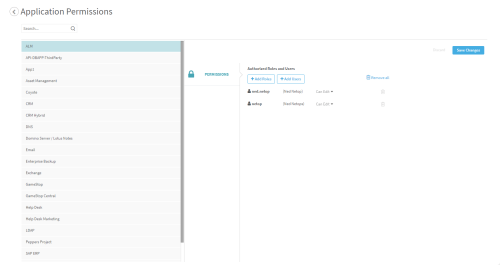
The Application Permissions page appears, displaying a list of applications on the left.
- Do one of the following:
- Select an application from the list.
- Perform a simple search for an application by doing the following:
Type any part of the application name in the search box, and click
 .
.The matching applications appear below the search box.
Select an application from the list.
The Authorized Roles and Users area for the selected application appears on the right.
Note: A role or user will appear disabled in the list for one of the following reasons: the user inherited permission to the application from a role, or the user or role has User has edit all applications permission.
- To give single users permission to view or edit the application, do the following:
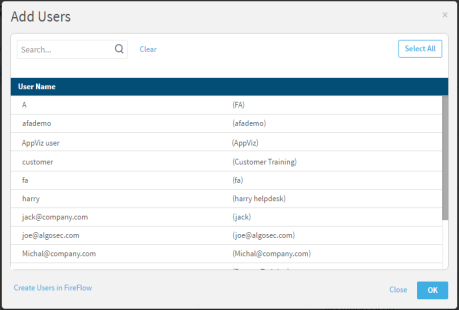
Click +Add Users.
The Add Users window appears.
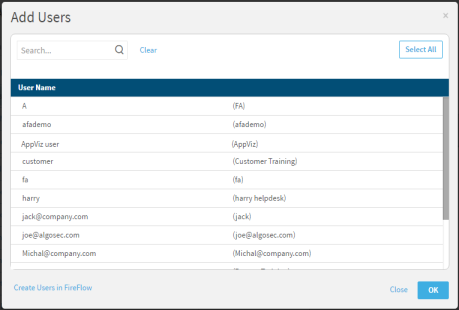
Do one of the following:
- Select users from the list.
- Perform a simple search for a user by entering any part of the user's name or username in the search box, and click . The matching users appear below the search box.
- To deselect users, click Clear.
Click OK.
Once added, the user(s) appear in a list below the application. By default they are only given permission to view the application.
To give the user permission to edit an application, click the Can View drop-down list for the application and select Can Edit.
-
To give all users with a specific role permission to view or edit the application, do the following:
-
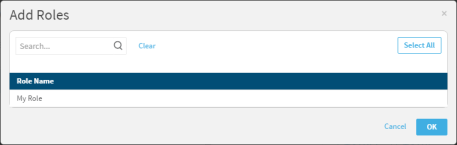
Click +Add Roles.
The Add Roles window appears.
- Do one of the following:
- Select roles from the list.
- Perform a simple search for a role by typing any part of the role's name in the search box, and clicking . The matching roles appear below the search box. Select roles from the list.
- To deselect roles, click Clear.
-
Click OK.
The role(s) appear in a list below the application. By default they are only given permission to view the application.
- To give the role permission to edit an application, click the Can View drop-down list for the application and select Can Edit.
-
- To remove the permissions of a user or role for the application, click
 .
. - To remove all user and role permissions for the application, click Remove all.
- Click Save Changes.

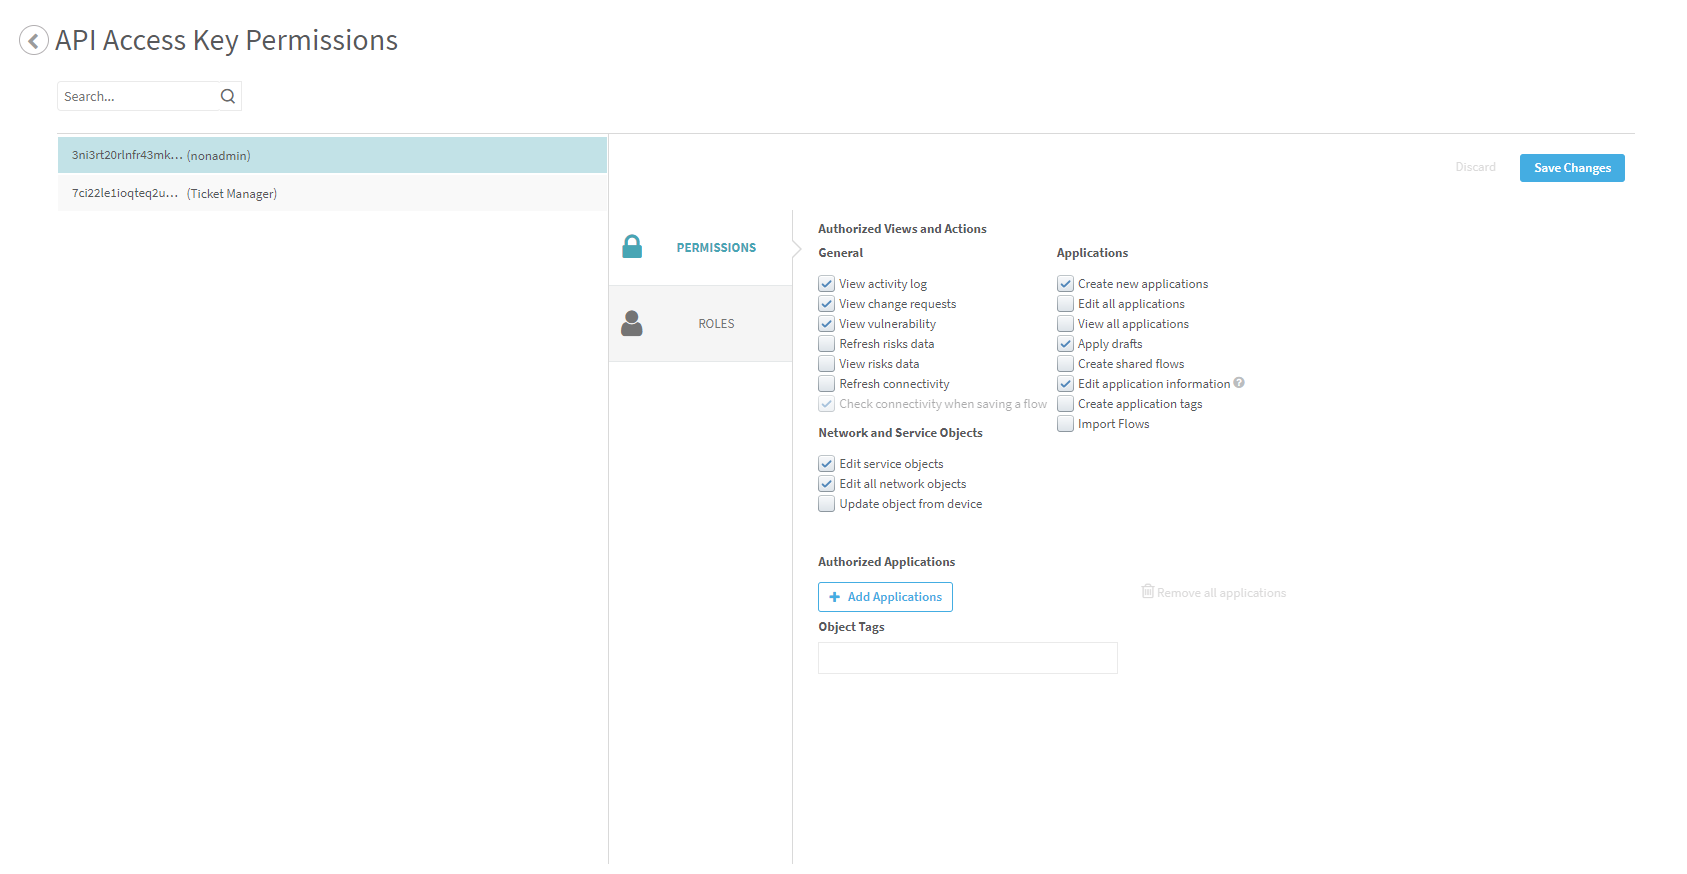
Manage API Access Key permissions
You can manage permissions to use APIs in two ways:
- You can assign API access keys their own set of permissions to view or edit applications via API. In this way, you can control the permissions of the anyone using these API Access Keys. For information about API Access Keys, see Manage API access keys
- You can assign individual roles their own set of permissions including to view or edit applications via API.