Manage Users
This topic explains procedures for adding, editing, and managing users within the system.
Note: For more information about AppViz Roles and permissions, see Manage permissions and roles.
Access the Users tab
Do the following:
-
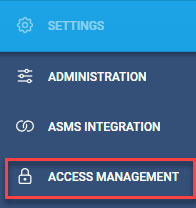
Hover over the Settings
 icon at the lower left of your screen. Settings options are displayed.
 -
Click on Access Management.

The Access Management page is displayed.

-
Select the Users tab.

From the Users tab you can:
-
See at a glance:
-
Instant User Count (total, filtered, searched)
-
User details of individual users
-
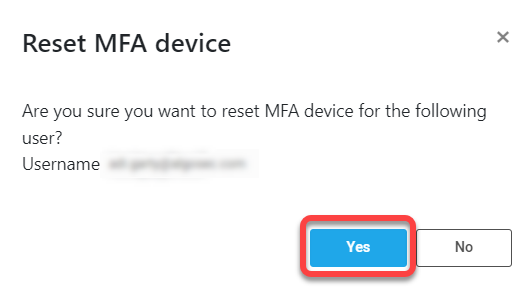
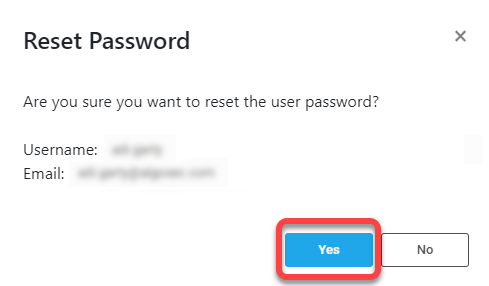
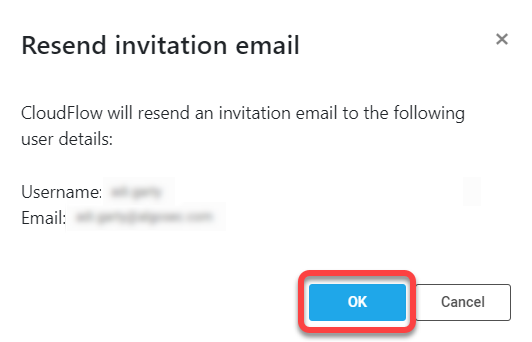
Note: Click on the ellipsis button to the right of each user to:
-
Reset MFA device available only if MFA is enabled for the user
-
Reset Password available only if user completed first-time login
-
Resend invitation available only if user has not completed first-time login
Add a new user
When SSO is disabled, Administrators can add a user, assigning any of the AppViz (SaaS) System Roles to the new user. See .
When SSO is enabled, the +Add User button is disabled.
-
Click +Add user above the Actions column.
-
Fill out the Add User dialog that is displayed according to the Add user fields table.
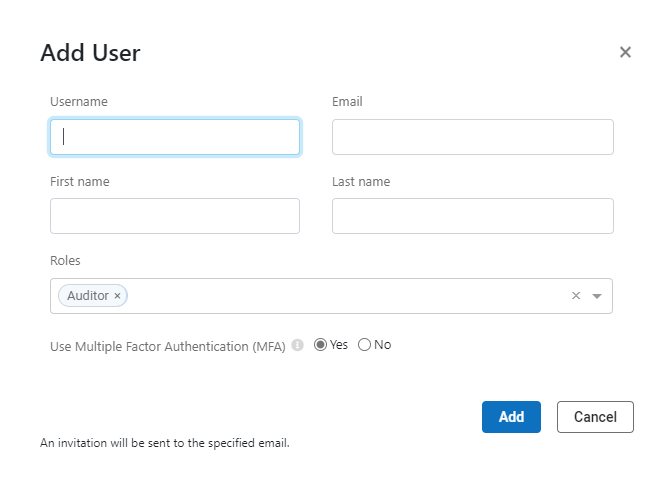
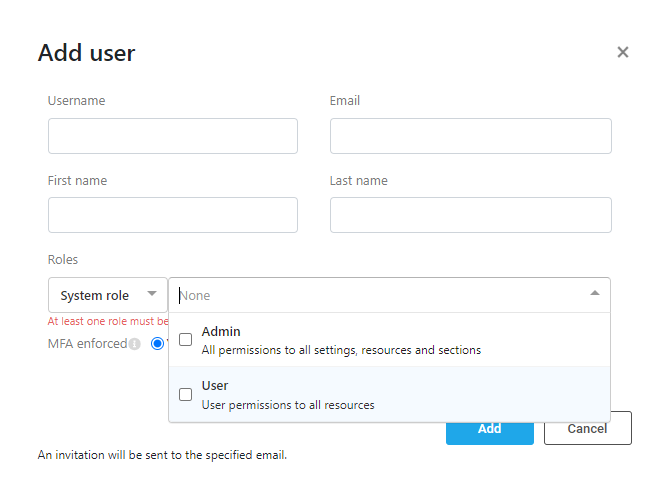
Note: Usernames must be unique.
After completing the fields, click the Add button at the bottom right of the Add user dialog.
The user is added to the list of users and is automatically sent a welcome email that enables a guided, seamless entrance into AppViz (SaaS). See Inside the invitation email.
Edit a user
Note: When SSO is enabled, user’s appear in the Access Management page USERS tab only after first login. They are assigned a default system role User, which can be edited later.
To edit a user:
1. Click on the vertical ellipsis  to the right of the user whose information needs editing.
2. On the options pop-up menu that is displayed, click Edit.
3. Modify the fields as required and then click Save to keep your changes or Cancel to discard them.
4. If required, change the MFA functionality for the user here.
Delete user
There are many reasons for deleting users including when a user leaves your organization. Deleting unauthorized users is an important security feature that should be undertaken in a timely manner.
To delete a user:
-
Click on the ellipsis
to the right of the user's row in the user table. -
On the options pop-up menu that is displayed, click Delete.
A confirmation message asks if you are sure you want to delete this specific user: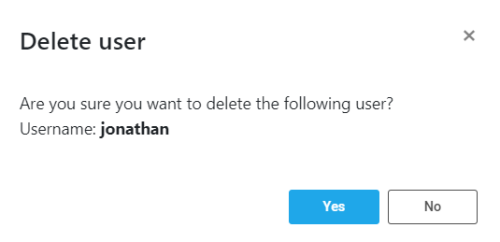
-
If you do not want to delete this user, click the x in the upper right corner of the message or click No.
To proceed with deleting the user, click the Yes button.
Upon clicking Yes, the User tab refreshes and the deleted user is no longer in the list of users.