Enable Threat Management on Azure ACR
This topic explains how to authorize and enable Cloud App Analyzer Threat Management with Azure Container Registry (CR) to scan and secure your continuous delivery (CD) cycle and prevent threats from reaching your container-based workloads.
This prevents the vicious cycle of continuous delivery of critical-vulnerable, compromised, or risky behavior images, by isolating high-risk images in a non-intrusive way, thus removing any concerns of failing company cloud business logic. If malicious content or vulnerabilities are found in your scanned images, Cloud App Analyzer protects your workloads by preventing their use.
Cloud App Analyzer alerts are delivered via email about any violation of the built-in rules, and include information about detected risks like malware, known-to-be exploited CVEs, and ransom-ware patterns such as exploited domains and ports.
Note: Threat management rule sets that form the basis of Cloud App Analyzer's scanning mechanism are defined in Threat Management.
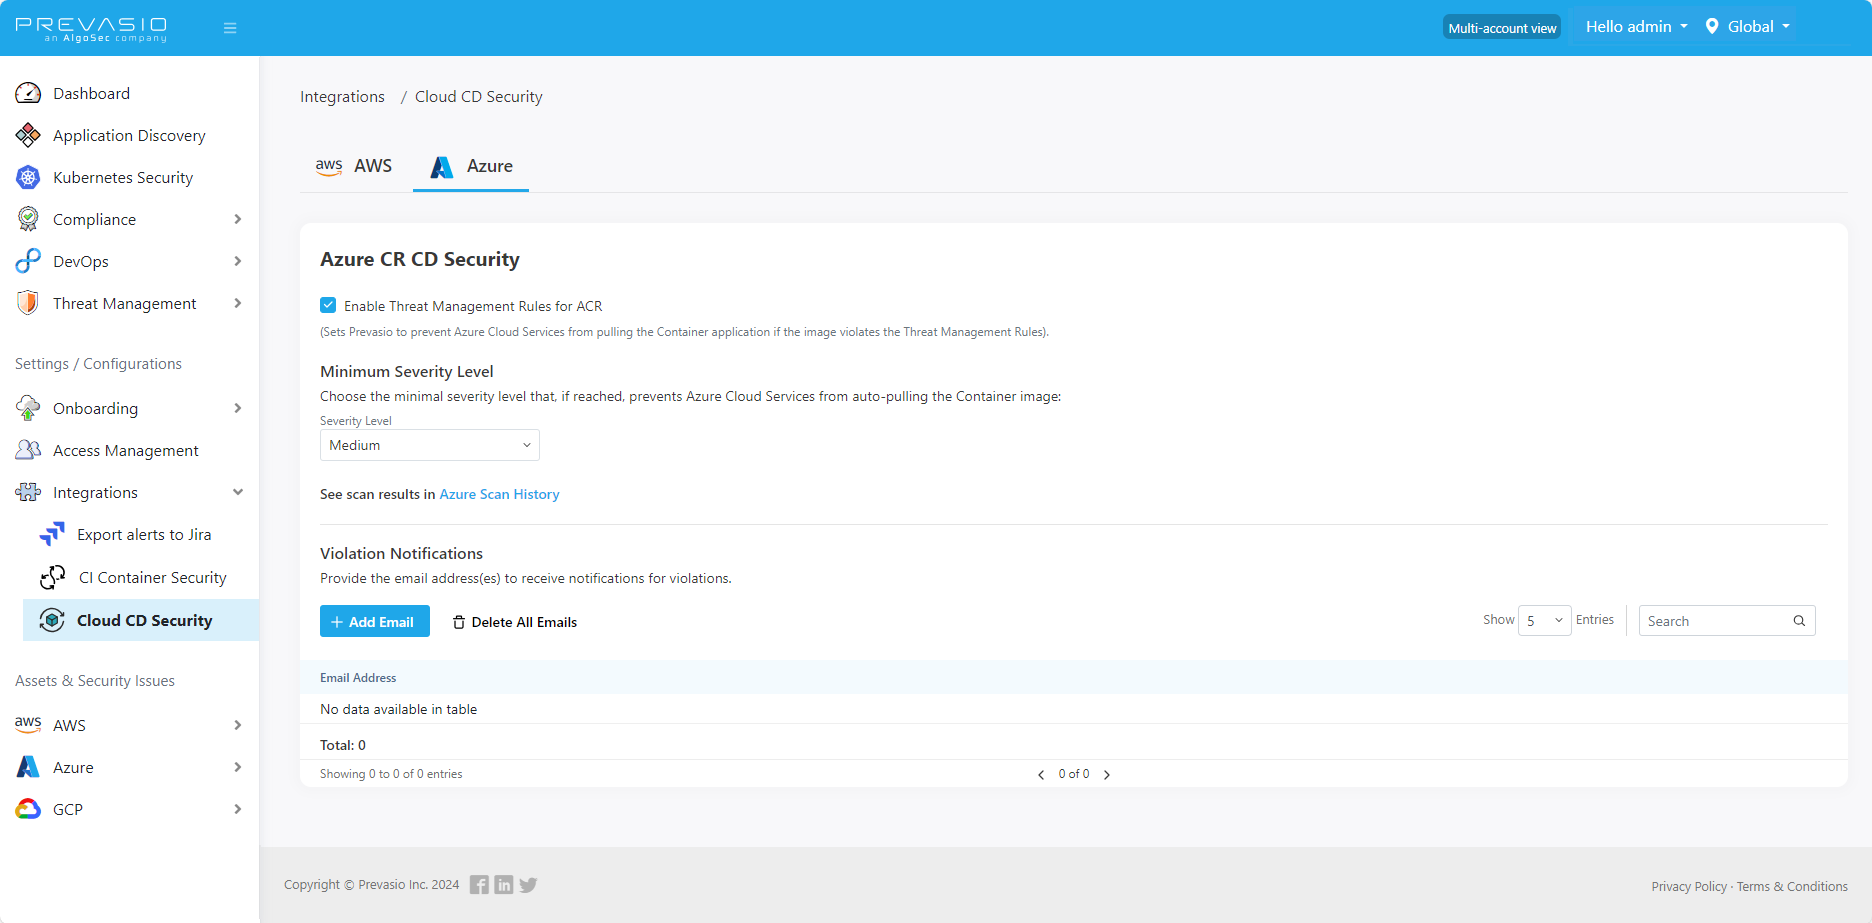
Configure and Enable Azure ACR Continuous Deployment (CD)
Configure and Enable Cloud App Analyzer's Container Workload Security with Azure ACR Continuous Deployment (CD).
Do the following:
- Ensure your Azure subscriptions are assigned all necessary Cloud App Analyzer roles. See Roles that are assigned by CAA.
-
From the Main menu, select Integrations> Cloud CD Security and select the Azure tab.

-
Set or edit details:
item Description Azure ACR CD Mitigation Select to enable this feature. When enabled, if the built-in blocking rules are triggered by a security violation, the risky image will be locked to prevent any Azure container-capable service from pulling it. Minimum locking level Set the minimum level of risk severity detected that will trigger the built-in rules to lock the risky image.
Available risk levels are: Medium, High, and Critical.
Notification email addresses Notification emails will be sent to the specified email addresses when an image is locked. - Click Save in the email popup box dialog to save the addresses that were added or removed.
â Next steps:
