Work with risks
The Risks page provides information on risks across all your on-boarded cloud accounts (such as AWS, Azure, and Google Cloud). From it, you can explore, activate, and suppress whole risks or risk triggers, export risk trigger details, identify affected assets, access rules in the context of their policy sets, and create risk reports.
Risks are determined based on AppViz risk profiles. To learn how you can set and manage risk profiles see Manage risk profiles.
View risks and risk details
To access the Risks page in AppViz, click the  RISKS icon on the main menu on the left.

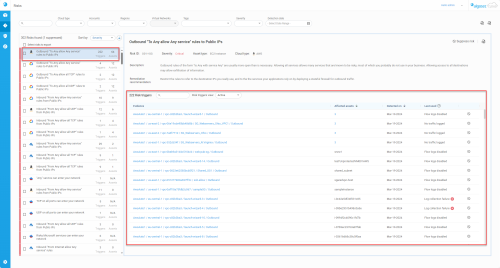
The RISKS page loads, listing risks detected across your cloud inventory on the left and the details of the currently selected risk on the right.
Search and filter risks
Use the Search field to display a Risks list whose titles contain a specific string. The Search field can be used in conjunction with Risk filters to find required risks efficiently.

Risk filters
Use the filters located at the top of the page to view a more focused list of risks. You can filter based on any of the following:
-
Cloud type
-
Account
-
Region
-
Virtual Networks
-
Tags
-
Risk severity
-
Detection date

Important: Configuring one or more filters can potentially result in no risks matching the filter criteria.
Note:
-
Multiple values, single values, or no value can be selected for all filters (except Detection date which can have either a single date range or no value selected)
-
Virtual Networks filter is only enabled when one account is selected
-
Between filters the Boolean AND operator applies
-
Between values within a filter, the Boolean OR operator applies
-
When Detection date has no value selected, the results will show risks detected from when the account was onboarded until the present date.
For more information about tags and working with applications in AppViz, see Work with tags.
Risks list
The left panel gives an overview of all active and suppressed risks, list sorting options, and displays key descriptive elements for each risk listed.

-
The total number of risks associated with your AppViz account.
-
How many risks are suppressed.
-
The Sort by selector which indicates the ordering of the list:
-
Severity
-
Cloud type
-
Risk name
-
Trigger count
-
Assets count
-
-
The Sort direction selector.
-
Risks list entry:
Severity color strip
A thin strip of color indicating the severity of the risk.
Red = Critical
Orange = High
Yellow = Medium
Blue = Low
Grey box = Suppressed risk (Suppressed risks are listed at the bottom of the list).
Cloud type The cloud type of the account the risk was found in. Risk name A short description of the risk. Triggers The number of rules that trigger the risk. Affected assets
The number and types of assets affected by the risk.
Note: For Azure NSG risks, this includes VMs attached either to network interfaces or to network interfaces found within subnets.
-
Select which risks to export a risks report. For more details, see Export risk and risk trigger details.
Risk summary
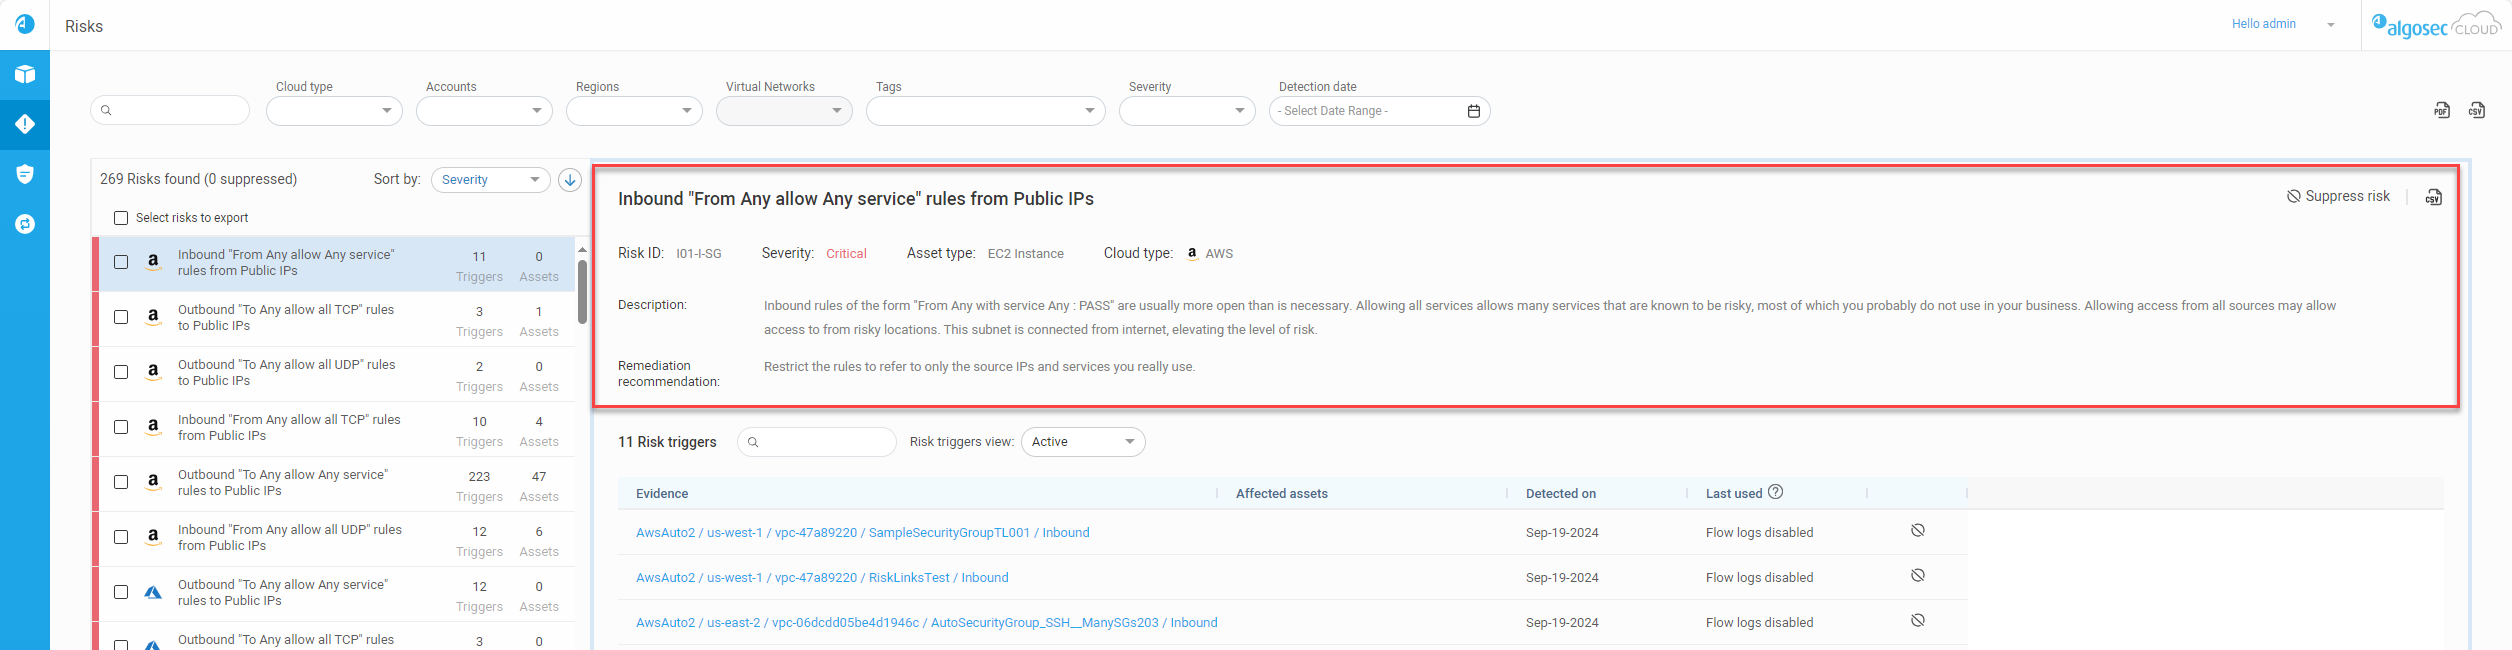
When a risk is selected from the Risks list, a full summary of that risk and its Risk triggers appear in the panel to the right.
The risk summary section contains the following information and options:
| Risk title | The name of the risk as it appears in the risks list panel. |
|
Risk ID |
The ID number assigned to the detected risk. Note: The risk profile that generated the risk is appended to the end of the Risk ID. For details on risk profiles, see Manage risk profiles. |
| Severity | The severity of the risk (critical, high, medium, low). |
| Asset type | Type of cloud asset (for example, VM, firewall, subnet). |
| Cloud type |
The name of the cloud vendor. |
| Description | A description of the risk. |
| Remediation recommendation | The suggested course of action to resolve the risk. |
|
|
Click to suppress the risk, including all of its risk triggers. For more details, see Suppress/Activate risks and risk triggers. |
| Export to CSV | Click the |
Risk triggers
The Risk triggers section displays and details the rules that trigger the risk selected in the left panel. In the Risk triggers section, suppressed and active risk triggers are shown in separate views selected using the Risk triggers view filter.

The Risk triggers header includes:
| No. of Risk triggers |
The number of rules found that trigger the risk. If this number includes suppressed risk triggers, the number of suppressed risk triggers is indicated in parentheses. |
||||||||||||||||||||||||||||||||||||||||||||||||||||||||||||||||||||||
| Search filter | When used, only the rules whose names contain the filtered text are displayed. | ||||||||||||||||||||||||||||||||||||||||||||||||||||||||||||||||||||||
| Risk triggers view |
|
||||||||||||||||||||||||||||||||||||||||||||||||||||||||||||||||||||||
|
In the Risk triggers list, the following fields are displayed for every risk trigger: |
|||||||||||||||||||||||||||||||||||||||||||||||||||||||||||||||||||||||
| Hierarchical (Google Cloud) |
Indicates that the risk is triggered by a rule that comes from a hierarchical policy. |
||||||||||||||||||||||||||||||||||||||||||||||||||||||||||||||||||||||
| Evidence |
This column lists the evidence (the full path to the rule) that triggered the risk. Path details depend on the vendor:
Tip: Click on a trigger to display the rule in the policy sets in which it is found. This allows you to:
|
||||||||||||||||||||||||||||||||||||||||||||||||||||||||||||||||||||||
| Affected assets |
Assets affected by the rule. When multiple assets are affected, a number is displayed in this column. Click on it to see a list of the affected assets. Note: For Azure NSG risks, if a risk trigger is part of an NSG attached to a subnet then the subnet name is shown as well as the number of affected VMs contained in the subnet. To review the full list of the VMs, use the Export risk and risk trigger details option. |
||||||||||||||||||||||||||||||||||||||||||||||||||||||||||||||||||||||
| Detected on |
Displays the date the risk trigger was first detected. Note: Accounts onboarded to AppViz before this feature was introduced will display the date the feature was released in AppViz (26-March-2024) instead of the date the risk trigger was first detected. Note: The detected date is reset in the following situations:
|
||||||||||||||||||||||||||||||||||||||||||||||||||||||||||||||||||||||
| Last used |
Shows either the date the rule was most recently used or a status message that varies based on the Security Control: The Last used column displays one of the following:
Note: For more details about unused rules, see About AppViz unused rules. The Last used column displays one of the following:
Note: For more details about unused rules, see About AppViz unused rules. The Last used column displays one of the following:
Note: For more details about unused rules, see About AppViz unused rules. The Last used column displays one of the following:
Note: For more details about unused rules, see About AppViz unused rules. The Last used column displays one of the following:
Note: For more details about unused rules, see About AppViz unused rules. The Last used column displays one of the following:
Note: For more details about unused rules, see About AppViz unused rules. |
||||||||||||||||||||||||||||||||||||||||||||||||||||||||||||||||||||||
| Suppress Trigger icon |
Click the |
||||||||||||||||||||||||||||||||||||||||||||||||||||||||||||||||||||||
|
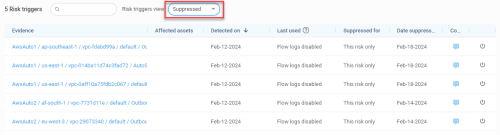
Additional fields for suppressed risk triggers: |
|||||||||||||||||||||||||||||||||||||||||||||||||||||||||||||||||||||||
| Suppressed for |
Indicates if this risk is suppressed for:
|
||||||||||||||||||||||||||||||||||||||||||||||||||||||||||||||||||||||
| Date suppressed | The date (mmm-dd-yyyy) the risk was suppressed. | ||||||||||||||||||||||||||||||||||||||||||||||||||||||||||||||||||||||
| Comment | Click on the  Comment icon to view or edit the suppressed comment. Comment icon to view or edit the suppressed comment. |
||||||||||||||||||||||||||||||||||||||||||||||||||||||||||||||||||||||


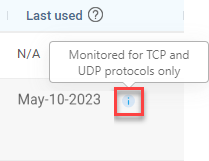
 appears in the column to indicate that this information may not be accurate.
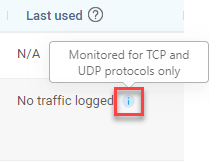
Suppress/Activate risks and risk triggers
AppViz identifies the risks across all your onboarded accounts and displays them on the Risks page; however, you can modify which risks appear by suppressing /activating the risks themselves or the risk triggers that generate the risks.
You can suppress or activate a risk, including all of its risk triggers.
Do the following:
From the left pane, select the risk you want to suppress or activate.
Details about the risk appear in the right pane, with an option to either suppress or activate the risk, depending on the current status of the risk.

-
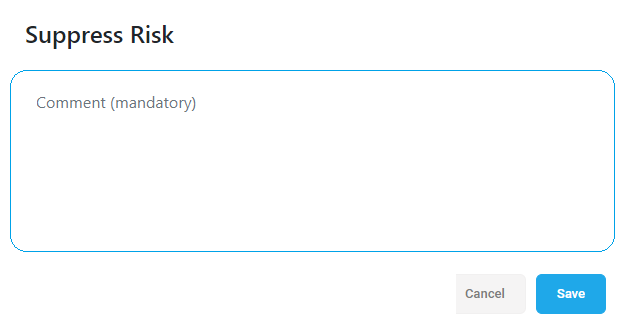
To suppress an active risk:
-
Click
 Suppress risk.
 -
Provide a mandatory comment in the Suppress Risk dialog.

Note: When the risk is suppressed:
A
Comment icon appears next to the Suppressed severity status.
-
Click the Comment icon to view or edit it.
-
The comment can be updated as long as the risk is suppressed.
-
-
-
To activate a suppressed risk:
Click
 Activate risk.
Note: When a suppressed risk is activated, its severity returns to the same level as it was before it was suppressed.
Note: A given risk trigger may identify more than one risk. Risk triggers can be suppressed for an individual risk (the risk in focus) or for all risks.
-
To suppress a risk trigger:
-
From the left pane, select the risk you want to focus on. The risk triggers for that risk are displayed in the lower part of the right pane.
Tip: You can use the Risk triggers search filter (located in the right pane) to help find the risk trigger you want to suppress.

-
Make sure Active is selected as your Risk triggers view.

-
Locate the row of the risk trigger you want to suppress and click the
icon to suppress the risk trigger. -
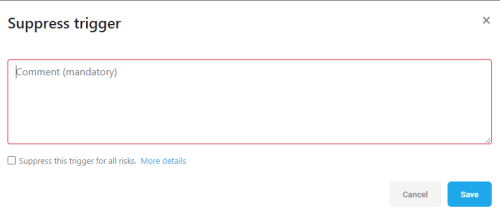
Enter a mandatory comment in Suppress trigger dialog that is displayed. Include relevant information such as your name and the reason you are suppressing the risk trigger.
-
Optional: Select the Suppress this trigger for all risks checkbox, to suppress all risks for this specific rule in the policy set.
-
Click Save. The screen refreshes and the risk trigger you suppressed no longer appears in the list of active risk triggers.
Tip: Select Suppressed as your Risk triggers view to see the newly suppressed risk trigger in the list of suppressed risk triggers.
-


-
To activate a suppressed a risk trigger:
-
From the left pane, select the risk that you wish to focus on.
The risk triggers for that risk are displayed in the lower part of the right pane.
-
Make sure Suppressed is selected as your Risk triggers view.
-
Locate the row of the risk trigger you want to activate and click the
icon to activate the risk trigger.Tip: Select Active as the Risk triggers view to see the newly activated risk trigger in the list of active risk triggers.
Note: Suppressed trigger information (such as date suppressed and the mandatory comment) is no longer associated with a trigger once it is activated.
-

Export risk and risk trigger details
Export a snapshot of risks and risk trigger information for easy sharing with relevant stakeholders and further analysis.
Do the following:
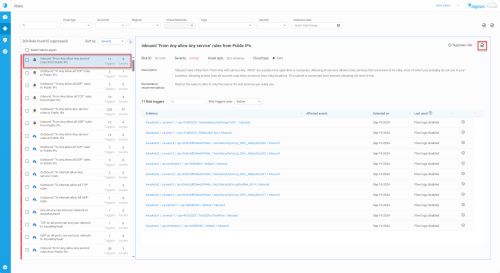
-
Customize the report results by using filters as needed.

-
(Optional) Use the checkbox next to each risk to select specific risks to include in the report.
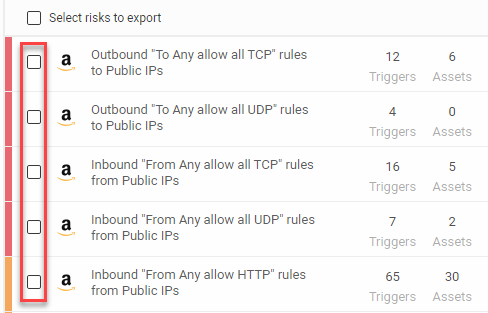
Note: Use the checkbox located above the list of risks to toggle all checkboxes on or off.

-
Click the
 icon on the top right.
The Export Report to PDF dialog appears.

Note: The option to export Selected risks is disabled when no checkboxes for specific risks are selected on the risks page to include in the report (see Step 2).
-
Fill in the details as required:
Report Description Report Name The name of the file created when exporting the PDF.
Note: AppViz by default suggests a report name that includes the current date.
Export Risks Report options:
-
All risks: Generate a report with all risks matching the risk filters
-
Selected risks: Generate a report with risks selected by the user
Include affected assets count only When selected (default), the report only displays the number of assets affected by the risk. Deselect the checkbox to include a list of all affected assets in the report. Description By default, the description field includes any risk filters selected. -
-
Click Export.
Note:
-
PDF Report generation can take up to 20 minutes.
-
Reports can contain a maximum of 2000 risk triggers. When there are more than 2000 risk triggers, the following message will be displayed:

-
-
Locate your successfully created Risks Reports in your Downloads folder.


The following table contains a brief summary of the Risks Report contents:
| Page Type | Description |
|---|---|
| Cover Page | Title of the report, the date and time it was generated, the user name of the person that generated it, and the Tenant ID. |
| Summary Page |
Lists
|
| List of Risks | The risks are listed by name, showing their color-coded severity, number of associated triggers and number of affected assets. Each risk name links to its own page in the report describing the risk in detail. |
| Risk Details Pages |
Each Risk Details page provides the following information:
|
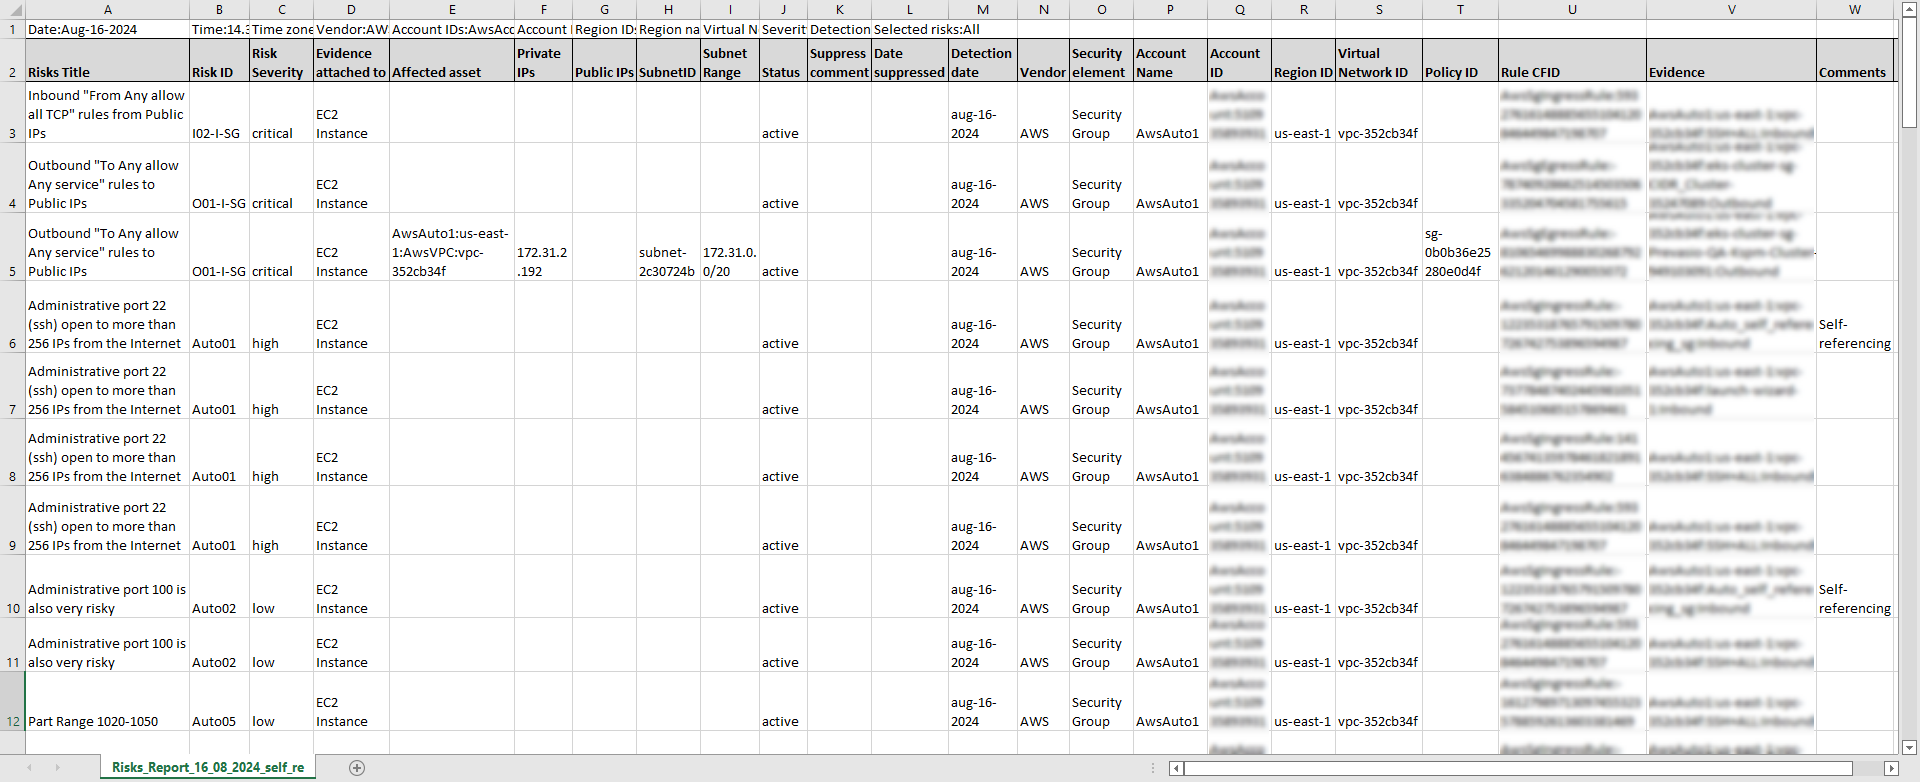
Note: The exported CSV file includes triggers for the selected risk. Each line in the CSV file describes a unique combination of trigger and affected asset, and also includes additional details for each asset, for example the public IP address and subnets for each asset.
If you are using one or more filters at the time of export, the exported CSV will include the same data as you see on the AppViz user interface. I.e. the filtered results.
Note: You can download scheduled Risk reports (in CSV) containing all detected risks in a compressed .gz archive. The report contains information about the risks, their severity, and detailed information about the affected virtual machines including IP addresses, tags, and related interfaces. The report is created once a day and downloaded using the Download Scheduled Risk Report API. To enable this feature, contact support.
Do the following:
-
Customize the report results by using filters as needed.
Note: Search and Tag filters are not applied when generating the risk report as a CSV file.
-
(Optional) Use the checkbox next to each risk to select specific risks to include in the report.
Note: Use the checkbox located above the list of risks to toggle all checkboxes on or off.
-
Click the
 icon on the top right.
The Export Report to CSV dialog appears.

Note: The option to export Selected risks is disabled when no checkboxes for specific risks are selected on the risks page to include in the report (see Step 2).
-
Fill in the details as required:
Report Description Report Name The name of the file created when exporting the CSV.
Note: AppViz by default suggests a report name that includes the current date.
Export Risks Report options:
-
All risks: Generate a report with all risks matching the risk filters
-
Selected risks: Generate a report with risks selected by the user
-
-
Click Export.
Note: In accounts with an enormous number of risks, CSV Report generation can take up to 40 minutes.
-
Locate your successfully created Risks Reports in your Downloads folder.


Helpful information about the exported CSV file:
-
The first line of the CSV report contains metadata including report generation time, information about any filters set when exporting the CSV, and other relevant settings.
-
The second line lists the table column headers.
-
The remaining lines in the CSV contain the report data.
-
CSV marker explanations:
-
, (comma): Used to separate fields.
-
| (vertical bar): Used to separate multiple values in a single field.
-
: (colon): In the first line of the CSV report, the colon separates the name of the field from its value. For example, Time zone:Asia/Jerusalem.
The colon is also used in the Evidence column to separate elements in the rule path. For example: AWSAlgoSecLabAccount:eu-central-1:vpc-d4a042bd:launch-wizard-10:Inbound.
-
. (period): Used to distinguish between hours and minutes when writing a time value. For example: 20.53.
-
Note:
-
To find rule details associated with the risk, use the rule CFID as the common identifier between risk CSV report and the policy CSV report. For details, see Export policy sets.
-
Self-referencing rules are indicated in the Comments column.
Note: The exported CSV file includes triggers for the selected risk. Each line in the CSV file describes a unique combination of trigger and affected asset, and also includes additional details for each asset, for example the public IP address and subnets for each asset.
If you are using one or more filters at the time of export, the exported CSV will include the same data as you see on the AppViz user interface. I.e. the filtered results.
Do the following:
-
From the left pane, select the risk that you wish to focus on. Details about the risk and its risk triggers are displayed in the right pane.
-
Click the
icon on the top right of the pane. -
The Export Report dialog appears.

-
(Optional) In the Report Name field, enter the name of the file created when exporting the CSV report.
Note: AppViz by default suggests a report name that includes the risk ID, name, and current date.
-
Click Export.
Your CSV file is automatically downloaded to your default download location. The file name includes the risk name and current date, for example I01-I-NSG Inbound From Any allow Any service rules from Public IPs - Risk Triggers Dec-31-2020.csv
Note: Exporting a report with many risks may take up to 20 minutes to complete.

Helpful information about the exported CSV file:
-
The first line of the CSV report lists the table column headers.
-
The remaining lines in the CSV contain the risk trigger data.
-
CSV marker explanations:
-
, (comma): Used to separate fields.
-
| (vertical bar): Used to separate multiple values in a single field.
-
: (colon): In the Affected assets column, the colon separates elements in the affected assets path. For example: AutomationAccount:us-east-1:AwsVPC:vpc-081f53f61755ab618:EC2_shared_vpc.
-
The contents of this file are as follows, unedited/unformatted: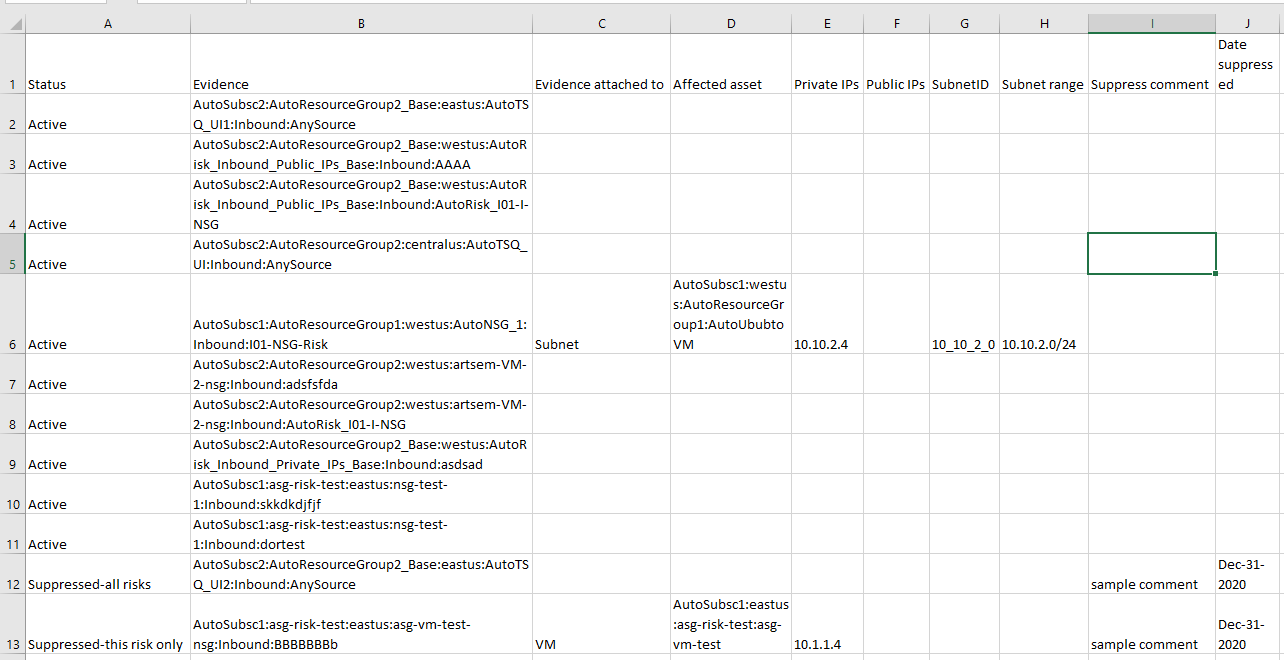
Here are the contents of a different file, presented here as a table:
| Status | Evidence | Evidence attached to | Affected asset | Private IPs | Public IPs | Subnet ID | Subnet range | Suppress Comment | Date Suppressed |
|---|---|---|---|---|---|---|---|---|---|
| Active | AlgoSecAWSAccount:myserv-1:vpc-252d67c:FF-SG3:inbound | AlgoSecAWSAccount:myserv-2:AwsVPC:vpc-63f825fc:Working broken AMI | 142.26.28.61 | ||||||
| Suppressed-this risk only | AlgoSecAWSAccount:myserv-1:vpc-252d67c:FF-SG1:inbound | AlgoSecAWSAccount:myserv-1:AwsVPC:vpc-252d67c:VMware SD-WAN Edge by VeloCloud | 142.26.9.146 | subnet-09616444 | 172.31.0.0/20 | suppressed by John | Nov-08-2020 | ||
| Suppressed-all risks | AlgoSecAWSAccount:myserv-1:vpc-3562ff0cf3fd6ed37:allow-all-SG:inbound | AlgoSecAWSAccount:myserv-1:AwsVPC:vpc-3562ff0cf3fd6ed37:CKP-CloudGuard-R80.10-SA | 10.631.1.5, 10.548.3.4, | 52.193.49.104 | Suppress comment 1 | Nov-09-2020 |
Note: This example shows three rules, each affecting a single asset. The third asset has a public IP, which means that it is accessible from the internet.
Access rules in the context of their policy sets
You can access rules in the context of their policy sets from the Risks page.
-
From the left pane, click on a risk.
-
Click on a link of interest in the evidence column.
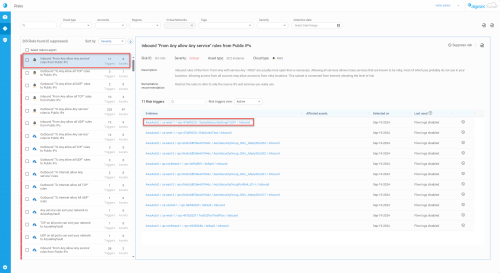
The Network Policies page appears with the relevant policy set showing its inbound and outbound rules tabs.

For each rule, the number of risks at each level is shown by colored-coded circles. Hover over the circles to see the number of risks and the severity level text.


Notes about risk triggers and affected assets
AppViz supports risks for policies that are not attached to any network interface, subnet, or virtual machine.
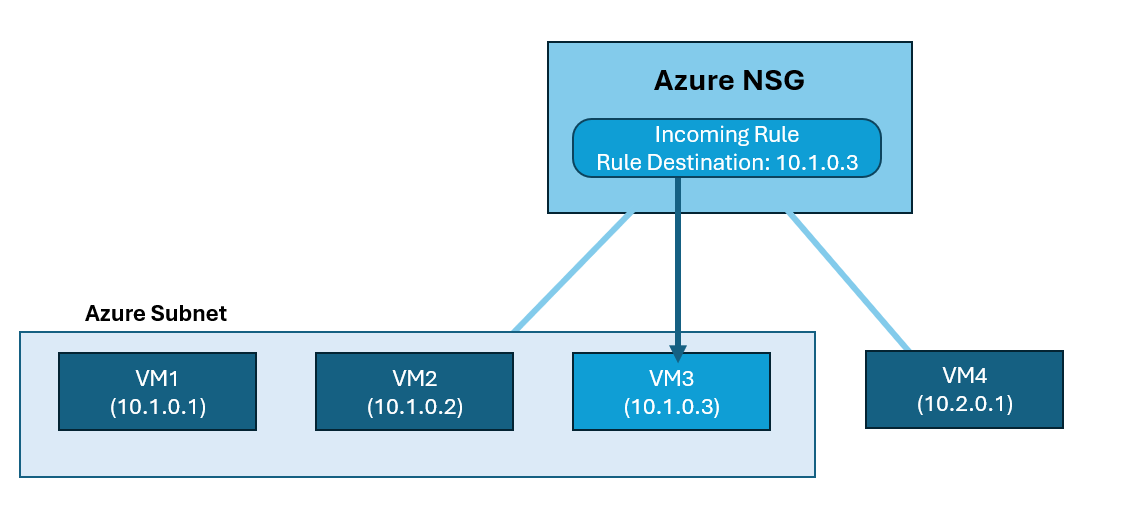
Azure Only: In certain scenarios, an Azure NSG may be protecting several assets, such as VMs, yet a particular NSG rule only safeguards a portion of these assets. This situation often arises when an NSG rule, designed to target a single IP address, is applied to a subnet that encompasses multiple VMs. In such cases, AppViz displays in the affected assets result only the VM effectively protected by this rule (the VM holding that specific IP).
In the following example, the NSG incoming rule has a rule destination 10.1.0.3. Although the NSG is applied to a subnet containing 3 virtual machines and to an additional interface with a single virtual machine, AppViz only considers VM3 an affected asset because it is the only virtual machine whose traffic is impacted by the rule destination.
Risks and risk triggers are displayed when the risk triggers (SG/NSG rules) belong to the set of rules matching the user input for the following filters:
-
Cloud type
-
Account
-
Region
