Manage risk profiles
This topic explains how to manage risk analysis in ACE using risk profiles, including Standard, Standard Plus and custom profiles.
ACE policy risk analysis is based on risk profiles, which define the criteria and logic ACE uses to inspect policy rules. These profiles identify potential risks in the network setup and assign severities. To improve accuracy, ACE considers both the traffic allowed by the rules and the routing configuration.
ACE supports three types of risk profiles:
-
Standard risk profile: The Standard profile is ACE’s baseline ruleset for inspecting security policies and configurations. You cannot customize it, but you can suppress individual risks (or specific risk triggers) to prevent them from appearing.
-
Standard Plus risk profile: Standard Plus is an advanced version of the Standard profile. It provides deeper coverage and will evaluate risks differently (including risk IDs and severities). Standard Plus serves as the baseline for creating organization-specific risk profiles. For some policies the Standard Plus becomes active when selecting a customized risk profile, for others it is enabled by default- see table below
-
Custom risk profiles: A custom risk profile contains additional risk definitions that allows you to extend Standard Plus to match your organization’s security requirements. When working wiht customized risk profile the standard plus is also active. For example, you can:
-
Customize permitted traffic: Define allowed traffic between networks and specify the severity of unauthorized traffic.
-
Customize zones: Override the default zone logic (RFC1918 = Internal, all others = External) by assigning networks to Internal, DMZ, or External. For more details see User-Defined Network Zone Definitions: Enhanced Risk Accuracy.
-
Customize trusted traffic: Define trusted networks or IP ranges. Rules whose entire source or entire destination is within a trusted network do not trigger risks.
-
Trusted Networks impact only the risk calculations performed by the Standard Plus risk profile.
-
Even if a Trusted Network is defined within a custom risk profile file, its effect applies to any account using the Standard Plus risk profile, regardless of whether the account is associated with a custom profile that does not include a Trusted Network definition.
Important:
Uploading a risk profile that includes Trusted Networks will affect all risks calculated by the Standard Plus risk profile, even if no accounts are currently assigned to that profile.
-
Trusted Networks do not apply to accounts evaluated using the Standard risk profile.
For details, see Global Trusted Host Groups (Trusted Networks).
-
-
Active risk profile by cloud policy type
ACE evaluates risks using a baseline risk profile, either Standard or Standard Plus, based on the cloud policy type. This baseline is referred to as the active risk profile. When a custom risk profile is applied, Standard Plus always becomes the active risk profile, regardless of the cloud policy type.
The following table shows which risk profile ACE uses to evaluate risks for each cloud policy type. It also indicates how the active risk profile changes when a custom risk profile is applied.
| Cloud policy type | Active Risk Profile when not using a customized risk profile | Active Risk Profile when using a customized risk profile |
|---|---|---|
| AWS Security Groups (SG) | Standard | Standard Plus & customized risk profile |
| Azure Network Security Groups (NSG) | Standard | Standard Plus & customized risk profile |
| Azure Native Firewall | Standard Plus | Standard Plus & customized risk profile |
| Google Cloud Platform Hierarchical Policy | Standard | No customized risk support |
| Google Cloud Platform VPC Firewall Rules | Standard | No customized risk support |
Caution:
When evaluation switches from Standard to Standard Plus (like when you create or apply a custom risk profile, for AWS Security Groups and Azure NSGs):
-
Risk IDs will change.
-
Risk severities can differ for existing risks.
Notes:
-
When you create or apply a custom risk profile, for AWS Security Groupsand Azure NSGs, Standard Plus becomes the active risk profile, replacing Standard.
Exception: Azure Native Firewall already uses Standard Plus by default.
-
For cloud policy types marked “No customized risk support”, risk analysis always uses the Standard risk profile, and custom risk profiles cannot be applied.
-
For cloud policy types marked “Risk analysis not available”, ACE does not perform risk analysis.
-
If you assign different risk profiles to different accounts and you have the same risk definition in two risk profiles, both risk definitions will share the same risk ID.
-
After making changes to risk profiles or the associated account, the updated risks will only appear after the next risk analysis cycle, which may take several hours to complete.
View Risk Profile page
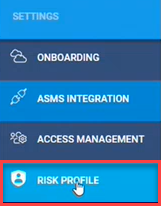
To access the Risk Profile page, click ![]() RISK PROFILE from the main menu on the left.
RISK PROFILE from the main menu on the left.
The Risk Profile page appears.
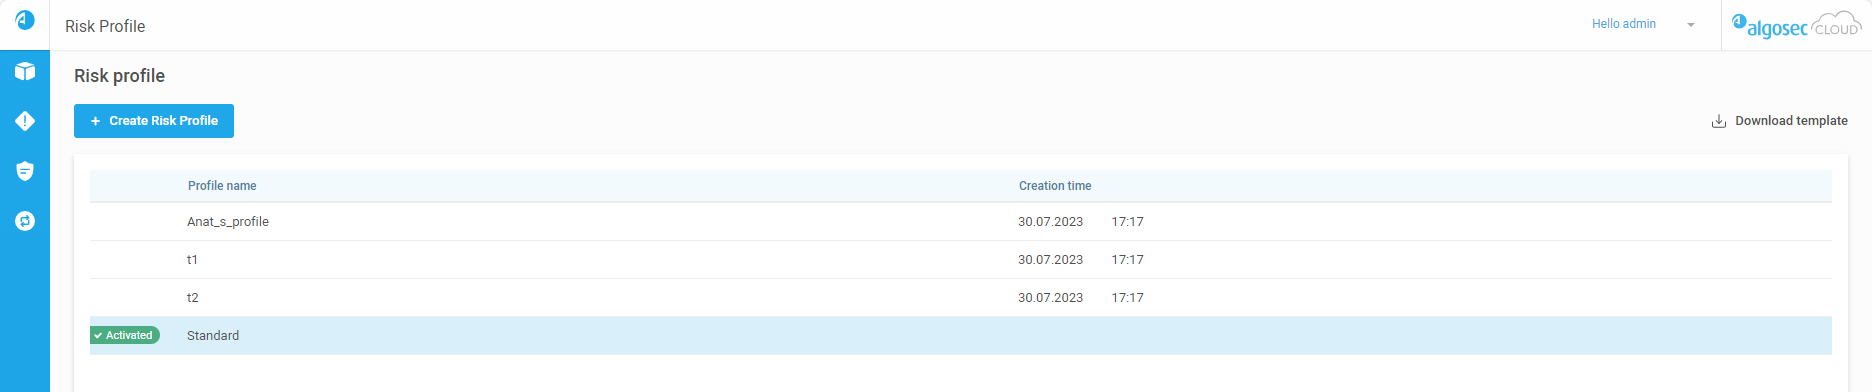
The page displays the following details and options:
| Risk Profile Name |
Name of the risk profile. Note: Custom risk profile names are set by the user when they are added. For more details, see Manage risk profiles. |
|
State |
Indicates the role of the risk profile when calculating risks on accounts. 3 possible values:
|
| Assigned Accounts |
Number of accounts associated with the risk profile. For details assigning / unassigning accounts, see Assign / Unassign accounts to a risk profile. |
| Creation Time | The date and time the risk profile was created. |
| Description | Description of the risk profile. For more details about setting a custom risk profile description see Manage risk profiles and Update a custom risk profile. |
| Actions Menu |
Hover over a risk profile to display the |
From the Risk Profile page, you can do any of the following:
Create/Add a custom risk profile
Note:
-
AWS SG: The capability to define network zones is available in Early Availability.
-
Azure Native Firewall: You can define network zones Internal, DMZ and External in the custom risk profile to improve risk assessments and risk accuracy.
For more details, see User-Defined Network Zone Definitions: Enhanced Risk Accuracy.
Note: To define risks for all traffic that allows a specific service, see Define Risks for All Traffic Allowing a Specific Service.
In the custom risk profile, you only need to include the risks you want to change or add. Everything else will be inherited from the Standard Plus profile.
Do the following:
-
On the Risk Profile page, click
 Download template to download an Excel spreadsheet template for creating a risk profile and update the template with your custom risk profile information.
Note:
-
For detailed instructions on how to use the template, see Customize risk profiles.
-
If you already have custom risk profiles created for ACE, you can upload that template file instead.
-
-
Click + Add Risk Profile.
The Add Risk Profile dialog appears.

-
Enter a name for the risk profile in the Risk Profile Name field.
Note:
-
Only alphanumeric characters are permitted in the profile name.
-
The profile name must be unique and not match the name of any other risk profile.
-
-
Click
 Upload and select the risk profile Excel spreadsheet you created from the template.
 -
(Optional) Add a note in the Description field. You can enter a maximum of 500 characters for the description.
-
Click Add.
The new risk profile appears in the list of risk profiles with the date and time it was created.
Important: For ACE to begin using a new custom risk profile:
-
Assign accounts to it (see Assign / Unassign accounts to a risk profile)
-
Set it as the default so that new accounts will automatically be assigned to it (see Set the default risk profile)
-
Update a custom risk profile
You can modify the risk calculations and description of a custom risk profile. The Standard Plus risk profile cannot be altered.
Do the following:
-
On the Risk Profile page, download the speadsheet of the existing custom risk profile that you want to edit and then modify it as needed. See Download a custom risk profile.
-
Open the Update Risk Profile dialog by doing one of the following:
-
Click the name of the custom risk profile that you want to edit.
-
Hover over the row of the custom risk profile. Click the
 icon that appears on the right, and then from the menu that appears select
  Update Profile.
The Update Risk Profile dialog appears.

-
-
Click
Upload and select the modified custom risk profile Excel spreadsheet from Step 1. -
(Optional) Add a note in the Description field. You can enter a maximum of 500 characters for the description.
-
Click Save to update the custom risk profile.
Important: The time it takes to recalculate risks after switching between risk profiles can be a lengthy process due to the need to recalculate the entire system.
Set the default risk profile
You can set a default risk profile for calculating risks on accounts. Any new accounts onboarded to ACE will be assigned to this profile. Existing accounts assigned to risk profiles other than the default will continue to calculate risks based on their assigned risk profile.
Do the following:
-
On the Risk Profile page, hover over the row of the risk profile that you want to set as the default.
-
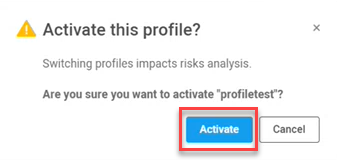
Click on the
icon that appears on the right and then from the menu that appears select  Set as default.
A confirmation dialog appears.
-
Click Set as default to confirm the new default risk profile.
Default appears in the State column to indicate the newly activated profile and the profile moves to the top of the list of risk profiles.
Note:
-
You can only have one default risk profile set at any time.
-
The time it takes to recalculate risks after switching between risk profiles can be a lengthy process due to the need to recalculate the entire system.
-
Assign / Unassign accounts to a risk profile
Assign and unassign accounts to a specific risk profile for calculating risks.
Do the following:
-
On the Risk Profile page, hover over the row of the risk profile for which you want to assign or unassign accounts.
-
To open the Assign Accounts dialog, either:

-
Click on the number or dash in the Assigned Accounts column, or
-
Click the
icon that appears on the right and then from the menu that appears select Assign accounts.
The Assign Accounts to Risk Profile dialog appears.

The dialog displays the following information:
Column Description Account Name Displays the vendor icon (AWS, Azure, Google Cloud) and name of the account / subscription / project. Current Risk Profile The name of the risk profile the account is assigned to. Account ID The Account ID is the unique ID generated by the vendor that identifies the account / subscription / project.
Hover over the
 icon to see a popup with the Account ID.
Tip: To copy the Account ID, hover over the
icon. In the popup that appears, click Copy. -
-
Select the checkboxes next to the Account Name you want to assign to the risk profile. Deselect to unassign them.
(Optional) Use the Search and Cloud Providers filters to narrow the results to locate specific accounts.
Note: When unassigning accounts, the always active and Default risk profiles ensure accounts are always assigned. Accounts removed from a custom profile automatically move to the Default profile. If unassigned from the Default profile, accounts are assigned to the current always active profile (Standard or Standard Plus).
Important: Assigning or unassigning accounts will irreversibly replace the current risks data with those calculated by the new profile.
-
Click Save to update the account assignments.
The next data collection cycle will calculate risks in the account based on the updated risk profile.
Download a custom risk profile
You can download custom risk profiles to view the sets of security risk items and their security levels. Custom risk profiles can be modified and then used to update custom risk profiles. For detailed instructions on how to modify the downloaded custom risk profile, see Customize risk profiles.
Note: The Standard and Standard Plus risk profiles cannot be downloaded.
Do the following:
-
On the Risk Profile page, hover over the row of the risk profile that you want to view or edit.
-
Click on the
icon that appears on the right and then from the menu that appears select  Download.
Note: For instructions on how to update a custom risk profile using a modified spreadsheet, see Update a custom risk profile.
Delete a custom risk profile
You can delete custom risk profiles that are no longer needed.
Note:
-
Risk profiles with accounts assigned to them cannot be deleted.
-
In order to delete the default risk profile, you need to first assign a different risk profile as the default. For details see Set the default risk profile.
-
You cannot delete the Standard and Standard Plus risk profiles.
Do the following:
-
On the Risk Profile page, hover over the row of the risk profile that you want to delete.
-
Click on the
menu icon that appears on the right and then from the menu select  Delete.
 -
Click Delete again to permanently delete the risk profile.

